Stencilling Has Been Around for a Million Years, Leaf Design Stencil
Well, I don't actually know if that is true, but it certainly feels like that to me.
Stencilling and stamping are at the absolute foundation of paper crafting techniques. Because these technique enable us to produce many, almost exact, reproductions of our designs.
And so those ideas, go back in history when people's livelihood depended on improving mass production. Now we just use these techniques to save us a bit of time personally.
Plus they are fun!
Stencilling is the technique of applying a colour through a shaped hole. The shaped hole masks the application of the colour on the paper or material below. Once the stencil or mask is lifted, we are left with a perfect copy of the shape in the stencil.
Thus the skill is in creating the stencil and not necessarily in the production of the final piece.
Well, that's the basic idea anyway.
So What Do We Need to Make Our Leaf Design Stencil Pen Pot?
- Basic paper craft toolkit
- Scrap card
- Green card, 7.5 x 27cms or 3 x 10 and five eighths inches
- Ink pads, green, purple and red
- Sponge
- Tin, 8cms diameter and height or 3 and one eighths inches diameter and height
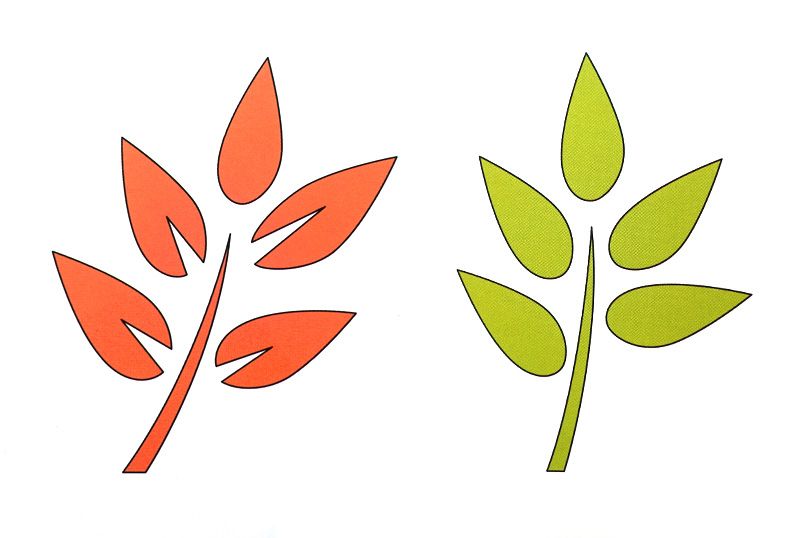
The Leaf Design Stencil Templates
Don't get too worried about precisely copying the leaf design stencil templates pictured above. We are just trying to have fun. And the stencilling we are doing here does not need to be accurate.
So start by copying the templates above onto some scrap card. Freehand draw them or copy them, resize them to suit and print them out.
How To Make A Basic Stencil
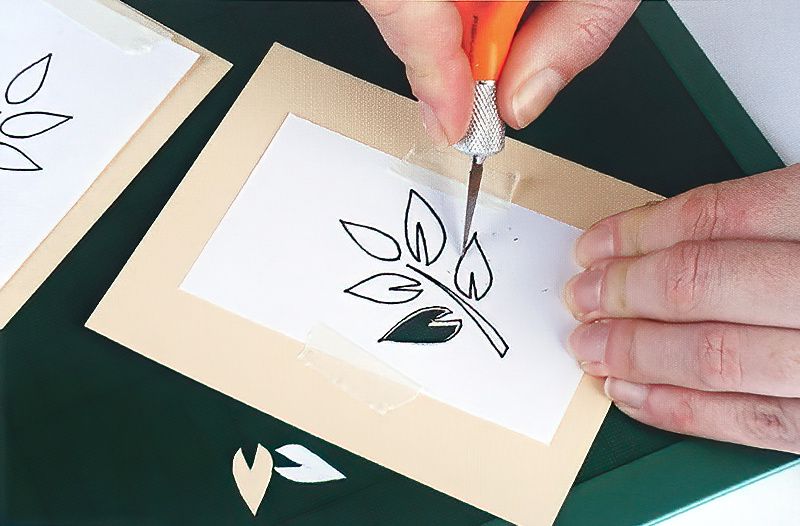
Step One
Once you have drawn the leaf design stencils on the scrap card, use a sharp craft knife to cut the shapes out.
If you have printed them out at a good size, just lay the paper on the card and cut through the paper and the card at the same time to transfer the design to the card.
Learn How To Stencil A Leaf Design
Step Two
First, make sure you have something protecting your worktop below. We are going to stencil over the edge of our paper. So cover your table or worktop with some old newspaper or similar.
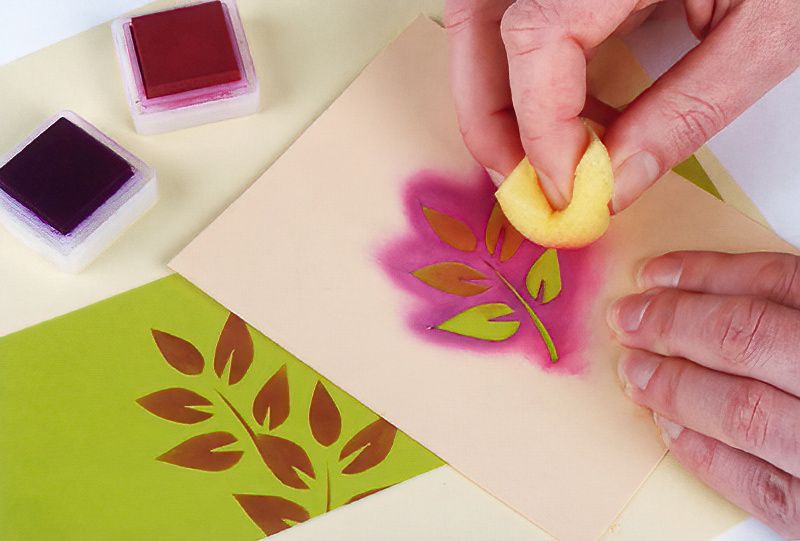
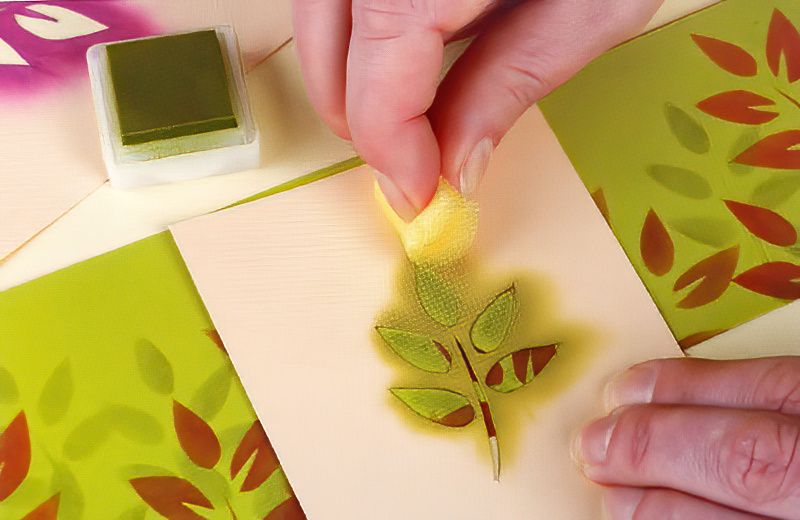
Place down the green paper and place on top one of the leaf stencil designs. Dab a clean sponge onto the purple ink pad. Once you have a small amount of ink on your sponge, press the sponge over the stencil holes, holding the card stencil firmly in place.
Continue sponging around the leaf design stencil until you can see the green paper below is completely coloured in. Remove the stencil and admire your work. Now move the stencil to a new area and continue.
Keep going sponging, stencilling and repositioning. With a clean sponge, try using the red ink pad.
Add Variations To Your Leaf Stencil Design
Step Three
Once you have a good spread of the darker leaves. Change to the other stencil shape. Use a clean sponge and the green ink to dab through the new design onto the green card.
Reposition the new shape and stencil some more along the green paper.
Try varying the intensity of the paint for different lighter and darker effects.
Applying Your Final Homemade Leaf Stencil Design
Step Four
Once the green card is fully stencilled, we should let it dry thoroughly. Now we can wrap our pen pot with our new leaf design stencil.
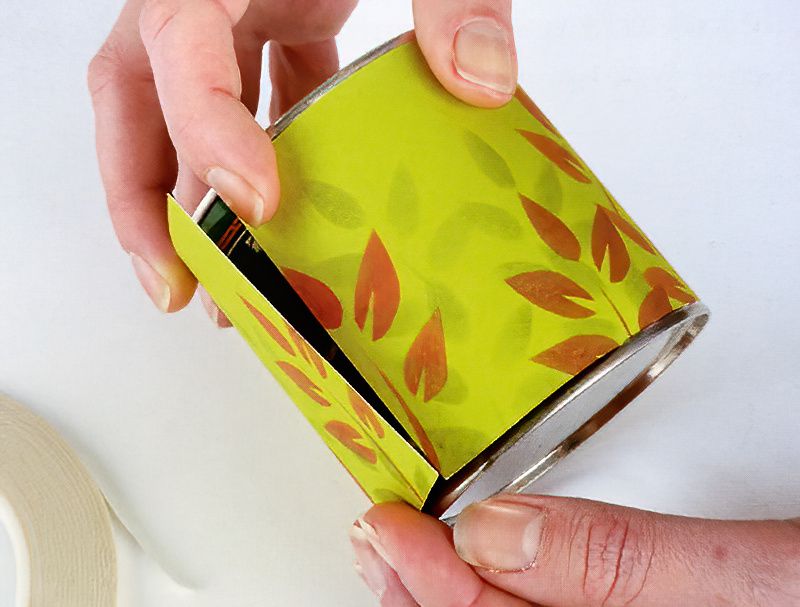
Apply some double-sided sticky tape to the back of the green card along all four edges. Now carefully wrap the green card around the tin.
Leaf Design Stencil Conclusion
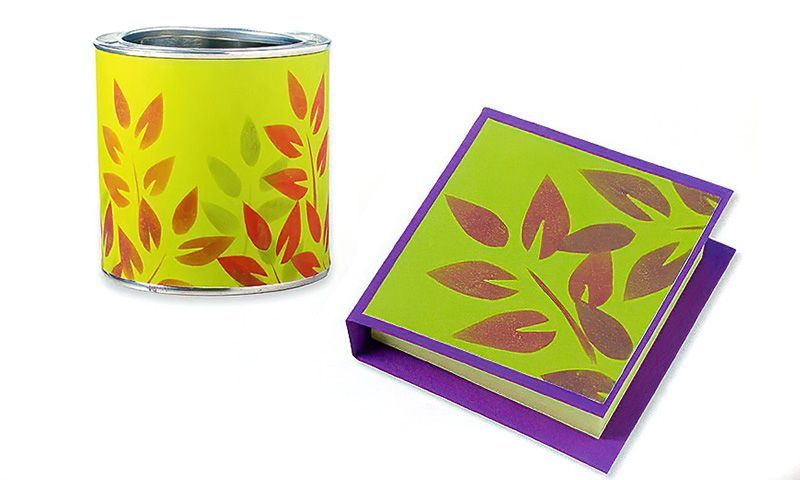
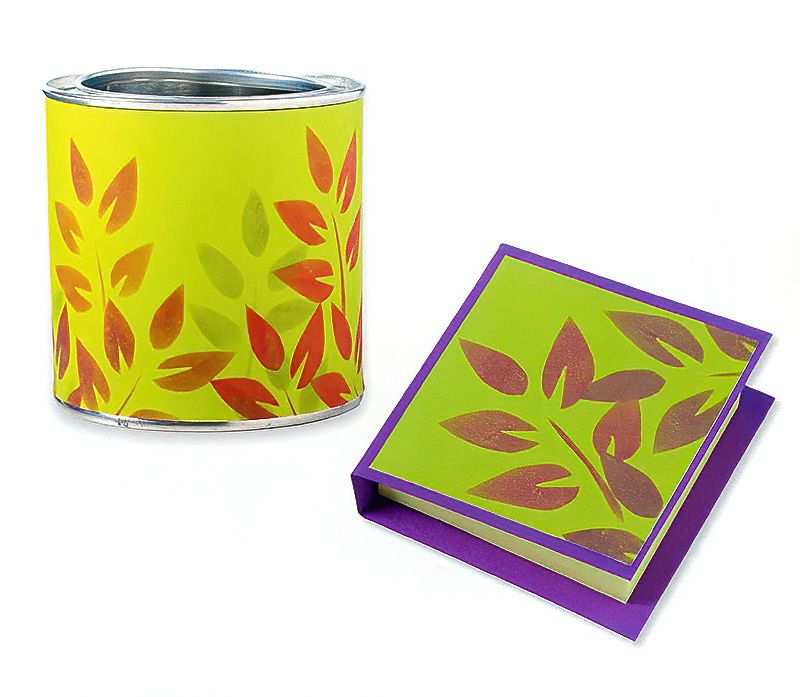
Well we have a fun pen pot. And obviously we made our own stencil, so we could actually make a pen pot that has any design we like, stencilled all over it. Brilliant!
So now you know how to stencil, why not make a matching notepad block cover to go with your pen pot and then you'll be on your way to a fully organised office space in no time.

