There Is Something Magical About a Day and Night Hanging Mobile
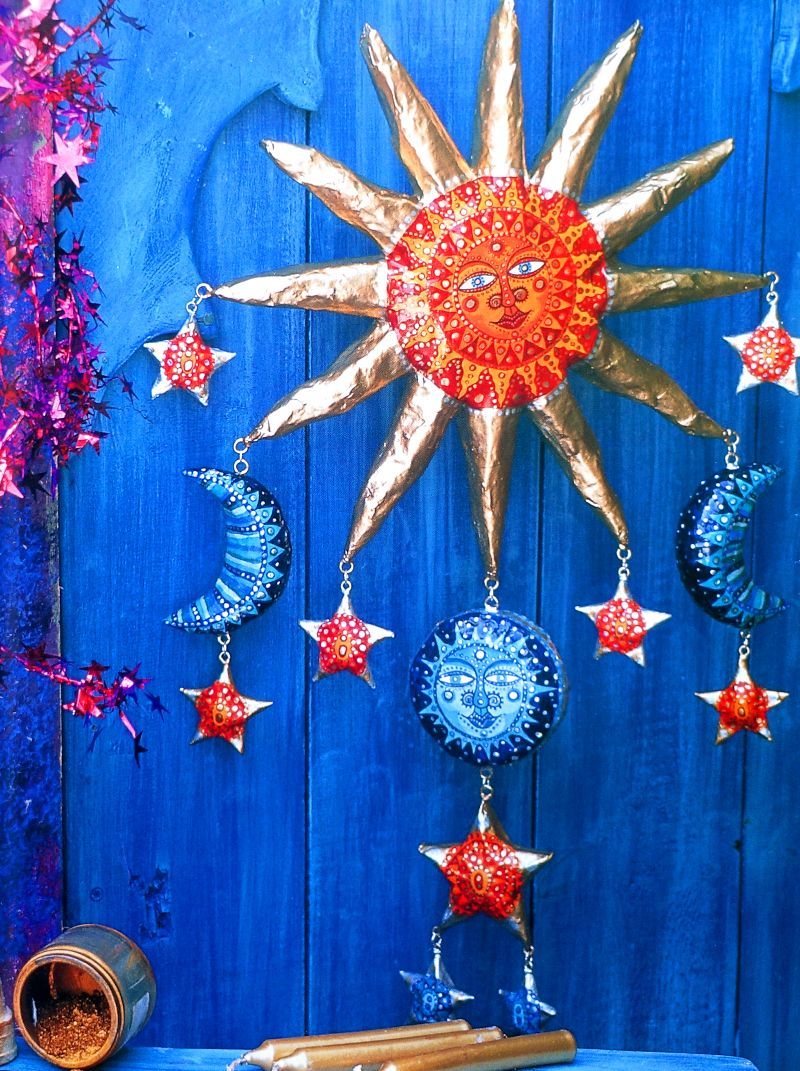
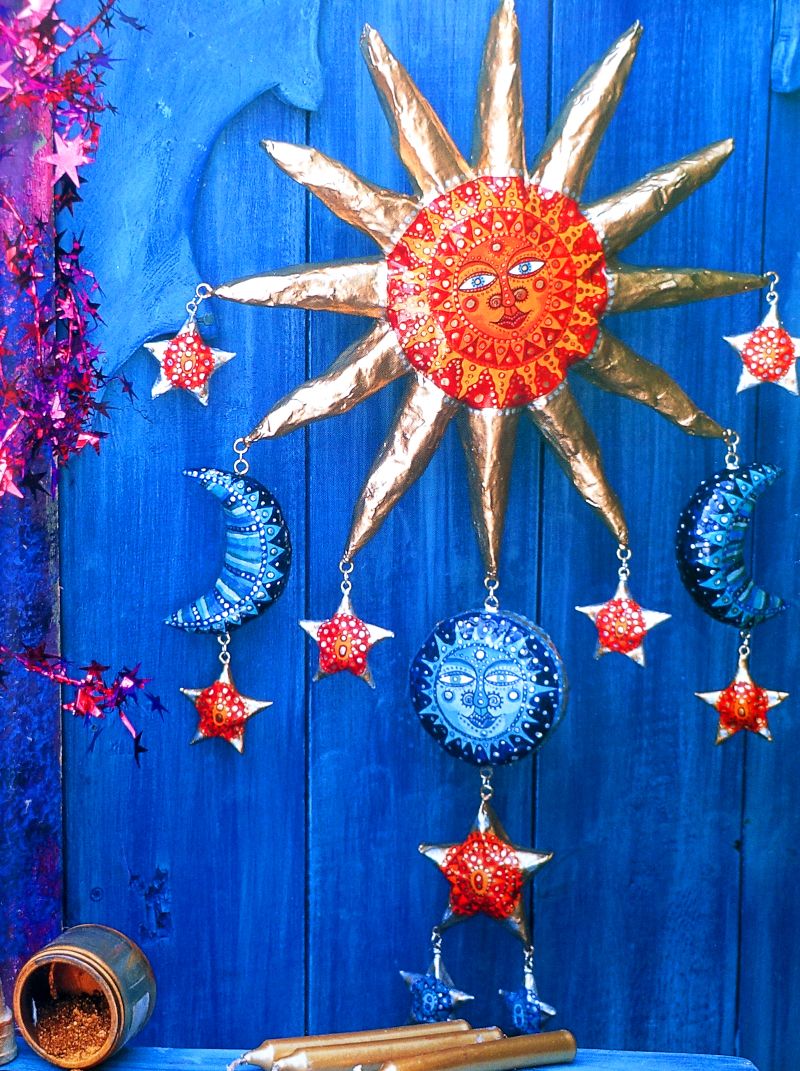
The day and night hanging mobile in contrasting colours can bring a decorative element to any room. I have made one to hang in the window of my craft room. Decorative mobiles are not just for children's bedrooms, they can be used anywhere you like. You can do any design or any colour. I just liked the way that the golden oranges and deep blues contrast against each other.
My friend is currently pregnant with twins, and is planning to decorate her nursery with suns, moons and stars. As she is having a boy and a girl, she wants the room to be unisex. She asked me to help with some of the finishing touches. These mobiles will hang from the ceiling. And I plan to make some soft ones for above the cots.
To Make a Day and Night Hanging Mobile You Will Need
Materials
- Corrugated Cardboard
- Newspaper
- Masking Tape
- Wallpaper Paste
- Small Brass Screw Rings
- Epoxy Resin Glue
- PVA Glue
- White Emulsion
- Gouache Paints
- Gloss and Matt Varnishes
- Gold Enamel Paint
- Small Jewellery Jump Rings
- Picture Hanging Wire
Equipment
- Pencil
- Craft Knife
- Cutting Mat
- Container for Wallpaper Paste
- Medium and Fine Artists Paint Brushes
- Container for Paint Mixing
Shaping The Celestial Mobile
Step 1
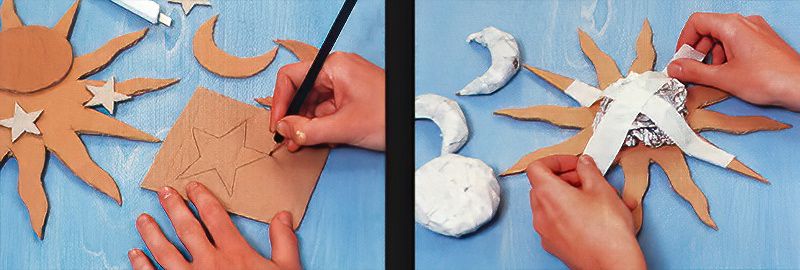
Start by drawing sun, star and moon shapes onto a piece of corrugated cardboard and then carefully cut them all out using a craft knife on a cutting mat.
Step 2
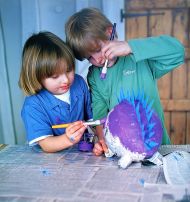
Next, bulk out each of the shapes to make them more three dimensional. Do this by scrunching up pieces of newspaper and wrapping them in masking tape and securing them to each of the cardboard shapes that you have made.
How To Prepare And Join Papier Mache Shapes
Step 3
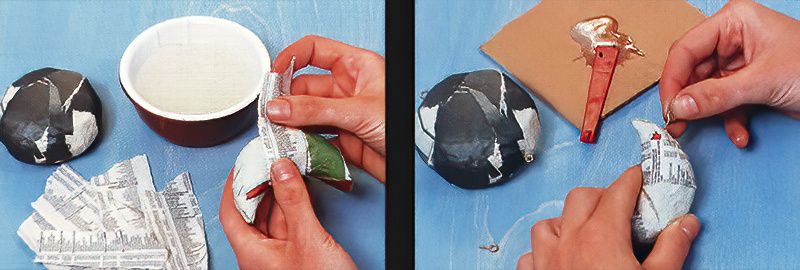
Cover each of the shapes in several layers of the newspaper pieces soaked in the wallpaper paste. Allow the papier mache to thoroughly dry overnight, or longer if needed.
Step 4
Now screw the brass screw rings into position, in appropriate places to allow for hanging. And secure them carefully into place with the epoxy resin glue.
Painting Papier Mache
Step 5
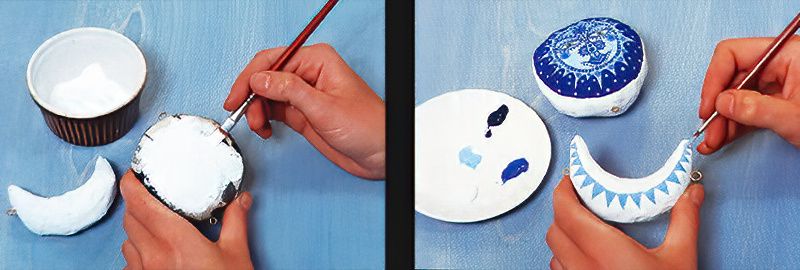
Next, coat each of the shapes in PVA glue and leave them all to dry. Then once dry, cover them in the white emulsion paint and again leave them to dry thoroughly.
Step 6
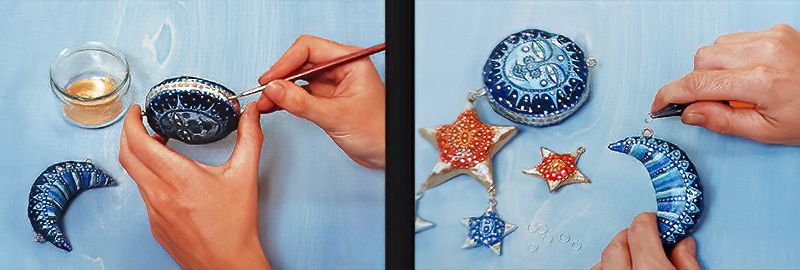
Now for the decoration part. Mix the gouache paints to create a range of vibrant colours and decorate the sun, moon and star shapes. I have chosen to use different shades of blue and orange.
Decorating The Day and Night Hanging Mobile and Adding Beautiful Finishing Touches
Step 7
Next give each of the shapes several coatings of the gloss varnish, and selecting some areas with matt varnish. This will give a bit of contrast in the finish of each piece. Allow them to completely dry. Then add some details using the gold enamel paint and a fine paint brush.
You can add even more detail if you wish, things like glitter can work well, although you will be finding it everywhere for eternity. Glitter glue might be a less messy option.
Step 8
Finally, assemble all of the pieces together of our day and night hanging mobile. Use the brass screw rings and the jump rings to join everything together. Then suspend the finished mobile from a length of picture wire threaded through the ring on the larges top sun shape. Now you have a beautiful hanging mobile.





.jpg)
