How To Make A Felt Alice Band
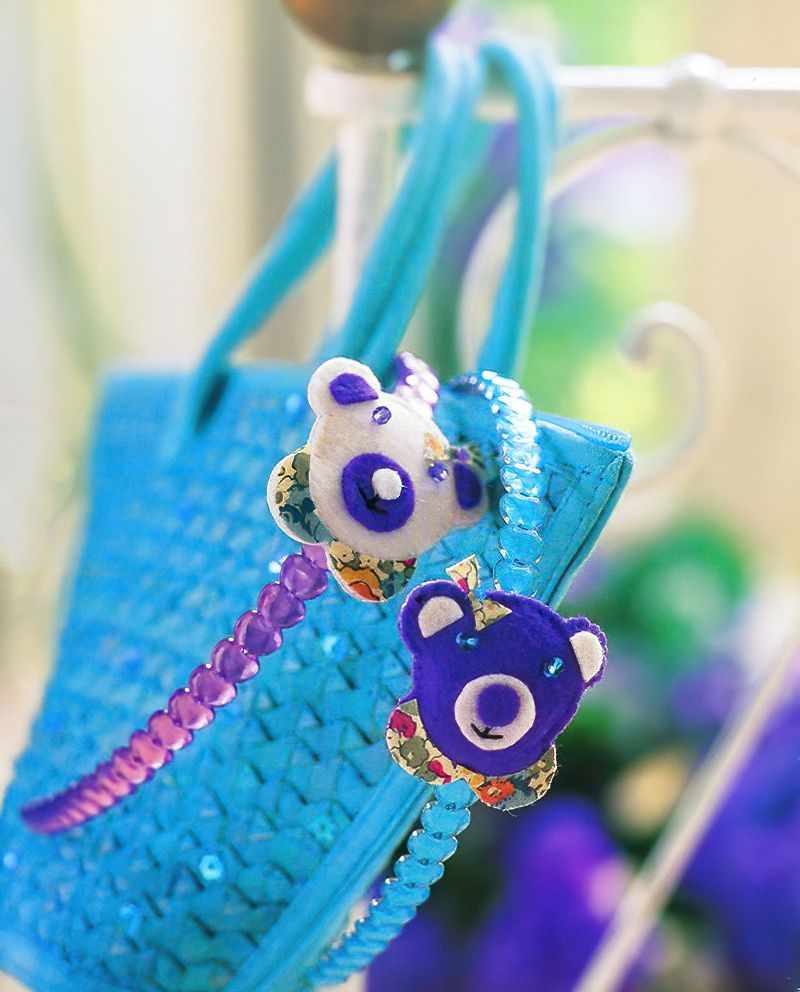
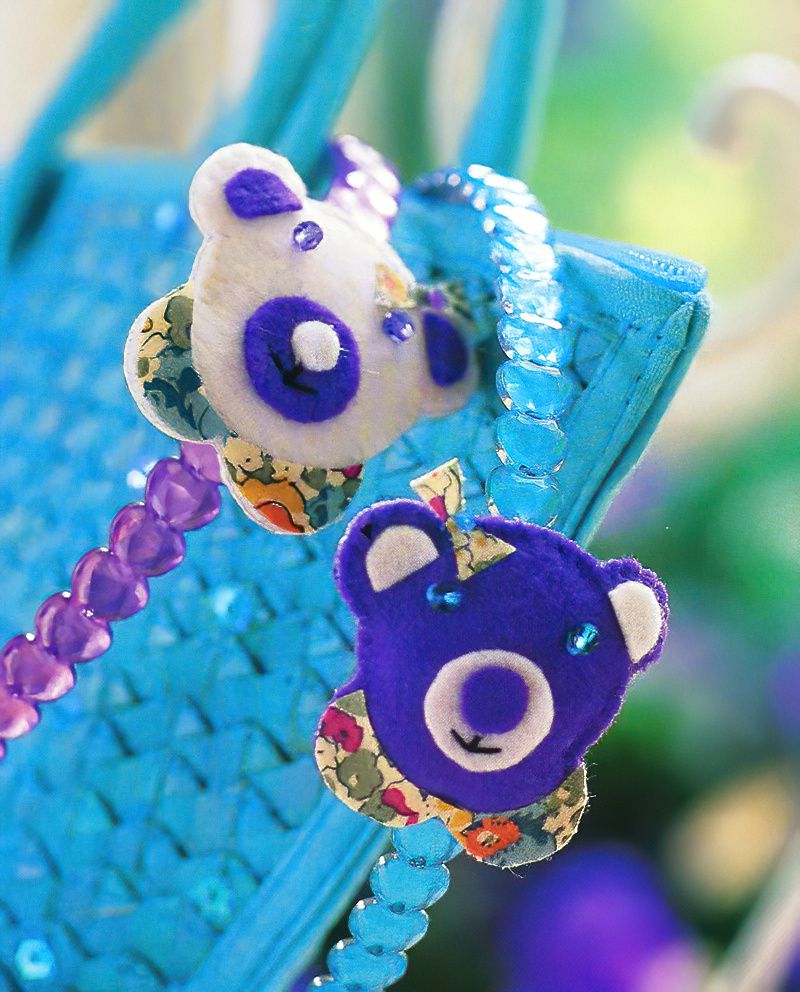
Bear character felt Alice bands are a whimsical and adorable accessory that adds a touch of charm to any outfit. These delightful headbands feature a plush, felt bear adorned with intricate details like tiny ears and sweet embroidered facial expressions.
Whether you're a child embracing the magic of dress-up or an adult looking to infuse a dash of playfulness into your style, these Alice bands are a fantastic choice. They combine fashion and fun, making them a versatile accessory for casual outings, themed parties, or even cozy nights in. With a bear character felt Alice band adorning your hair, you'll not only look cute but also feel a sense of childlike wonder and cheerfulness that's hard to resist.
Materials Needed To Make A Felt Alice Band
- 1 Alice band
- 14 x 6cm (5 1/2 x 2 1/2in) woven felt in white
- 4cm (1 3/4in) square synthetic felt in violet
- 5cm (2in) square floral lawn fabric
- 24 x 6cm (9 1/2 x 2 3/8in) lightweight iron-on fabric
- 2 Swarovski beads in violet
- 1 bugle bead in violet
- White sewing thread
- 20cm (8in) stranded cotton in black
- Sewing needle and beading needle
- Kapok stuffing
- Extra-strong glue
- White glue
- Very fine-tipped paintbrush
- Soft (2B) pencil
- Thick tracing paper
- Fabric pen
- Paper scissors and embroidery scissors
- Iron
Start Making The Felt Alice Band
Step 1 Cut Out the Pieces
Trace the bear templates onto tracing paper (head with collar, collar alone, insides of the ears, two nose pieces, and the bow), and cut them out. Use a hot iron with the steam setting turned off to adhere the iron-on fabric to the reverse of the white felt and floral lawn fabric.
Place the templates on the reverse of the fabrics, referring to the photo as a guide. Trace around the outlines using a fabric pen and then cut out the shapes with embroidery scissors. Cut out the head motif twice. Remove any markings using a damp white cloth.
Step 2 — Assemble the Head
Take one head motif and, following the picture as a guide, glue the ears and two nose pieces onto the front. Sew two Swarovski beads for the eyes. Embroider the bottom of the nose and the mouth with two strands of black stranded cotton, using three straight stitches.
Place the second head motif under the first one and, using white sewing thread, sew around the outside with a fairly tight blanket stitch. About 2cm (3/4in) before finishing, slide a small amount of kapok stuffing inside to give the head some body without making it too bulky. Finish off with a blanket stitch.
Finish Making The Felt Alice Band
Step 3 Add Finishing Touches
Apply a small amount of glue to the reverse of the floral lawn collar using your paintbrush and glue it to the white felt collar, matching the curved edges. Sew a bugle bead to the center of the floral bow.
Apply glue to the reverse of the bow and attach it on the diagonal near the bear's ear. Apply extra-strong glue to a 3cm (1 1/8in) length of the Alice band and secure the bear on top.
Hold the bear in place until the glue has set on the felt Alive band.






.jpg)
