Paper Quilling Explained
I'm sure you have probably seen paper quilling before. It is even more likely that you may have even already done some paper quilling yourself before. Maybe as a child. Paper quilling is loads of fun and results in a rather special effect that frankly I have always found mesmerising.
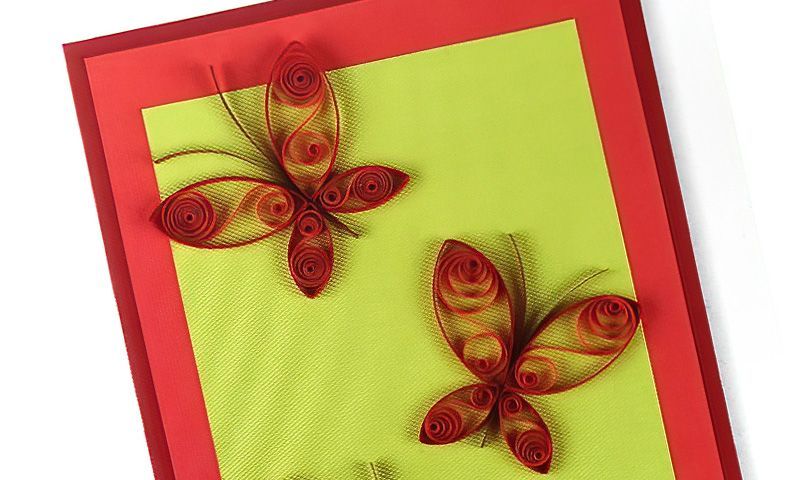
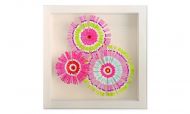
Paper quilling is basically the effect of rolling, coiling and pinching thin strips of paper that are then glued down on their side to create a three-dimensional line drawing effect.
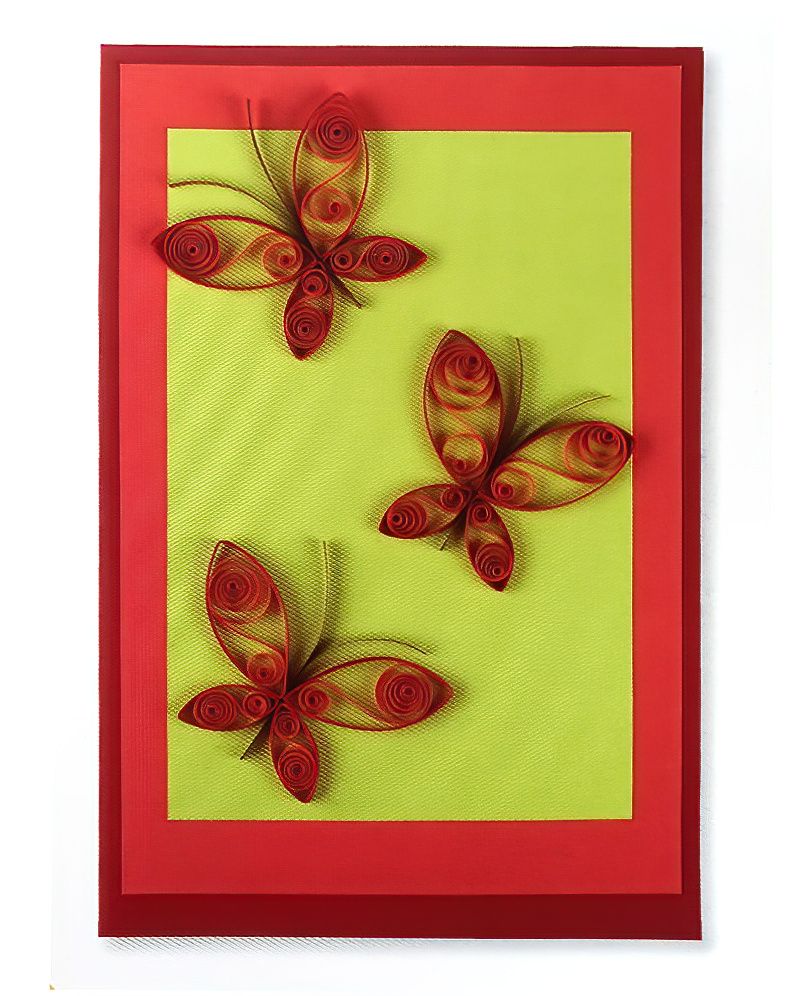
Have a read of my tutorial as we go into how to use the paper quilling technique to make some pretty butterflies.
What do we need for this paper quilling tutorial?
- Basic papercraft tools
- Various round objects of various thicknesses to wrap the paper around
- For example wooden dowels or similar, thin and thick. Maybe a pencil or a broom handle and even a very thin piece, maybe a long nail, cocktail stick or similar
- You can actually get specialist quilling tools, but have a play first before spending money
- Brown, red and pink paper strips, 3mm wide or one eighth of an inch wide
- Green card, 10 x 15cms or 4 x 6inches
- Pink card, 12 x 18cms or 4 and three quarters x 7 and a half inches
- Red card blank 13 x 19cms or 5 and a quarter x 7 and a half inches
Basic Paper Quilling Tutorial For Beginners
Stage One
You can actually buy ready made quilling papers already cut into strips. Wow, what a world we live in. But if you don't have access to that, make your strips up first. Just cut the coloured paper into long strips, 3mms wide.
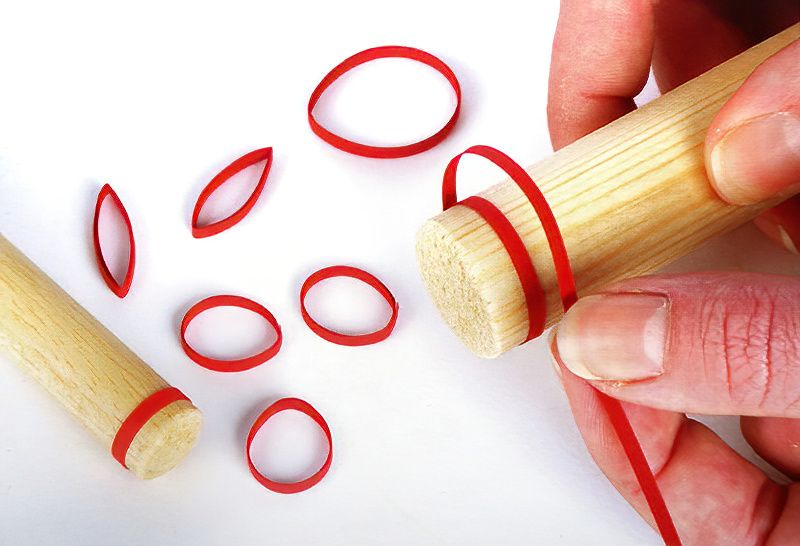
To start we really need dowel of two thicknesses because we want to make larger and smaller rings. The large rings will become the butterfly top wings. And the smaller will become the butterflies' lower rings.
But really if the process is about having fun and experimenting. Once you are familiar with the technique, you can then go wherever your imagination takers you. So take a strip of red paper and wrap it around a thicker wooden dowel. Wrap it around 3 times and glue the end down to create a ring. Don't glue it too tight, because we obviously need to slide paper quilling off the wooden dowel. Cut off any excess.
Repeat again another five times. These larger rings will become the butterflies upper wings. Now with a slightly thinner dowel, make six more rings. These rings will be slightly smaller and will become the three butterflies lower wings.
Squeeze all 12 rings to make eye shapes. Pinching slightly on each side of each ring.
Paper Quilling Is Really Fun Even For Little Ones
Stage Two
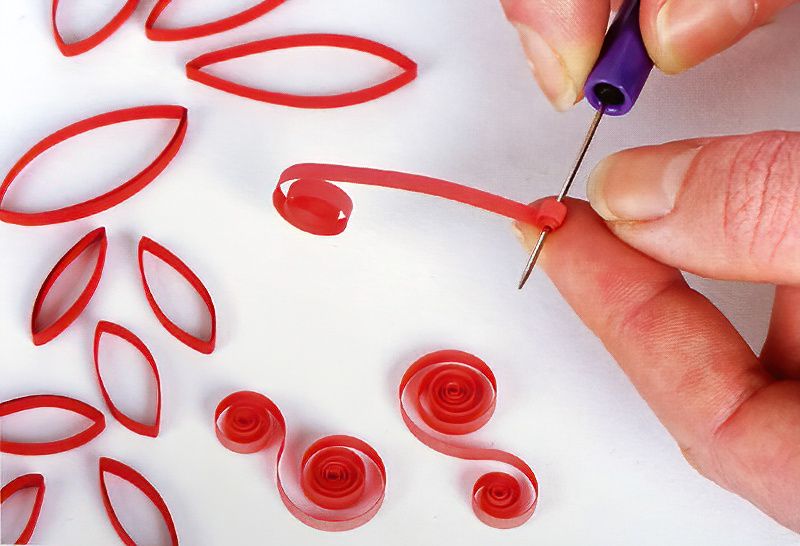
Take a 20cm or 7 and three quarters inches length of pink paper and use to cocktail stick or quilling tool to start rolling the end. Keep rolling, rolling tightly until you roughly half way. Now flip it over and do the same on the other end.
You want to create a sort of an S shape.
Use your creativity here to determine where to start rolling which end. The larger end will have more length of the paper in it. But again, this is your design and creativity has no rights or wrongs.
Now repeat. We have three butterflies, so that is twelve wings and so we need twelve little S curly paper quilling shapes to fill each wing. So get some friends and start a production line.
Start Assembling Our Paper Quilling Picture
Stage Three
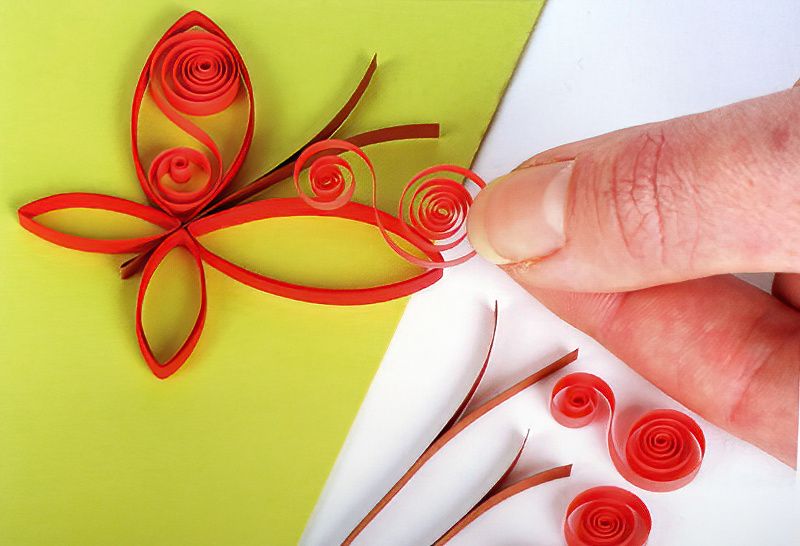
We need to start assembling our little picture now and let these little butterflies start fluttering. Find some brown paper strips and cut lengths of around 10cms or 4 inches.
Now fold these brown strips in half, these will be the butterfly antenna. Put a little curve in the open ends to make them look natural.
Now lay out the butterfly design on the green card, remember the bigger loops are the upper wings.
Once you have a pleasing design, use a cocktail stick to apply white glue more precisely and glue all the pieces in place. Glue the wings and antenna first. Then squeeze the S shape designs into the wings. Remember, if your S shapes feel a bit cramped, just cut some length off the strip and curl up again.
Finally, glue the green card to the pink card to create a border effect. And in conclusion, glue the design to the red card blank.
Paper Quilling Project Conclusion
And there you have your first official paper quilling greetings card. Such a fun technique that always gets a lot of wows when presented. Fun for kids to get involved in and it really has no limits. I always think of paper quilling like three-dimensional line art so have fun and explore your creativity.
Extra Tip For Spiralling Paper Art
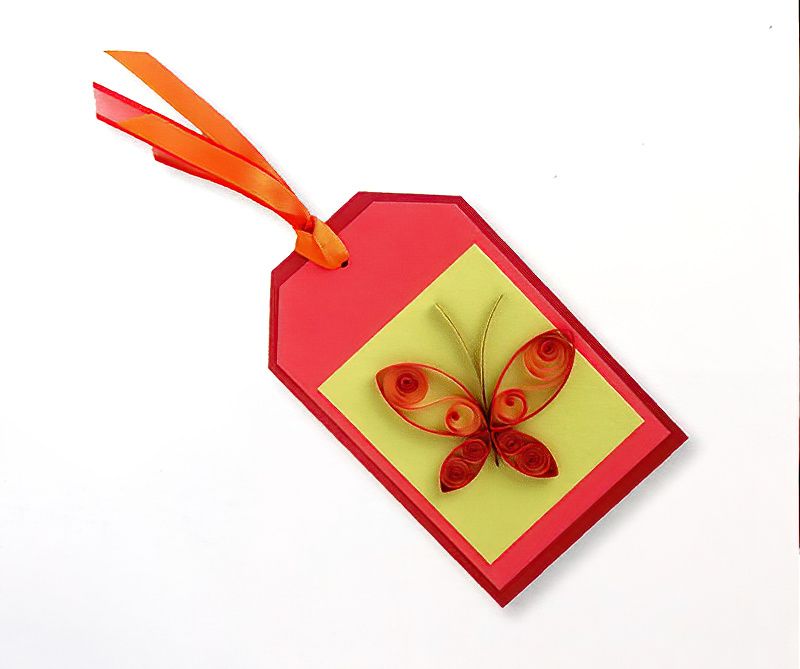
If you are giving a gift or maybe just for fun. Why not make a cute little paper quilling gift tag. Use the same techniques and let your imagination run wild.

