Let's Make a Tissue Pompom Flower Heart
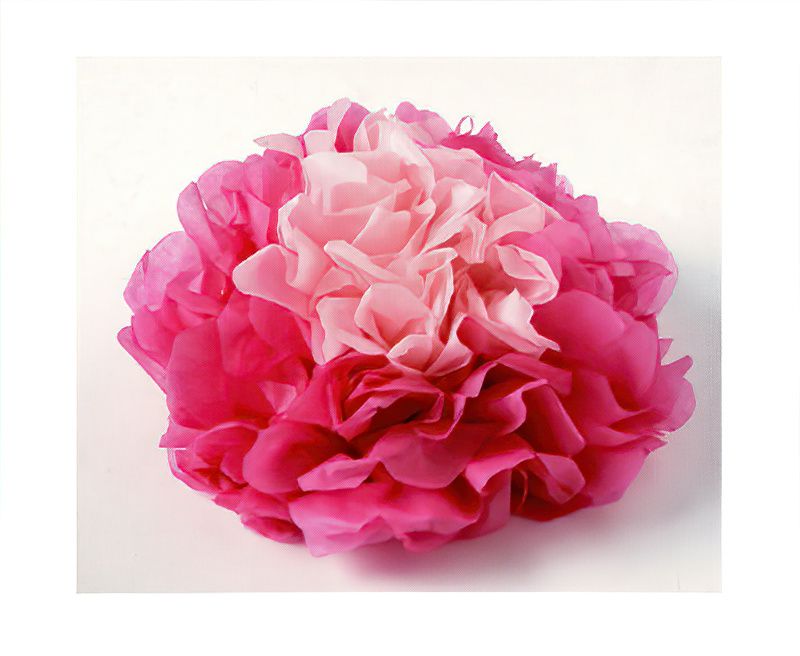
Once you learn to make these tissue paper pompoms, I'm sure you will find yourself adding them to everything. They're just fun to make and make great displays and of course can be added to so many crafting projects and gifts.
Thought to have originated in South America as part of folk art and used in celebrations, these pompom flowers were a really bright and fun alternative to real flowers. They easily make large displays. And they last for much longer than real flowers.
Things We Need To Make Tissue Pompom Flowers
- Basic crafting tools
- Packs of tissue paper, pink and light pink
- Cream and light pink mount board, 30.5cm square or 12 inches square
- Pink embroidery thread
How To Make Tissue Paper Pompoms
Step One
We start our tissue pompom flowers by cutting dark pink tissue paper into rectangles 25 x 11cms or 10 x 4 and a half inches.
- We want six sheets of dark pink tissue paper
- And two sheets of light pink paper
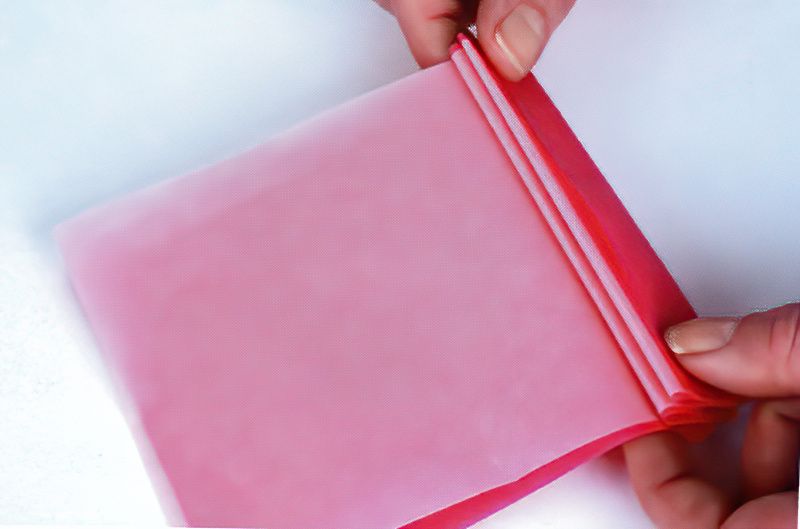
Once cut to size, layer all of these sheets on top off each other. Now fold over along the short edge a 2cm or 1 and three quarter inch piece. We want to start a concertina fold. So folding back and forth. The easiest way to do this is to fold, then flip over and fold back.
Continue the concertina folding at 2cm or 1 and three quarter inch intervals. Continue all the way to the end. Make sure to keep pressing the layers flat and neat.
Start Folding Tissue Paper For Pompoms
Step Two
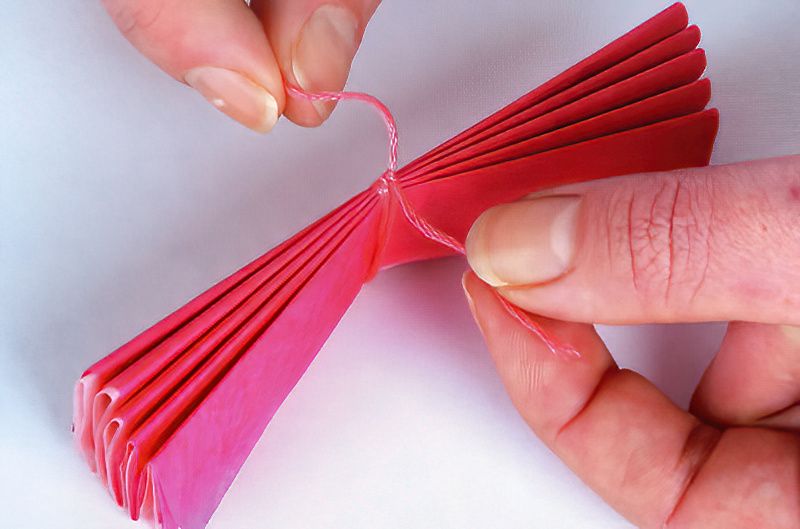
Now you have your concertina folded tissue paper finished. Press flat and then tie together at the centre with the embroidery thread wrapped around a few times. Tie securely without crushing the tissue paper and trim off any excess thread.
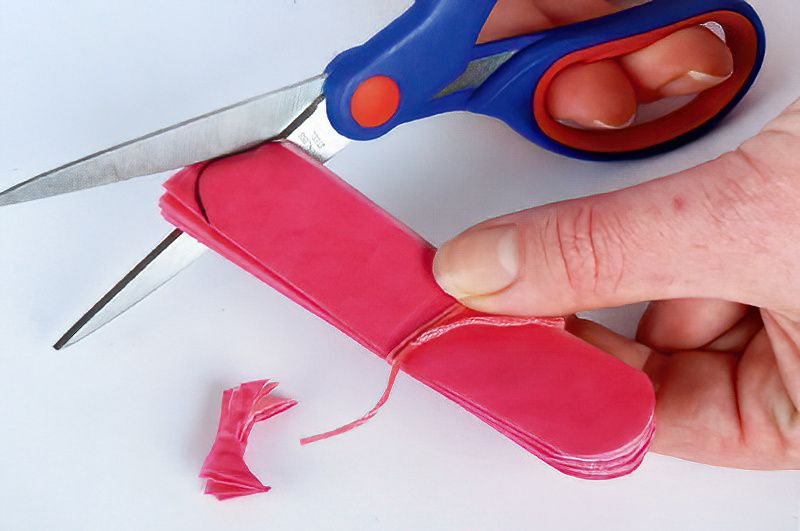
Cut The Edges Of The Tissue Pompoms
Step Three
With some sharp scissors cut the ends of the folded tissue layers into curves. Cut through all the layers at the same time. This can be tricky so make sure you use a larger pair of sharp scissors.
Our tissue pompom flowers are about to bloom.
The Fun Part Of Tissue Paper Pompoms
Step Four
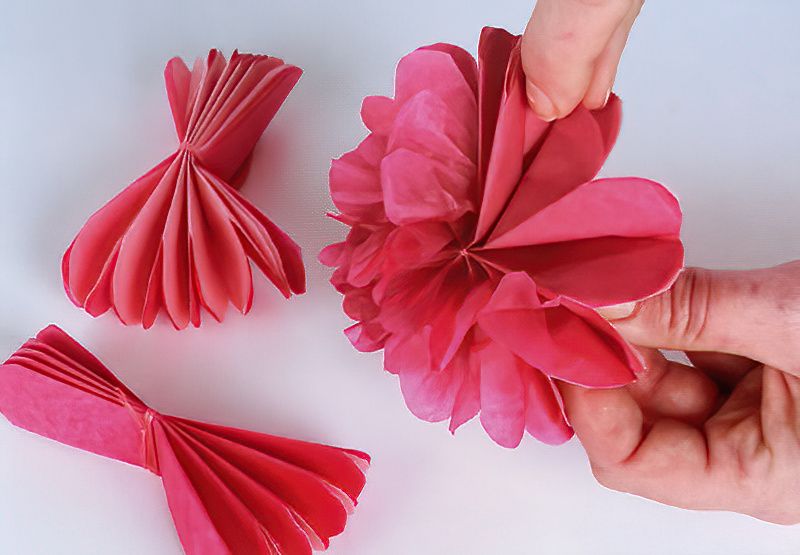
Now comes the tricky bit. We want to gently, but firmly start teasing out the darker pink tissue paper layers. The tissue paper can tear easily if pulled too hard. Don't worry if you tear a piece, no one will notice in the end display.
Keep teasing the layers of dark pink tissue paper up and apart from each other. The light pink tissue paper will end up at the bottom. Take a little time to tease the tissue pompom flower out and into a nice shape.
Continue Making Pompoms From Different Coloured Tissue
Step Five
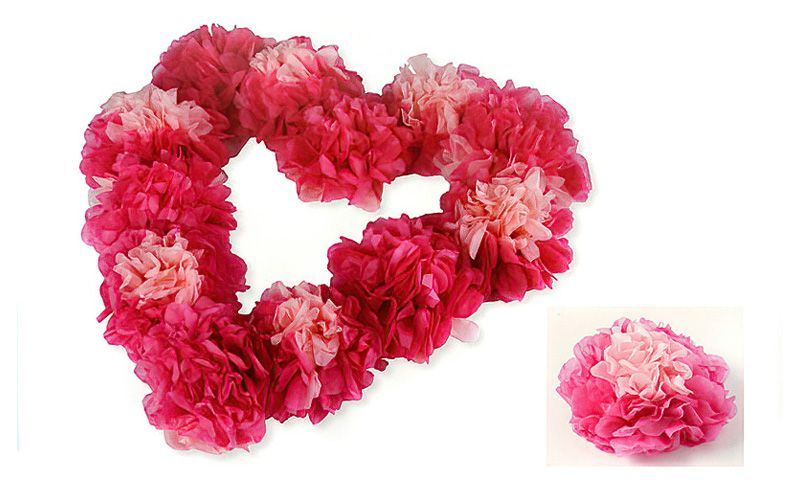
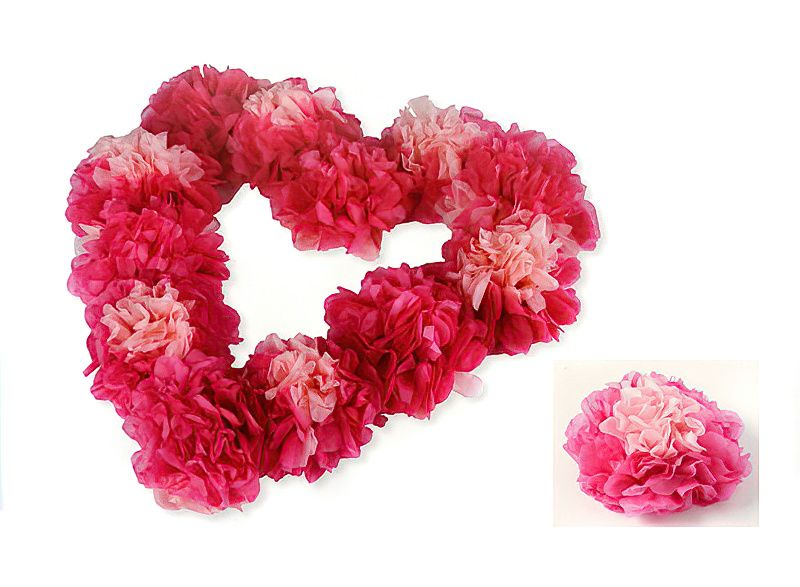
Repeat the whole process five more times, so we have six tissue pompom flowers in total. We need twelve pompoms in total.
So make another six, but this time, when we start teasing out the tissue paper layers at the end. Tease out the light pink tissue paper and leave the darker pink tissue at the bottom.
When you make more tissue pompom flowers, obviously varying the layers of coloured tissue paper and then the direction you tease out the layers, can create lots of variations in your flowers.
Final Assembly Of The Pompom Heart
Step Six
Now we can finish our tissue pompom flowers project. We want to create a flower pompom heart. So cut out a heart shape from thick cream mounting board and simply glue the tissue pompom flowers to the heart shape in a pleasing fashion.
And there we have it. Show your children how to make these and they will just have so much fun endlessly decorating everything in fun, colourful tissue pompom flowers.




.jpg)






.jpg)


