Make a Pretty Paper Christmas Wreath
How To Make a Paper Christmas Wreath
Christmas wreaths are so expensive to buy and generally they are never exactly how I want them. So over the years I have found myself making loads of my own Christmas wreaths. I have made real Christmas wreaths and papercraft Christmas wreaths. And although the real ones are nice, they don't tend to look fresh for too long.
So I like making pretty paper Christmas wreaths because they can last years, although you can't put them outside :)
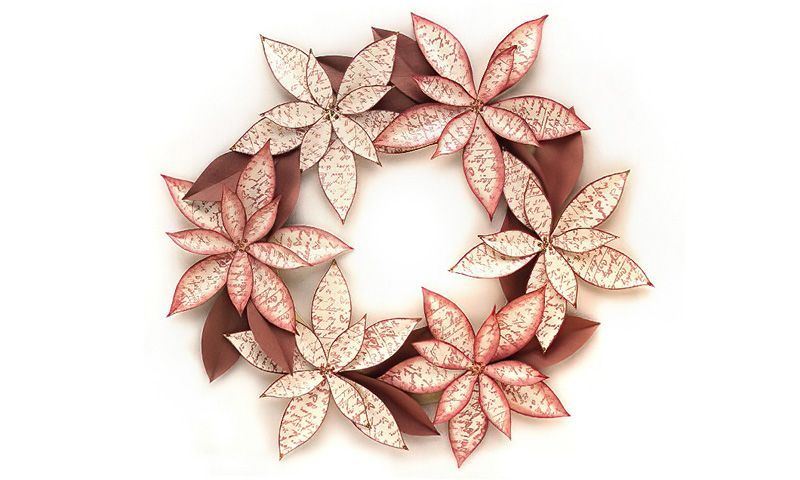
So I have chosen the theme of this paper Christmas wreath to be the Poinsettia flower. The Poinsettia flower is a Christmas standard and so my paper Poinsettia Christmas wreath will hopefully be well received. I have made here a more unusual classical look but of course, the usual red and greens would work amazingly well. How about some patterned paper. Or how about using last years wrapping paper.
Yes, I am that person who goes around collecting all the old wrapping papers. If you buy me a pressie with expensive wrapping paper, chances are next year you will see that same wrapping paper made into a pretty paper Christmas wreath.
So What Do We Need for Our Paper Christmas Wreath?
- Basic papercraft tools
- Cream paper, two sheets 30cm square or 12 inches square
- Brown card, 15 x 30cms or 6 x 12 inches
- Cream mount board 23cms square or 9 inches square
- Brown ink pad
- Rubber stamp for script on acrylic block
- Gold glitter
- Sponge
- Circle punch, small 1cm diameter
Make The Paper For The Christmas Wreath
Step One
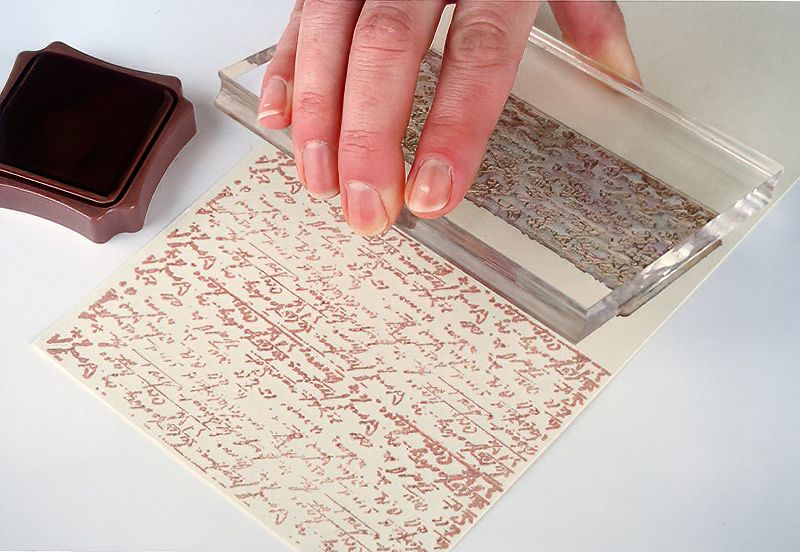
Mount the script stamp onto the acrylic block. Ink the stamp by dabbing the ink block across the stamp surface. Make a print on the cream paper.
Ink the stamp again and print again, until the whole cream paper is covered with the script design.
Embellish The Printed Paper For The Christmas Wreath
Step Two
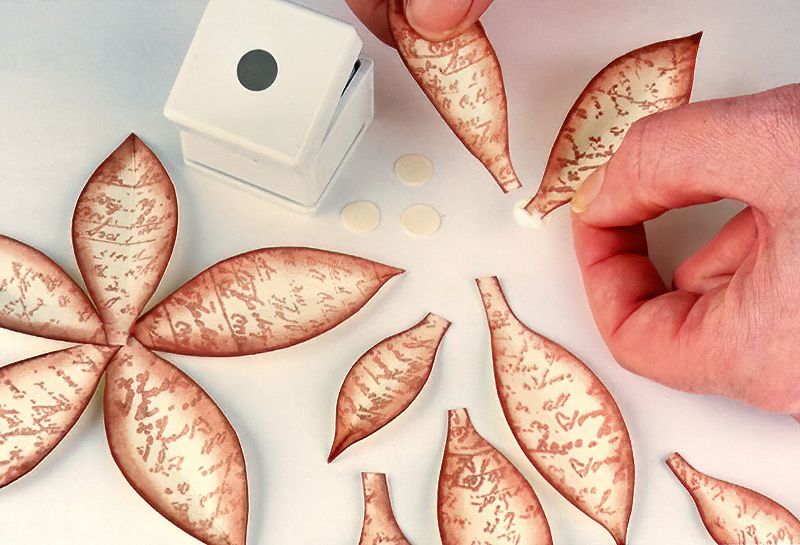
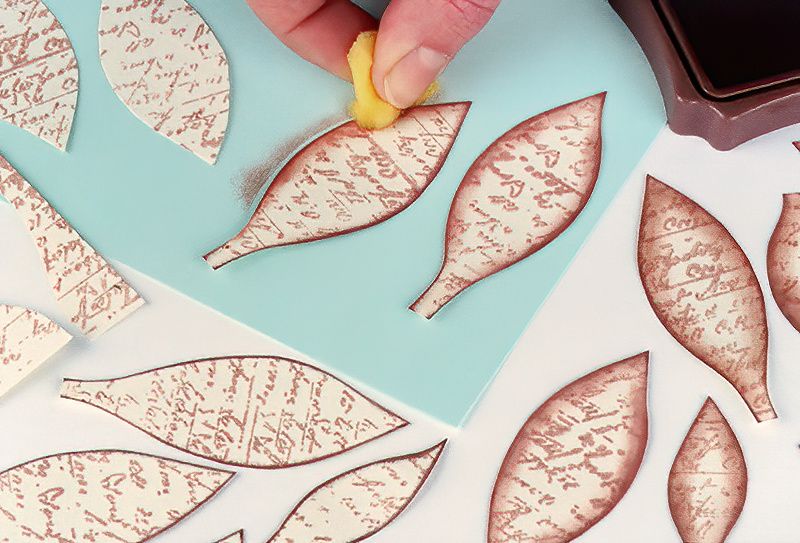
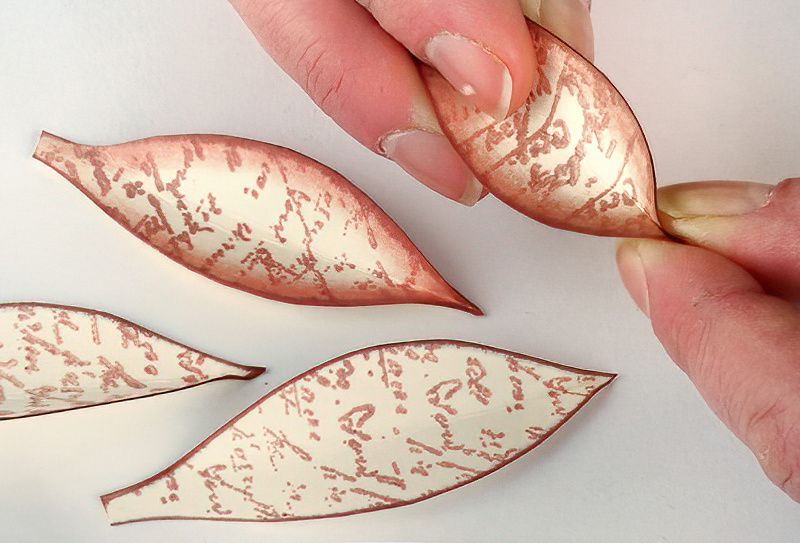
Now we need to make two petal shape templates. One large and one small. Copy the look of the petals in the image above. They look like leaves but they are actually petals. Make sure they have a pointed end on one end. And on the other end, a tab we can use to glue them down.
To save time, make a large and small petal template from an old cereal box. Cut the templates out and then just trace around them. Keep the little petal templates for future makes.
So now we need to cut petals from the paper we just printed with the script. So we want to make:
- One flower
- Which is five large petals
- And four or five smaller petals
Then we are going to make six flowers for our paper Christmas wreath. So get to work and cut out all those shapes.
Inking The Petals
We are going to apply two inking styles to our petals. So we can make two styles of Poinsettia flowers for our paper Christmas wreath.
So divide the larger petals in half and separate into two piles. Then divide the smaller petals in half and add them to the two piles.
Take pile one petals and, one at a time, hold them above the brown ink pad and gently run the edges of the petals across the ink pad. This produces a sharper coloured edge on the petal.
Once pile one is completed.
For pile two, put each petal down on some scrap paper and take the clean sponge and press it into the brown ink pad and gently sponge around the edges of the petals.
This produces a much softer coloured edge to the petals.
Review the image above to see the two styles of inked petals.
Make The Paper Leaves More Leaf Shaped
Step Three
Go make a cup of tea and let all that inking dry thoroughly.
Once the ink is dried, bend each petal into a pleasing curve. The more you shape them with your hands the better the end result will be.
Phew, now we have the majority of the bits we need to make a pretty paper Christmas wreath.
Start Assembling The Paper Flowers
Step Four
Use the paper punch and punch out some card circles. We will glue the petals to this central circle. Make sure to match the inking styles of petals.
To start we need to glue down 5 of the larger petals in a circular shape. You can use a cocktail stick to accurately apply glue to the back of each petal tab. Then glue them down on top of each other. Carefully glue them down to the card circle.
Take your time to give the glue a moment to set. Maybe work on the other flowers in a little production line.
Finish Making The Paper Flowers For The Wreath
Step Five
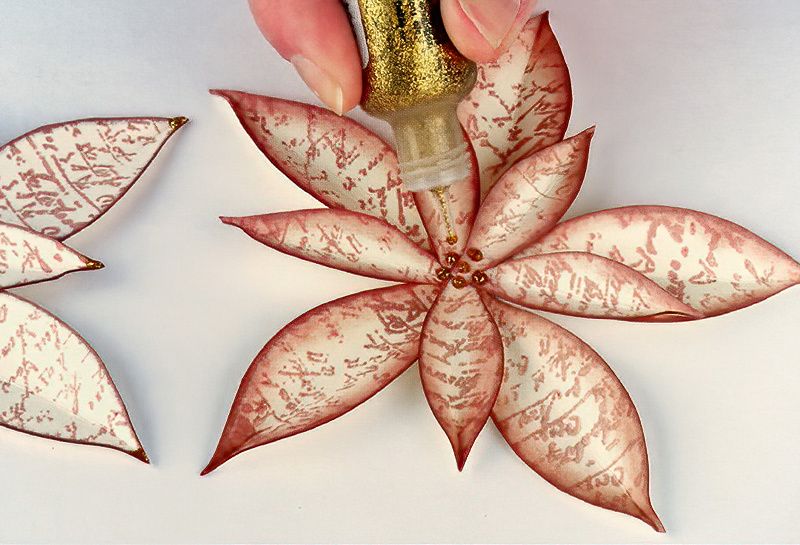
Now, we need to glue four or five of the smaller petals on top. Glue them in positions that look natural.
Finally add gold glitter to the centre of each flower to add a little glamour and also add gold glitter to the end of each petal.
Leave everything to dry and set up.
Finally We Can Assemble The Paper Flowers Into A Wreath Shape
Step Six
Once dry you can tease and puff up the flowers and very gently bend the petals to look more natural.
We are nearly finished with our pretty paper Christmas wreath.
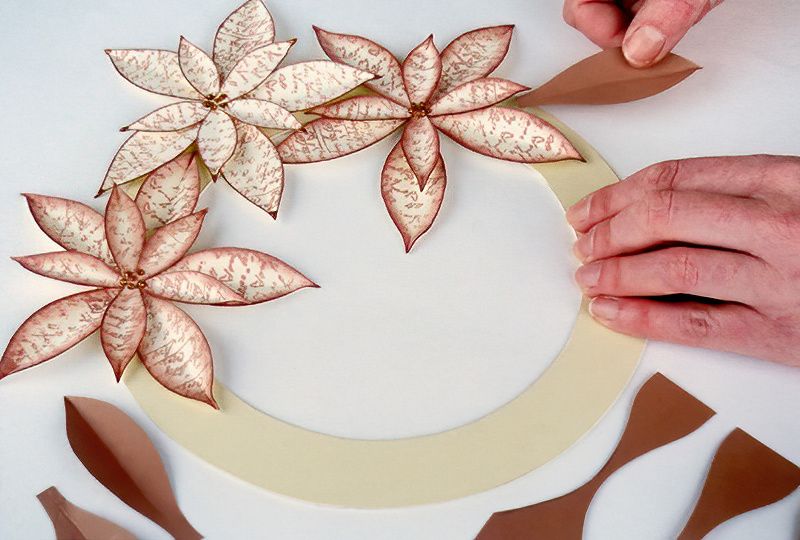
Next, cut some leaf shapes from the brown card. These are basically the same shape as the Poinsettia petals, but slightly larger.
Bend the leaves with your fingers, and maybe score down the centre and the veins for a more realistic leaf look.
The Mount For Our Paper Christmas Wreath
Cut a circle of mount board 22cms or 8 and a half inches in diameter. Remove an inner circle of 16cms or 6 and one quarter inches to make a ring.
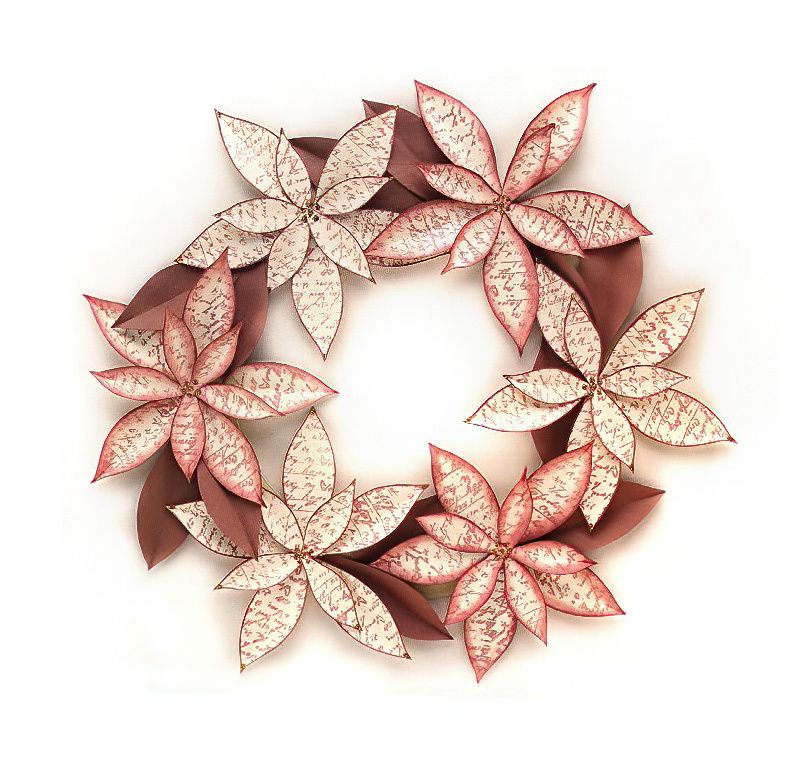
Finally, glue down the six paper Poinsettia flowers around the mount ring. And then add as many leaves as you feel looks nice. Weaving them in and out of the flowers.
The Poinsettia Paper Christmas Wreath
And there we have it. And really, doesn't it have a wow factor?
These are perfect for decorating interior doors and mantlepieces. Obviously don't hang it outside. And if you look after it and store it well, it should easily last a few years.
Now you know the basics. Think about the different papers and shapes you can use to make up the paper Christmas wreaths.
As long as you make your shapes with a tab sticking out one side. You can add any crazy shapes to make up a fun classy Christmas wreath or maybe even a wacky fun action hero paper Christmas wreath for the children.
Thanks again.

