How To Make A Felt Baby Book
Introducing the perfect sensory wonder for your little one's early developmental journey – the Baby's First Book made from felt. This enchanting and tactile masterpiece is designed to engage and captivate your baby's senses from the very start. Crafted with soft, colorful felt pages that are easy for tiny hands to explore, this book is a gateway to a world of textures, shapes, and colors. Each page boasts adorable felt characters and interactive elements that encourage your baby's curiosity and fine motor skills.
Whether it's the crinkly sound of the pages or the velvety touch of the felt, this book provides a multi-sensory experience that will foster early learning and bonding moments between you and your little one. Watch as their eyes light up with joy as they embark on their literary adventure with the Baby's First Book made from felt. How to make a felt baby book.
Materials You Will Need To Make A Felt Baby Book
- 27cm (10 1/2in) square sketchbook
- Synthetic felt in sky blue: 77 x 35cm (30 3/16 x 13 3/4in)
- Synthetic felt in white: 10 x 8cm (4in x 3 1/8in)
- Synthetic felt in pink, pale green, pale yellow, and sky blue: 7 x 3cm (2 3/4 x 1 1/8in) each
- Velvet ribbon, 3mm (1/8in) wide, in pink, pale green, pale yellow, and sky blue: 45cm (17 5/8in) each
- Sewing threads matching your felts
- Sewing needle
- Pins
- Cotton wool
- Floral heart stencil or similar
- Fabric paint in titanium white
- Small stencil brush
- Tube of fabric glue
- Sticky tape
- Soft (2B) pencil
- Thick tracing paper
- Fine-tipped fabric pen
- Cutting mat
- Rotary cutter
- Flat metal ruler
- Paper scissors and embroidery scissors
- Iron
Start Making Our Felt Baby Book
Step 1 — Make the Cover for Our Felt Baby Book
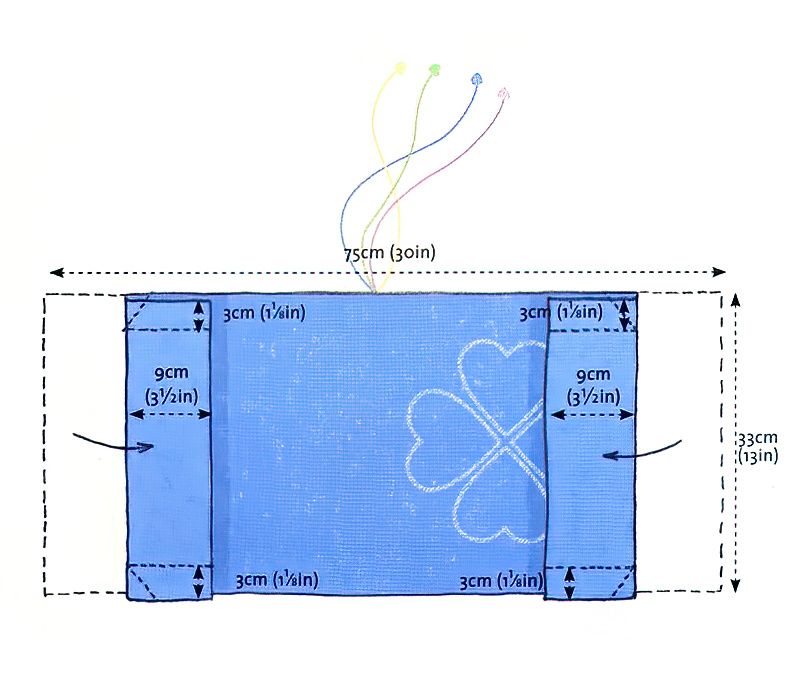
Using a rotary cutter and cutting mat, cut a rectangle measuring 75 x 33cm (29 1/2 x 33in) from the sky blue felt. Fold over 9cm (3 1/2in) of the felt on the left side of the rectangle, right sides together, following the diagram as a guide.
Sew the flap down across the top and bottom, 3cm (1 1/8in) from the edge. Insert the sketchbook cover into the flap, fold it around the book, and fold in the remaining fabric.
Trim the second flap to measure 9cm (3 1/2in), remove the book, and sew down the flap as before. Cut off the four corners of your fabric to prevent bulkiness and turn the cover right side out.
Iron the cover, then sew a small running stitch all the way around it, close to the edge. Ensure that the sketchbook fits snugly inside the jacket.
Step 2 — Paint the Motif
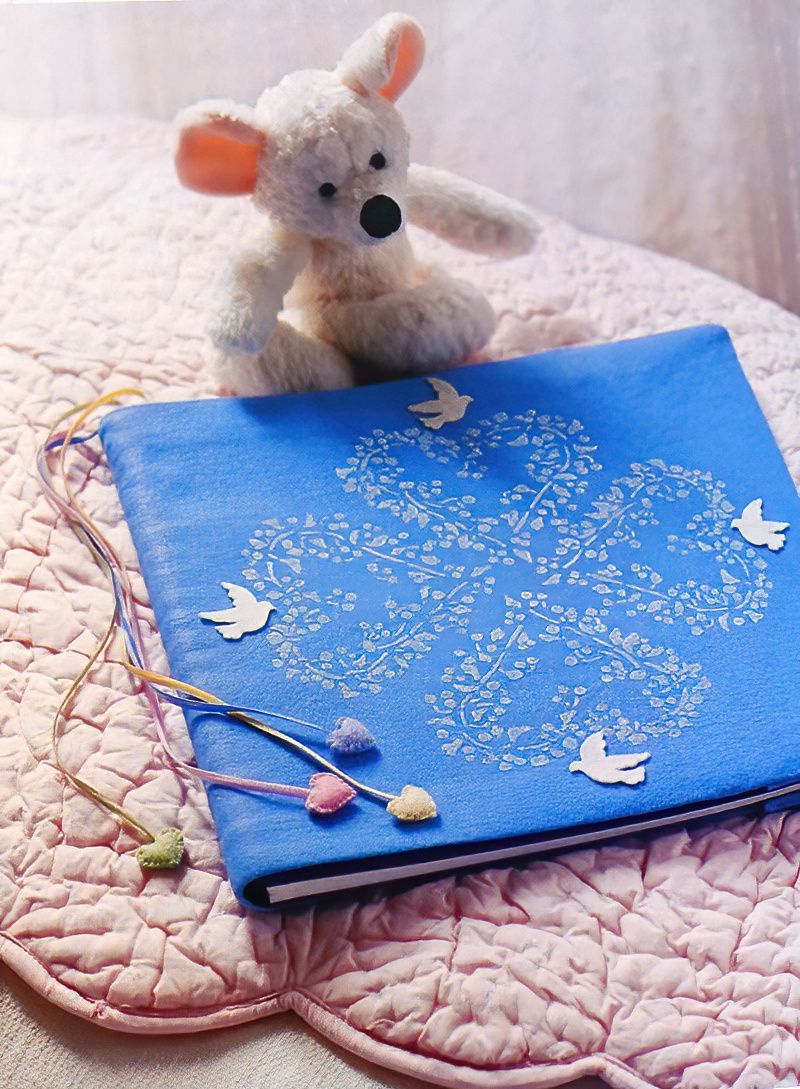
Place tracing paper on your stencil and make four copies of the heart outline only. Lay them in the center of the cover's front in your desired design and pin them down.
Place the stencil on top of one of the tracing paper hearts, securing three sides with sticky tape. Lift up the fourth side and remove the tracing paper. Using a stencil brush, apply the paint by dabbing gently.
Allow the paint to dry thoroughly, then repeat the process for all of the hearts.
Finish Making Our Felt Baby Book
Step 3 — Make Up the Birds
Trace the bird templates and cut out tracing paper templates using paper scissors. Draw around each template twice on the reverse side of the white felt and cut out the bird shapes using embroidery scissors.
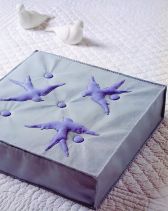
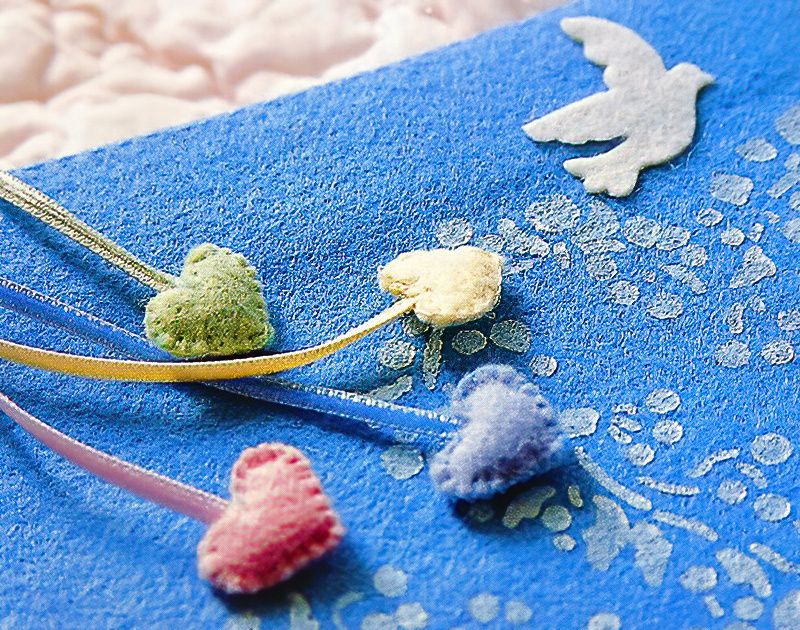
Glue the birds onto the cover of the felt baby book, using the picture as a guide for their placement.
Step 4 — Make Up the Bookmarks
Trace the small heart and cut out the template using paper scissors. Draw around the heart template twice on the pink, yellow, green, and sky blue felt.
Cut out the felt hearts using embroidery scissors. At the center of one heart of each color, sew the end of a velvet ribbon in the same color. Place the other half of the heart on top and sew them together using blanket stitch with matching sewing thread.
Before completing the stitching, insert a little cotton wool between the two hearts and then finish off the blanket stitch.
Sew the four ribbons inside the cover at the center, making the ribbons different lengths.
We hope you enjoyed making this felt baby book. It's a lovely project and you can adapt it to make a lovely present for any aged child.



.jpg)
