How To Make A Felt Toy Box
A felt toy box is a delightful and practical addition to any child's room. Crafted from soft and durable felt material, this charming storage solution offers a safe and stylish haven for a child's cherished playthings. Its cozy texture and vibrant colors add a touch of whimsy to the room's decor, making cleanup an enjoyable activity.
The felt toy box's spacious interior provides ample room for stuffed animals, building blocks, and action figures, helping to keep clutter at bay while fostering a sense of organization. Its collapsible design also allows for easy storage when not in use, making it a versatile and space-saving solution for parents and children alike. With a felt toy box, tidying up becomes a breeze, and playtime remains as enchanting as ever.
Materials You Will Need To Make A Felt Toy Box
- Round cardboard box: 23.5cm (9 1/4in) in diameter, 16.5cm (6 1/2in) high, and 76cm (30in) in circumference
- White woven felt: 3 x 50cm (20in) squares
- Pale blue woven felt: 35 x 10cm (13 3/4 x 4in)
- Pale green woven felt: 35 x 10cm (13 3/4 x 4in)
- Heavyweight iron-on fabric: 40cm (16in) square
- Mini pompoms in white: 8
- A4 sheet of foam board
- Pins
- Hard pastel sticks or pencils in pale green, pale blue, melon, and pale yellow
- All-purpose tube paints in crystal effect, pistachio, sky blue, and scarlet
- Clear matte fixative for pastels
- 2 tubes fabric glue
- Tube white glue
- Soft (2B) pencil
- Tracing paper
- A4 sheet of Bristol board
- Fabric pen
- Flat metal ruler
- Rotary cutter
- Cutting mat
- Paper scissors and embroidery scissors
- Iron
Start Making Your Felt Toy Box
Step 1 — Make Up the Templates
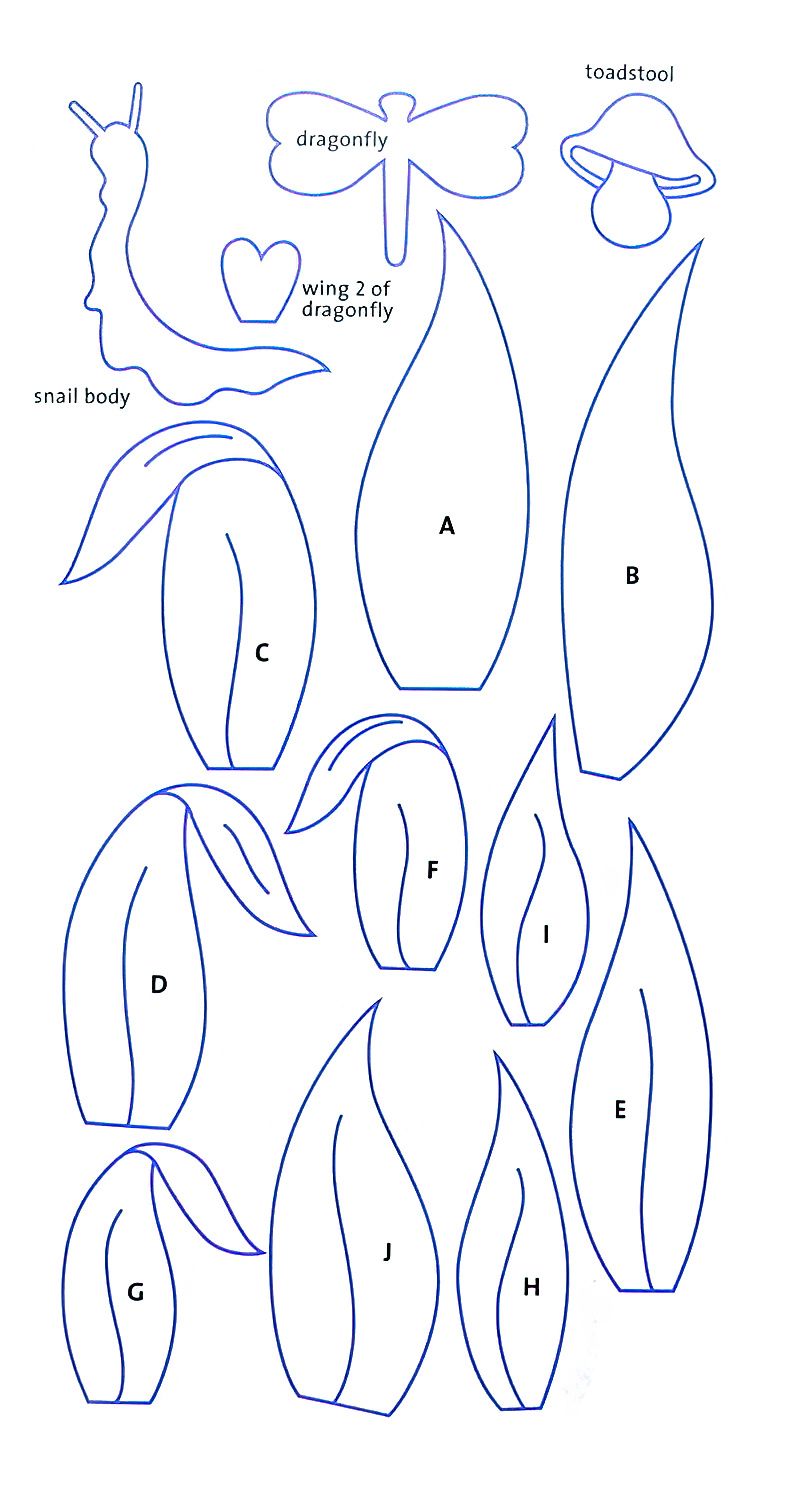
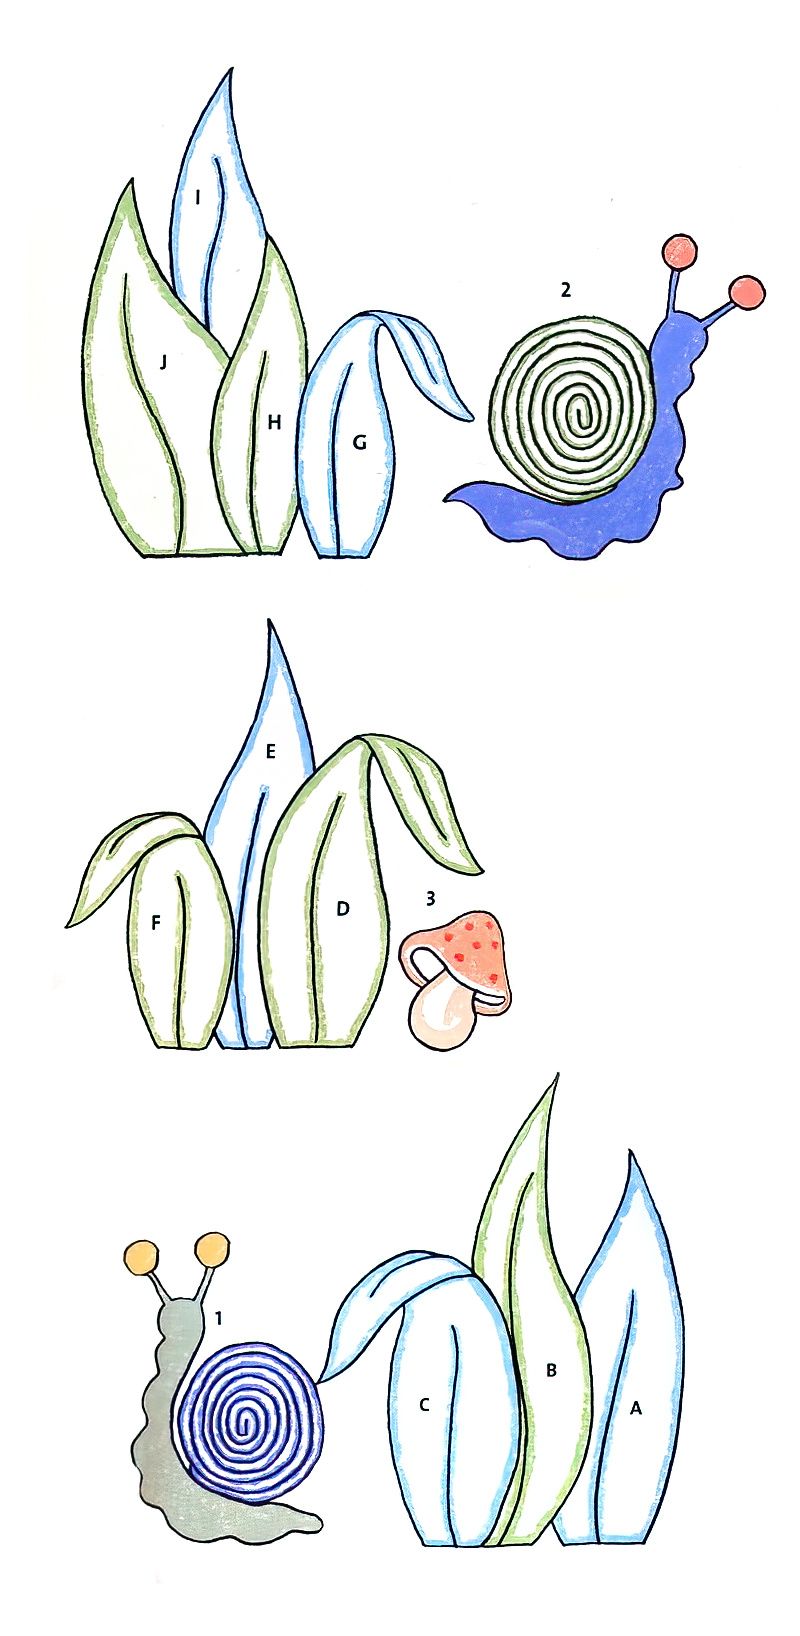
Enlarge the motifs (leaves, dragonfly, wing, toadstool, snail body) by 155%, then trace them onto Bristol board. Carefully cut out the templates using paper scissors.
Step 2 — Make Up the Motifs
Place one square of white felt right side down and lay your template for leaf A on top. Use your fabric pen to draw around its outline twice and label it for reference.
Repeat this process to create two copies of each motif, except for the snail, and three copies of the dragonfly and its wings. You will have 20 leaves, two toadstools, and three dragonflies.
Using embroidery scissors, cut out each motif carefully inside the markings. Remove any fabric pen markings with a damp white cloth, dabbing carefully to avoid removing the letters.
Make The Motifs For The Felt Toy Box
Step 3 — Add Color to the Motifs
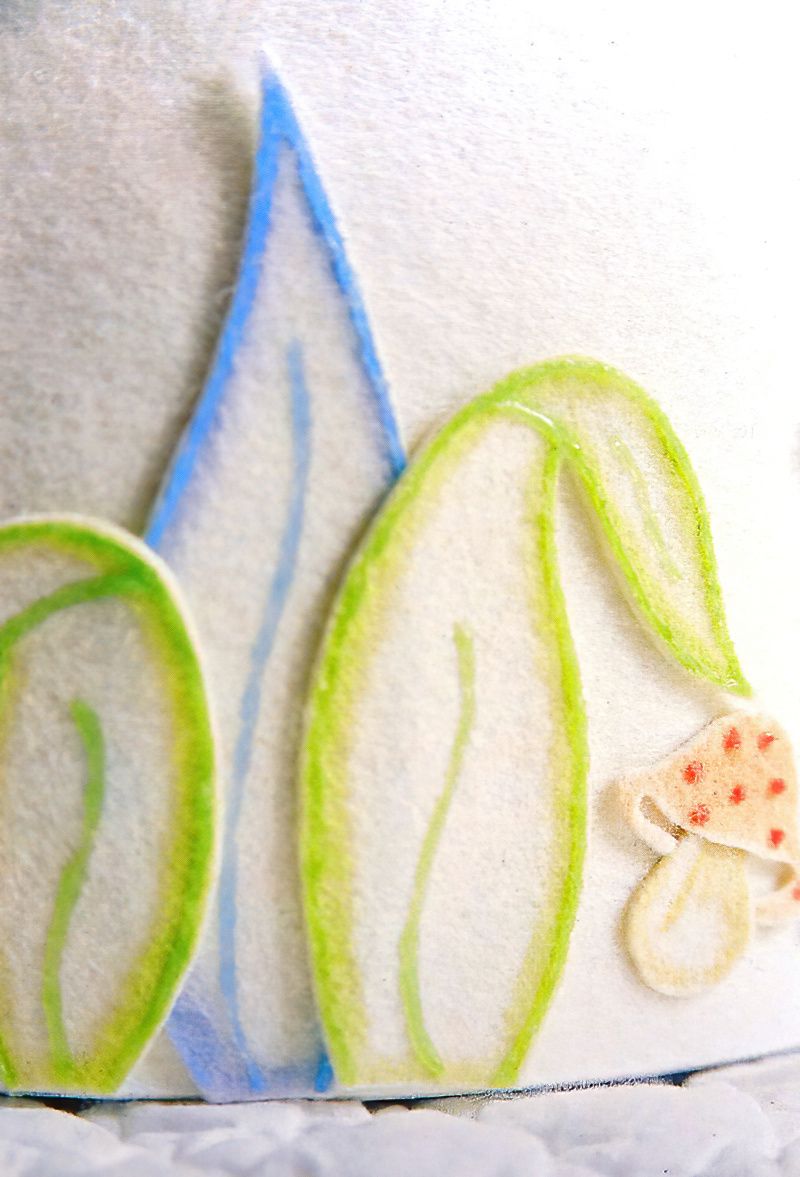
Lay out all the motifs right side up. Use hard pastel sticks or pencils to color the edges of the leaves and their veins, the two toadstools, and the three dragonflies.
Color half of the mini pom-poms orange and the rest pink for the snail antennae. Pin all the shapes onto the sheet of foam board to make it easy to spray on a layer of pastel fixative.
Allow it to dry for at least one hour, then repeat. Wait another hour before removing the shapes from the foam board.
Step 4 — Make Up the Snails For Our Felt Toy Box
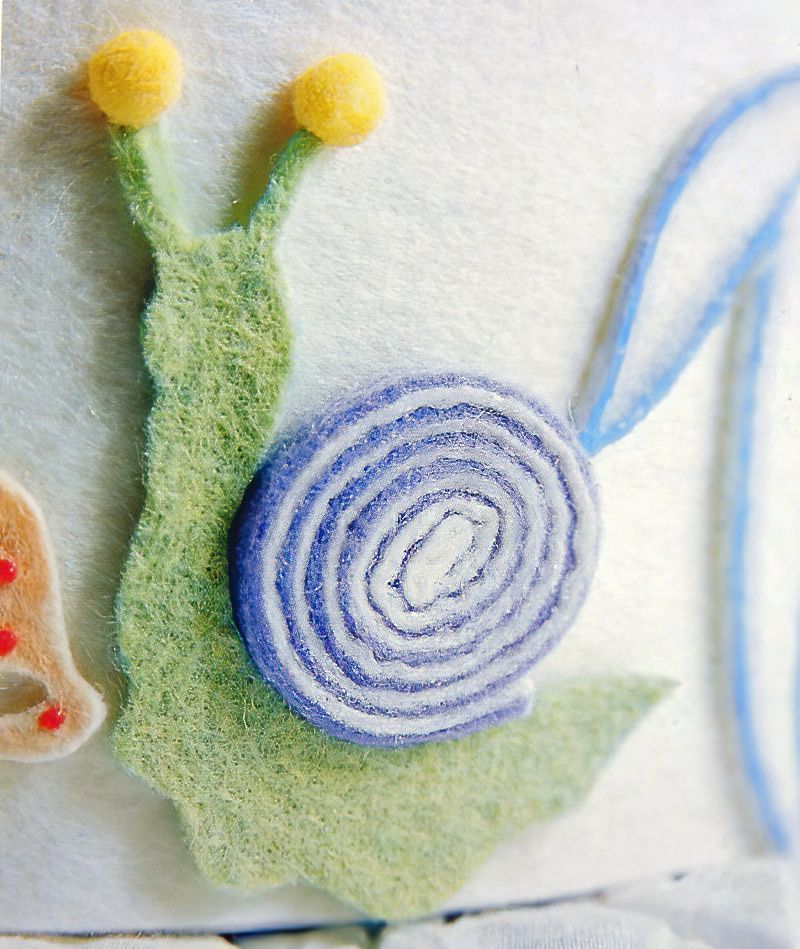
Prepare strips measuring 4mm x 32cm (5/32 x 12 3/4in) as follows: Cut four in white felt, two in blue felt, and two in green felt. Use a metal ruler and a rotary cutter on a cutting mat to keep the edges straight.
Cut out two rectangles from blue felt, each measuring 16 x 14cm (6 1/2 x 5 1/2in), and cut each rectangle into two equal-sized pieces. Apply glue to the reverse of one of the pieces and glue the other one on top. Do the same with the green felt.
Wait 20 minutes until the felt is dry before transferring the snail template twice onto each rectangle using a fabric pen. Cut out the four shapes using embroidery scissors. Take the four white strips and apply a strip of white glue on top. Glue a green or blue strip onto each of them.
Leave to dry for 15 minutes. Turn the strips over and add a little more glue to the other white side. Start to roll the two glued strips around themselves, with the white felt inside and the colored felt on the outside.
Work a little at a time, allowing the glue to take hold with every turn to make the snail shells tight.
Start Assembling Your Felt Toy Box
Step 5 — Paint Your Motifs
Check that the fixative on the leaves is dry. Lay the leaves out flat and paint around the edges and the central veins in matching tones (sky blue paint on the blue leaves and pistachio on the green leaves). Be careful not to paint too thin a line because when it dries, the paint will shrink in size by a third.
Dot scarlet paint on the hoods of the toadstools. Leave each motif to dry for at least 12 hours, by which time the paint will have turned clear, revealing the finished colors.
Step 6 — Assemble the Motifs
Using a rotary cutter, cut two strips measuring 38 x 16.5cm (15 x 6 1/2in) in white felt. Lay out one strip right side up and position the different pieces along the bottom, following the provided diagram as a guide.
Make sure to keep the following order, working from right to left: A, B, C, 1, 3, E, D, F, 2, I, J, H, G.
When you are satisfied with the design, use white glue to stick them down, noting that some pieces may overlap. Repeat this process on the second strip and leave it to dry.
Finish Making A Felt Toy Box
Step 7 — Put the Felt Toy Box Together
Take one of the motif strips and coat the reverse side with a little white glue. Place the box on the table and quickly stick your strip on top, as the paint may react with the glue.
Pull the strip to prevent creasing if necessary. Smooth out any air bubbles using a clean white cloth. Attach the second strip in the same manner.
Step 8 — Make the Roof For The Felt Toy Box
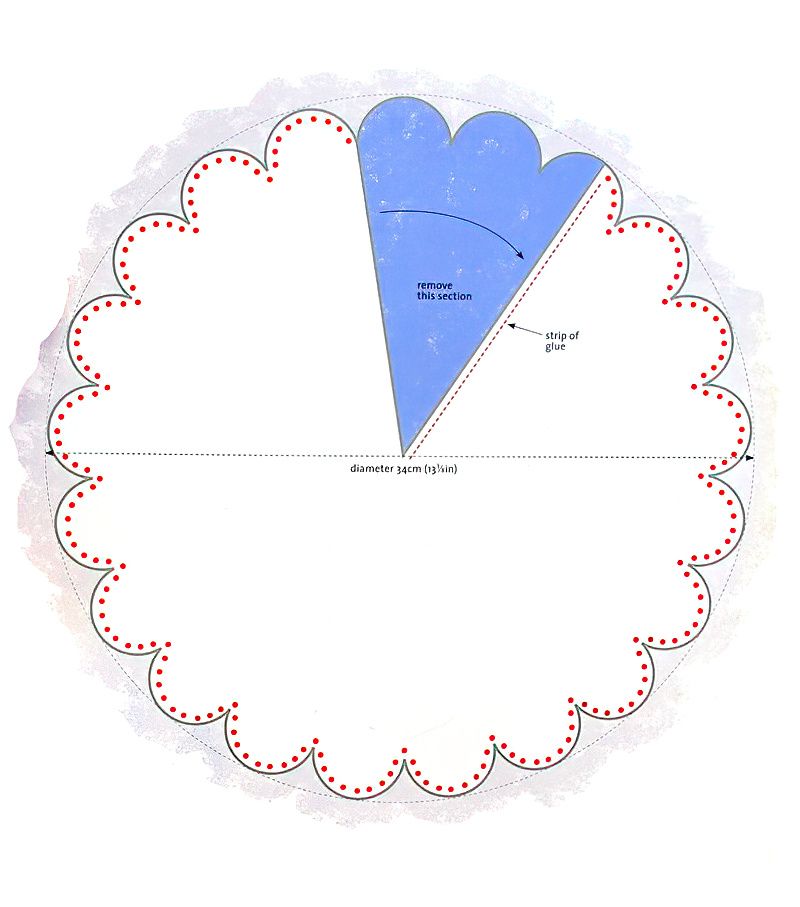
Enlarge the roof template by as much as you like to create a scalloped circle measuring 34cm (13 3/8in) in diameter. Cut it out carefully.
Take a square of white felt and iron the square of iron-on fabric onto the reverse side with a very hot iron. Place the template on the felt and secure it with a pin at the center. Trace around the outline using a fabric pen.
Cut out the shape inside the markings using embroidery scissors. On the reverse side, mark the piece to be cut out using a ruler, then cut it out. Apply a little glue along the felt edge of the cut in the roof and stick the two sides together, matching the scallops. Trim any excess fabric.
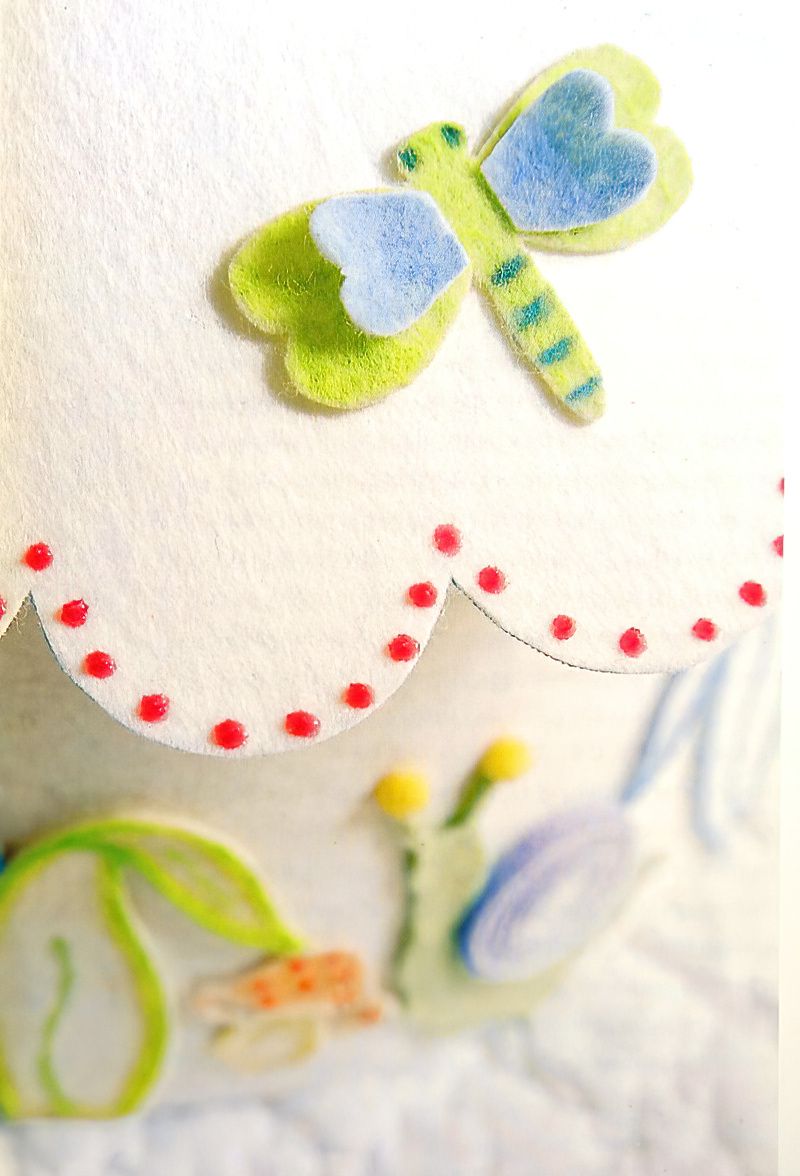
Paint dots at regular intervals around the scalloped edging with scarlet paint. Allow it to dry for 12 hours. Glue the small dragonfly wings onto the large wings by applying a line of glue close to the straight edge of the small wings.
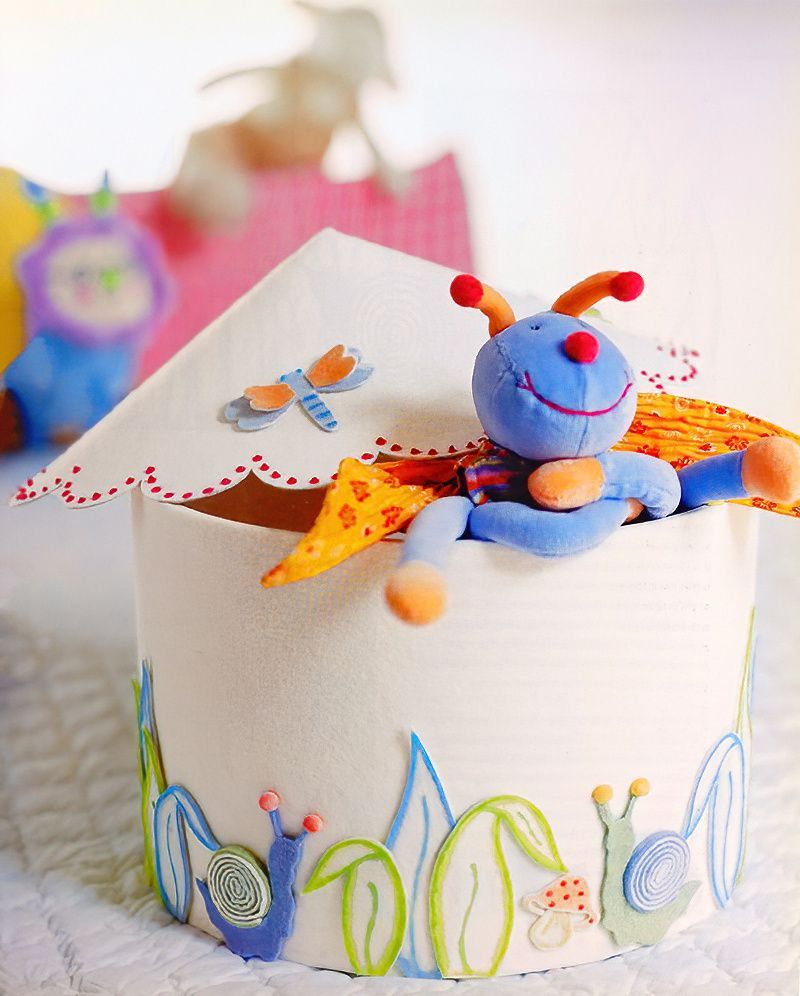
Glue the three dragonflies onto the roof, using the pictures as a guide.
Congratulations, you have completed your felt toy box. Have fun filling it with little felt toys.





















.jpg)






.jpg)
