How To Make An Iris Throw
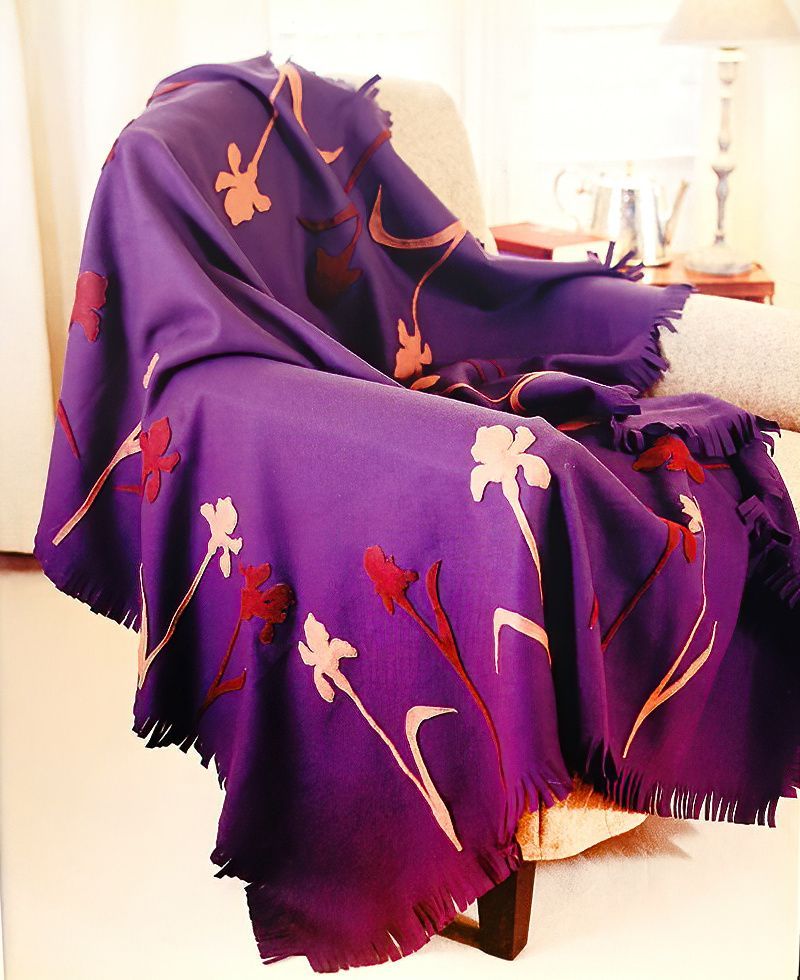
Making an Iris Throw is a creative and rewarding DIY project that allows you to infuse your living space with a personalized touch of style and comfort. To get started, choose a fabric that resonates with your aesthetic – whether it's a vibrant burst of color or a subtle, soothing pattern. You can opt for a no-sew approach using fabric glue for a quick and easy project, or if you're feeling more adventurous, hone your sewing skills for a more tailored finish. With a few hours of crafting, you'll have a unique and cozy throw that's not only visually appealing but also perfect for wrapping yourself in warmth on chilly evenings or adding a chic accent to your home decor.
Materials Needed To Make An Iris Throw
- 140cm (55in) square woollen throw in purple heather
- 2 x 50cm (20in) squares woven felt in pale pink
- 2 x 50cm (20in) squares woven felt in mahogany
- Thread matching your felt
- Tacking thread
- Sewing needle
- Pins
- Spray mount adhesive
- 60cm (24in) ruler
- Soft (2B) pencil
- Tracing paper
- 4 sheets Bristol board 21 x 30cm (8 1/4 x 12in)
- Water-soluble fabric pen
- Paper scissors
- Dressmaking scissors and embroidery scissors
Make The Iris Cutout
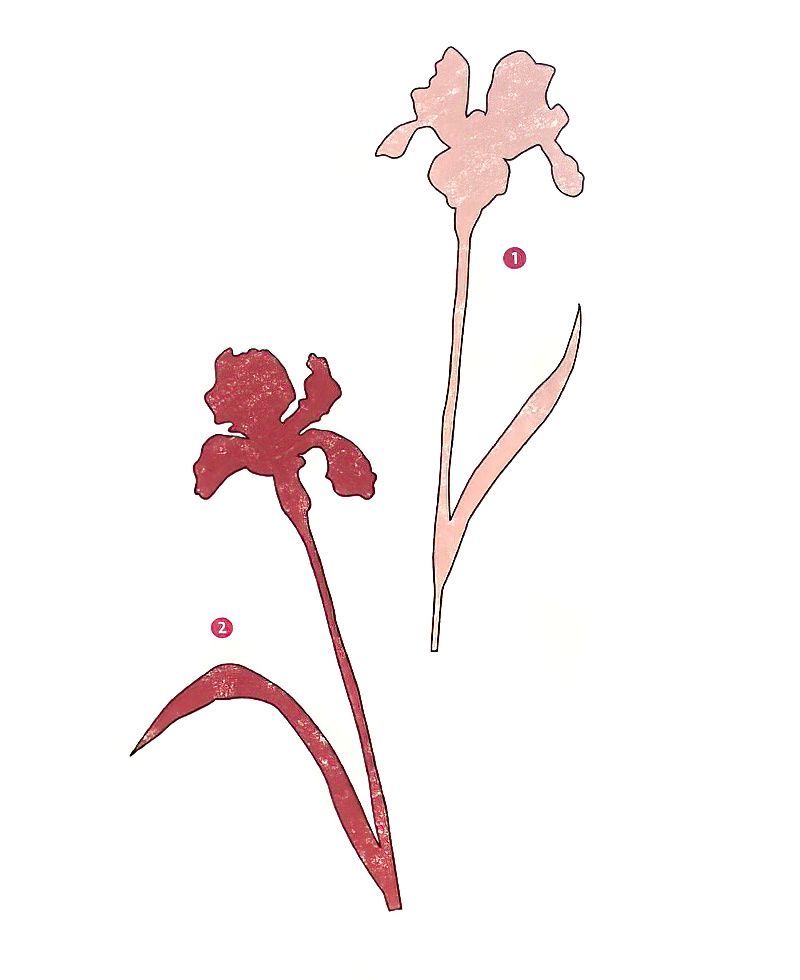
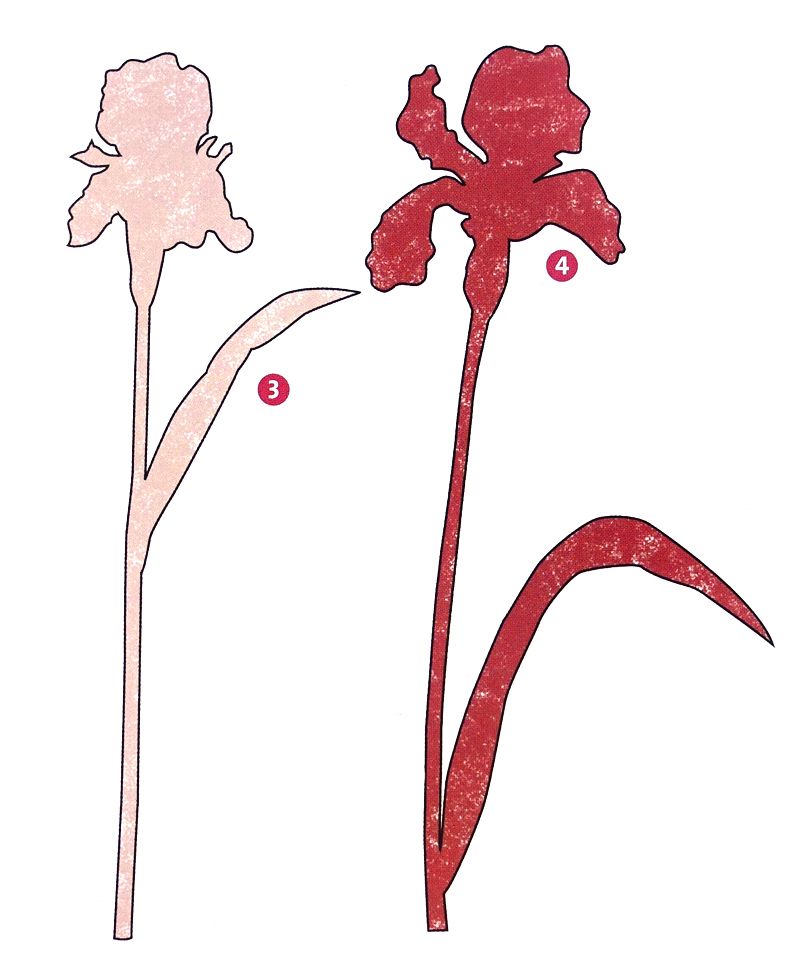
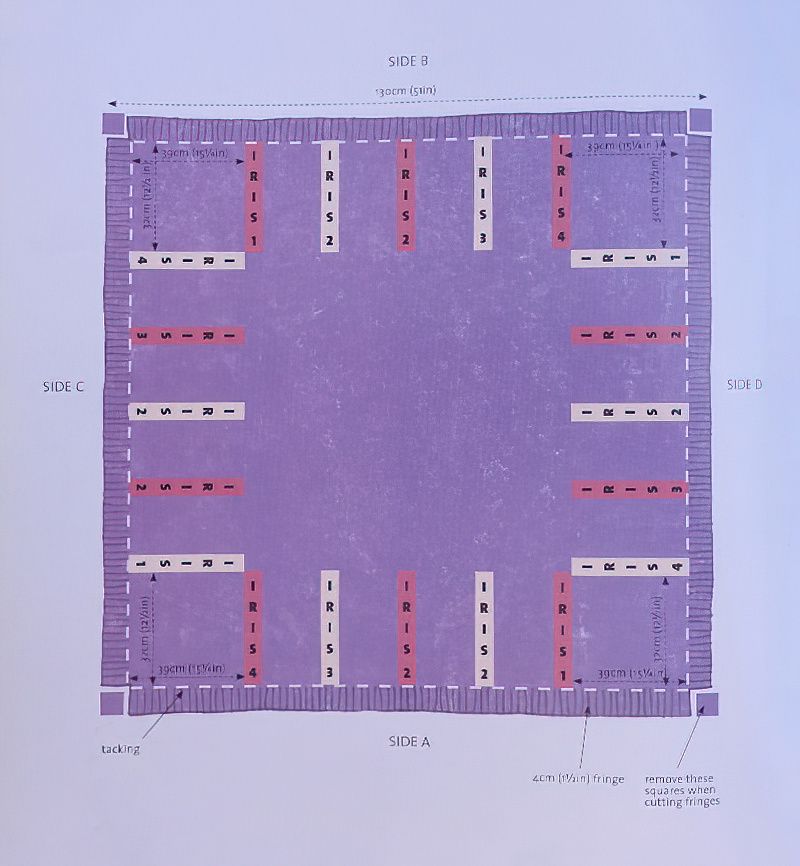
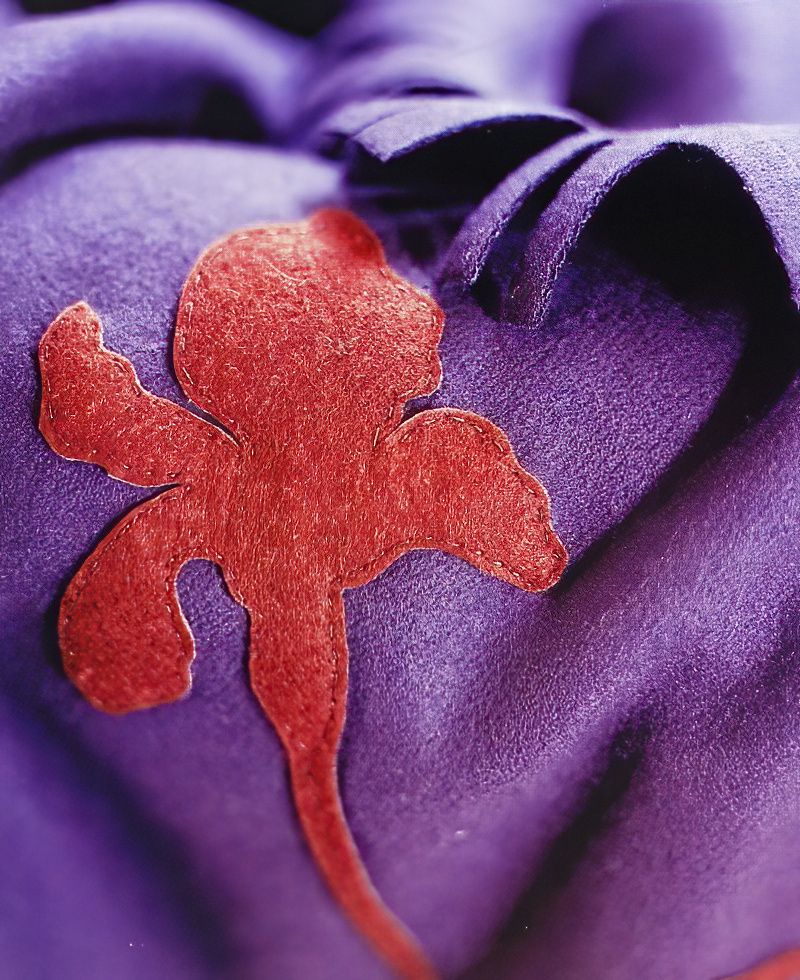
From pale pink felt, cut the following:
- 2 x iris 1
- 4 x iris 2
- 2 x iris 3
- 2 x iris 4
Let's Start Making Our Iris Throw
Step One — Prepare The Throw
Use dressmaking scissors to carefully cut your throw fabric into a 130cm (51in) square. Draw a line 4cm (1 1/2in) from the edge around the square with the fabric pen. Tack along this line.
Step Two — Make The Irises
Enlarge the four iris motifs by 240%. Copy them onto tracing paper and transfer them onto the Bristol board sheets. Carefully cut out all the shapes using paper scissors. Lay out the felt squares, right side down, and position the templates to maximize the number of irises you can cut from a 50cm (20in) square. The irises are numbered in the diagram on page 34.
Step Three — Position The Irises
Lay the throw flat on a table and position the irises on top, using the diagram as a guide. Ensure the bases of the stems are 4mm (5/32in) above the tacking line. Focus on alternating colors and shapes to create a dynamic design. Once positioned, pin all the irises onto the throw.
Finish Making The Felt Iris Throw
Step Four — Sew On The Irises
Decide which edge of the throw to start sewing the flowers onto first. Remove the pin from the first iris, then spray a little adhesive on the reverse and stick it back into position. Use a small backstitch with thread matching the felt color to secure the iris in place. Finish sewing one edge before moving to the next to address any issues.
Step Five — Make The Fringes
After sewing all the irises, use dressmaking scissors to cut 1cm (3/8in) wide fringes, each 4cm (1 1/2in) in length. At each corner, remove a small 4cm (1 1/2in) square as shown in the diagram. Remove the tacking stitches.
Congratulations you have completed our lovely Iris throw project. We hope you will get many hours of pleasure out of your new Iris throw.
**Note:** As this throw is made of wool, it should be dry-cleaned for maintenance.









.jpg)
