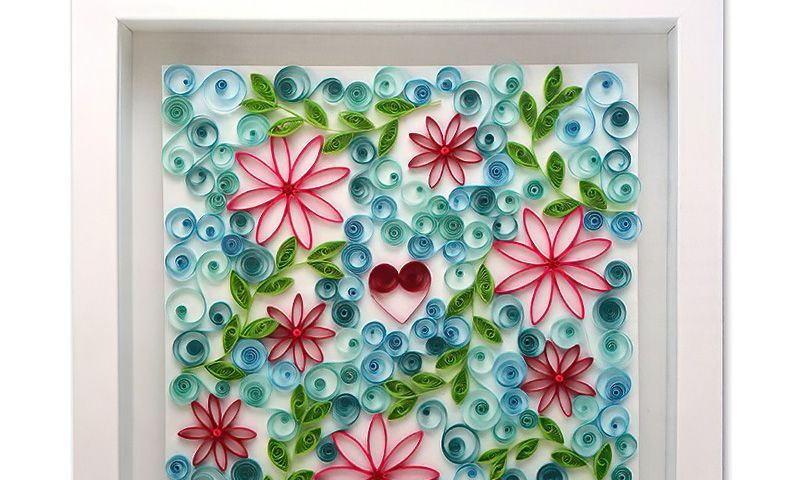
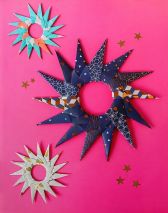
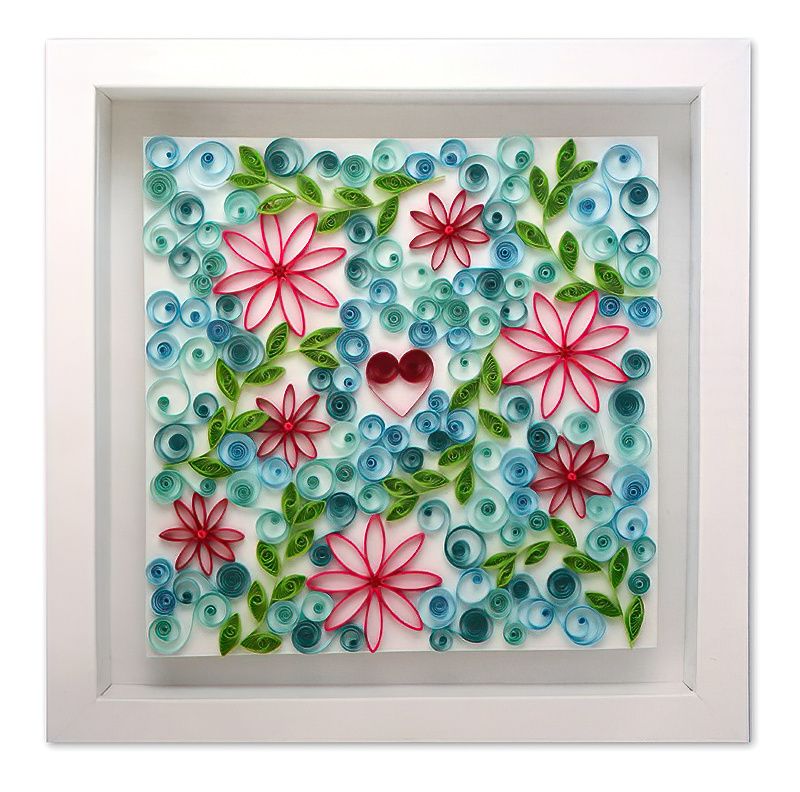
Paper Quilling Flower Picture
What the Dickens Is A Paper Quilling Flower Picture?
Well before we get to our paper quilling flower picture, what is paper quilling?
Paper quilling is the art of creating patterns, images and pictures using strips of thin coloured paper, wound, squeezed and looped and glued, end on, on to a flat background.
So we make the thin strips of coloured paper first. Well actually, you can even buy the paper already cut into thins strips! What a world we live in. But who on earth would do that, I hear you ask?
ME!
Well, I didn't at first, when I was learning and practising, I would cut my own strips of coloured paper. Now I know I like paper quilling, I buy the paper strips. Well this gives me more time to play with a design, right?
Also, when you buy them, the strips are all exactly the same width, so when you glue them on their end, they all stick out exactly the same distance from the mount. That's nice and neat!
Having just said that. It might be cool to try quilling with a tapered strip and have a more three-dimensional result if you know what I mean. Maybe I have just created something new there! A future tutorial maybe!
So What Do We Need for Our Paper Quilling Flower Picture?
- Basic paper crafting tools
- Quilling papers, 3mm or one eighth of an inch, colours red, pink, green, turquoise, light blue, light green
- Quilling tool, you can use a cocktail stick for beginner
- Cream card, 19cms square or 7 and a half inches square
- Wooden dowel or similar, 1.5cms or five eighths of an inch diameter
- Wooden dowel or similar, 1cm or three eighths of an inch diameter
- Picture frame, 25cm square or 10 inches square, measured to the outer edges
How To Do Paper Quilling
Step One
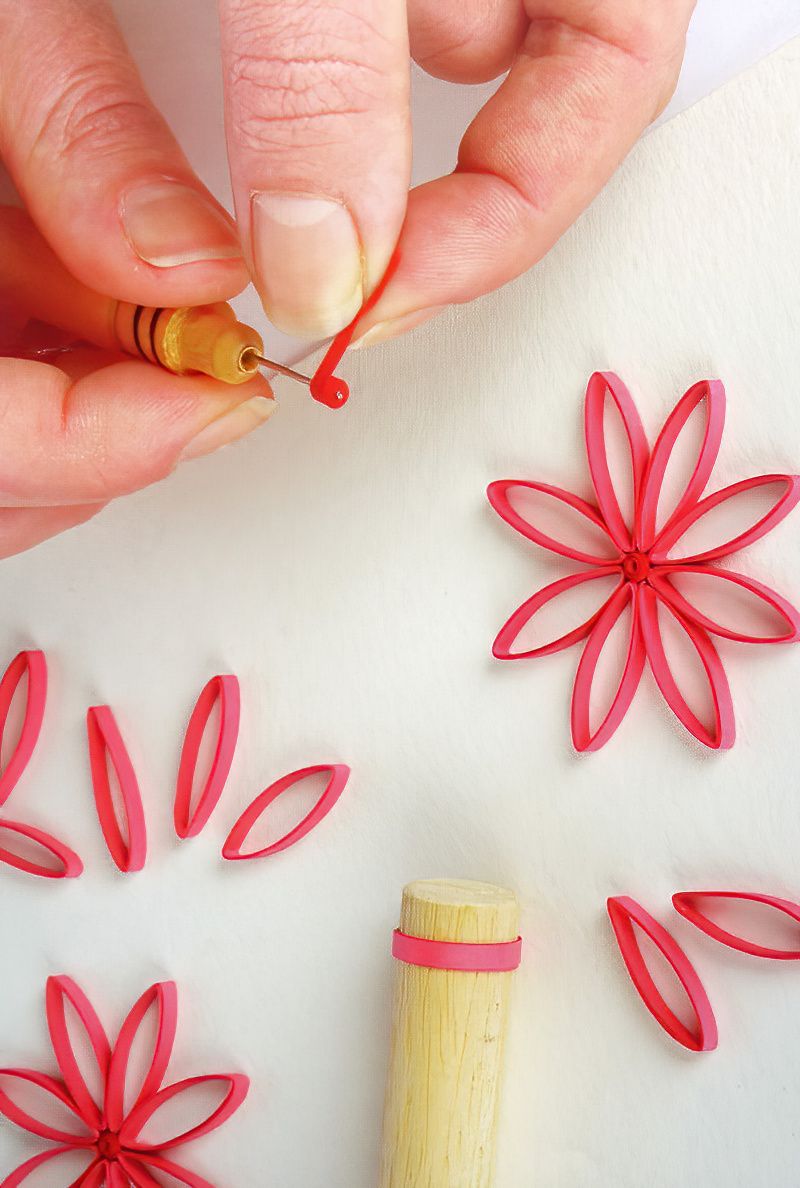
3 BIG PINK FLOWERS
We are going to start our paper quilling flower picture with the largest flowers. Start winding a 15cm or 6 inch piece of pink quilling paper around the larger of the two wooden dowels.
Be as neat as you can. When you get to the end, carefully glue down the end and slide off the dowel. Now we are left with a cute little pink paper ring.
Make eight of these rings for each flower. Then we need three flowers. So get a cup of tea and get to work on 24 pink rings. Pinch the rings to make a petal shape.
To make the centre of the flower we need a 10cm or 4 inch length of red quilling paper. Put the end of this strip into your quilling tool and start winding tightly.
A quilling tool is basically a needle with a slot in the end. You can use a cocktail stick to wind the quilling paper, but the tools are so cheap and really make life a lot easier. Can you see a pattern forming of how lazy I am?
Glue the end of this tight coil. You may have to hold it a moment for it to stick.
In brief:
- Petals — pink quilling paper, 15cm or 6 inches, on larger dowel
- 24 pink rings
- Centre — red quilling paper, 10cm or 4 inches
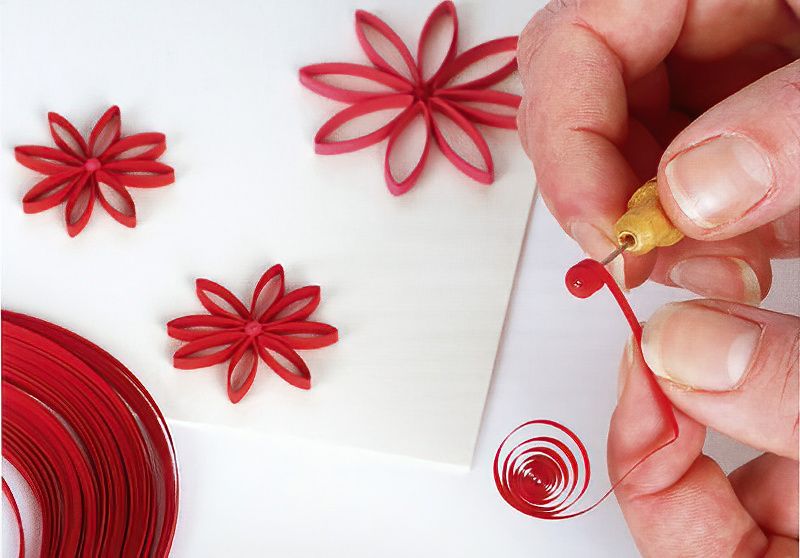
4 SMALLER RED FLOWERS
We basically need to just repeat the process above but using the following directions:
- Petals — red quilling paper, 10cm or 4 inches, on smaller dowel
- 32 red rings
- Centre — pink quilling paper, 9cm or 3 and half inches
That was a lot. Let's move on with our paper quilling flower picture.
Continue Making Paper Quilling Pieces
Step Two
Phew! That was a heck of a step one eh?
But when you get into it, you will find quilling is very relaxing. Slow yourself down and just take your time. Don't worry too much about precise measurements. Maybe just even eyeball it. It's like doing a jigsaw, knitting or fishing, the process is supposed to relax your mind. The end result is just a bonus.
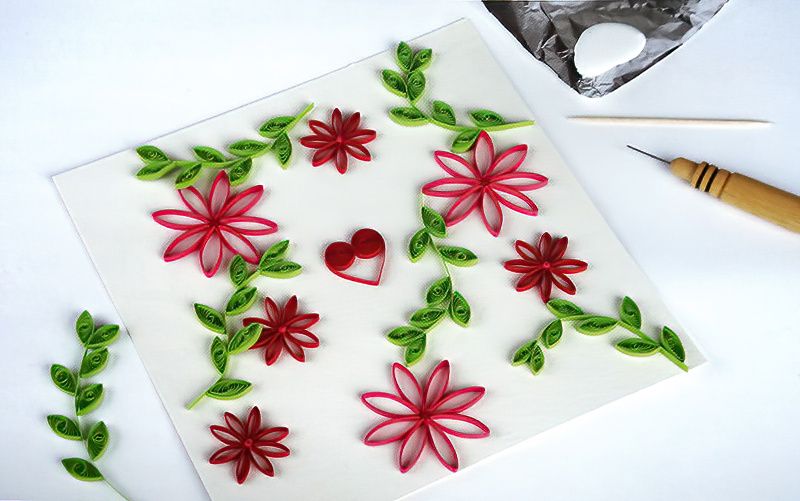
If you want to follow me precisely, you can now stick your flowers down to the back card. Just roughly estimate their positions based on the final image at the end of this post.
Next The Heart Centrepiece
Cut a 40cms or 15 and three quarters length of red quilling paper. Now fold it perfectly in half to find the centre. Pop one end in the quilling tool and start winding. When you get to the centre, do the same to the other side winding the right way to make a heart shape.
Glue this heart shape to the centre of the paper quilling flower picture. Did you glue the flowers down, just checking, there's a lot of text here!
Make Some Leaves For Our Homemade Paper Quilling Picture
Step Three
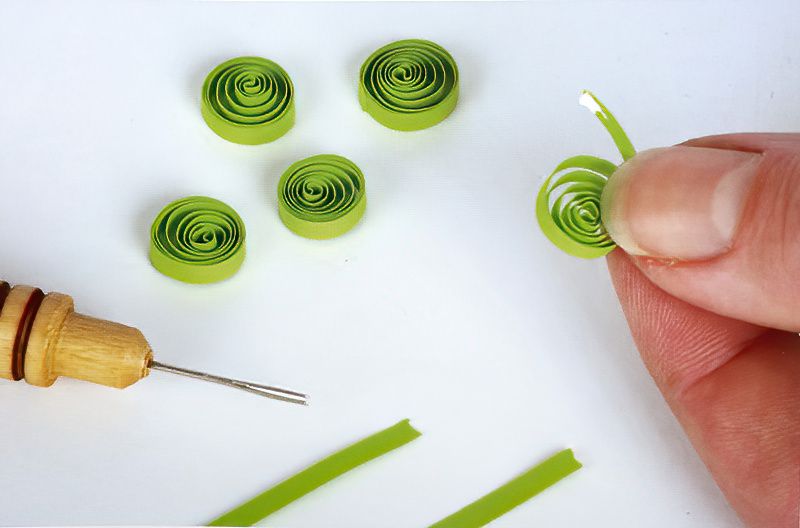
Leaves. We need lots of leaves for our paper quilling flower picture. I don't know why, but I really enjoyed this bit. It's like practising, and so you get faster and faster and more and more confident. And they are leaves so it's not too worrisome.
To make the leaves for our paper quilling flower picture, cut some green quilling paper in 20cms or 7 and three quarters long lengths.
Use the quilling tool again and wind up the green quilling paper tightly. Now before you glue it, release the tension a little and let it unwind a bit. Again, you don't have to be too precise, leaves come in all shapes and sizes after all.
Oh and I hate to break it to you, but we are going to need 40 of these. Sorry!
Assembling Our Paper Flower Quilling Wall Art
Step Four
Our amazing paper quilling flower picture is coming together now. Brilliant!
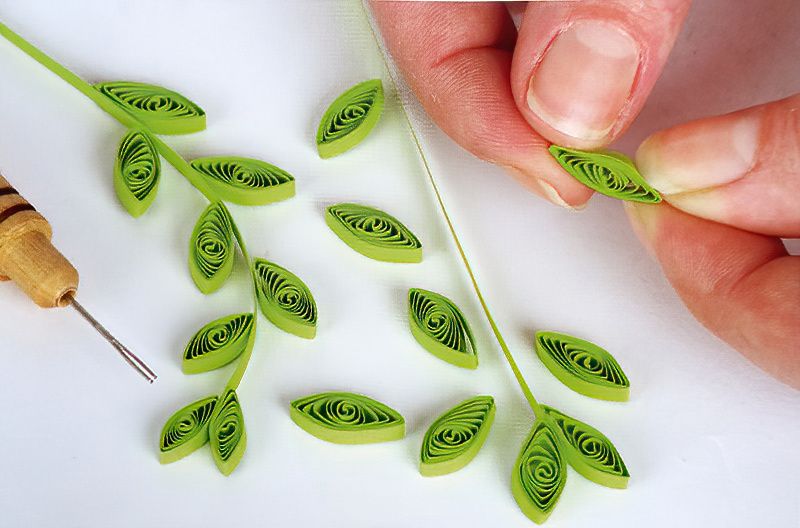
Pinch your little round spiral leaves to make leaf shaped leaves. Cut another piece of green quilling paper 8cms long or 3 and one eighth inches long. This will be the stalk.
Glue eight of the new leaves on to the stalk. Get fancy and make it look nice.
We need 6 stalks with leaves in total, so crack out the snacks and get to work. Probably get the kids on a little production line now.
Take Your Time Making A Quilling Picture
Step Five
Now glue down the sprigs you just made to the cream card. Bend and weave them through to make the design more interesting. But really, if you have got this far, you are an expert in quilling. So let loose with your creativity and layout those leaf twigs how you think looks nice.
Our paper quilling flower picture is really coming along now.
More Details For Our Quilling Art
Step Six
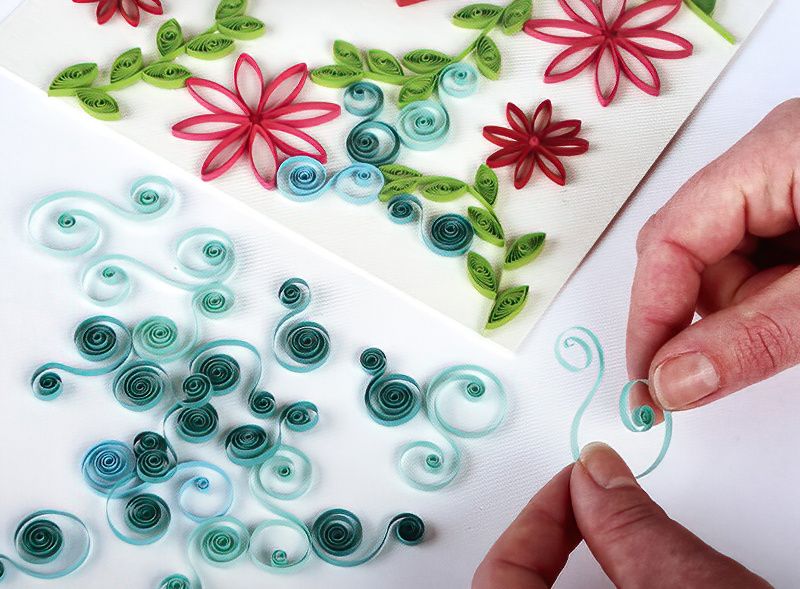
Finally, we are all at the advanced level, so we can complete this pretty paper quilling flower picture. Using 20cms or 8 inch lengths of light blue, light green and turquoise quilling paper we can fill in the blanks.
Use the quilling tool to make S shapes, some tighter, some looser, some with one end bigger than the other. Start filling in the blanks.
I like the busy look, but be careful to step back and take a good look halfway through. As it's not pleasing for a paper quilling flower picture to be too heavy on one side.
Just have fun and take your time completing the picture, the way you think looks nice.
Paper Quilling Flower Picture Conclusion
This paper quilling flower picture is very time-consuming but that's what I like. So often crafting is about making something nice for someone else. And that is great. But occasionally it's nice to make a project for yourself.
And even if you are giving it away as a gift, the time you have put in really shows. There is no one who thinks you could have made that in an hour or two.
Also consider getting others involved. It's a fun bonding project. Once you know what you have to do, the process is easy. So whilst your hands are busy you can have a nice chat.
Thanks for reading.