How To Make A Felt Photo Album For Christmas
The Christmas felt photo album is a cherished holiday keepsake that captures the essence of the season in a tangible and heartwarming way. Crafted with meticulous attention to detail, this album is adorned with soft, vibrant felt covers, adorned with festive motifs like snowflakes, reindeer, and twinkling stars, creating an immediate sense of yuletide joy.
Its pages are designed to hold cherished memories, each pocket adorned with delicate embroidery and room to display beloved photographs of holiday gatherings, special moments, and cherished traditions. As you flip through its pages, the tactile sensation of the felt cover and the visual delight of the photos within bring to life the magic of Christmases past, making it a perfect gift to share with loved ones and a treasured family heirloom for generations to come.
This Christmas felt photo album truly encapsulates the warmth, love, and nostalgia that defines the holiday season.
Materials You Will Need To Make A Felt Photo Album
- A 7 1/4 inch square sketchbook (18.5cm)
- Woven ivory felt measuring 8 5/8 x 7 1/4 inches (22 x 18cm)
- Woven beige felt measuring 8 1/4 x 20 inches (21 x 50cm)
- Small and medium-sized silver beads
- Silver stranded cotton thread
- Beige tapestry wool skein
- Ivory sewing thread
- Sewing needle and beading needle
- White glue
- Fine-tipped paintbrush
- Soft (2B) pencil
- Tracing paper
- Bristol board
- Water-soluble fabric pen
- Paper scissors and embroidery scissors
- Iron
Start Making Your Felt Photo Album
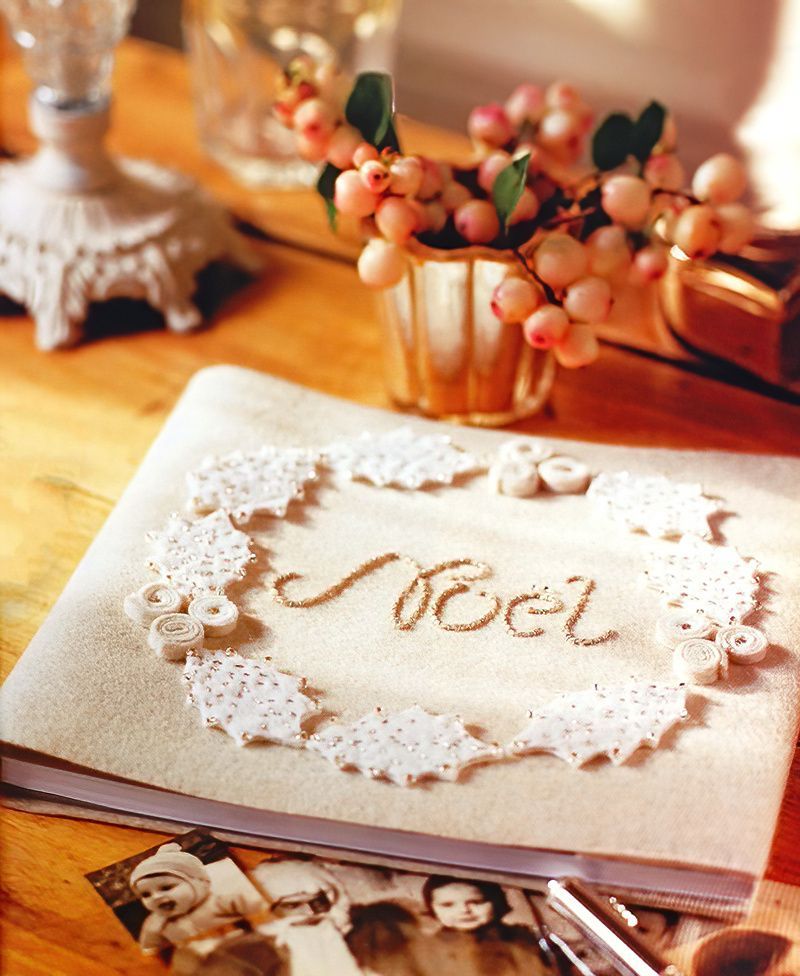
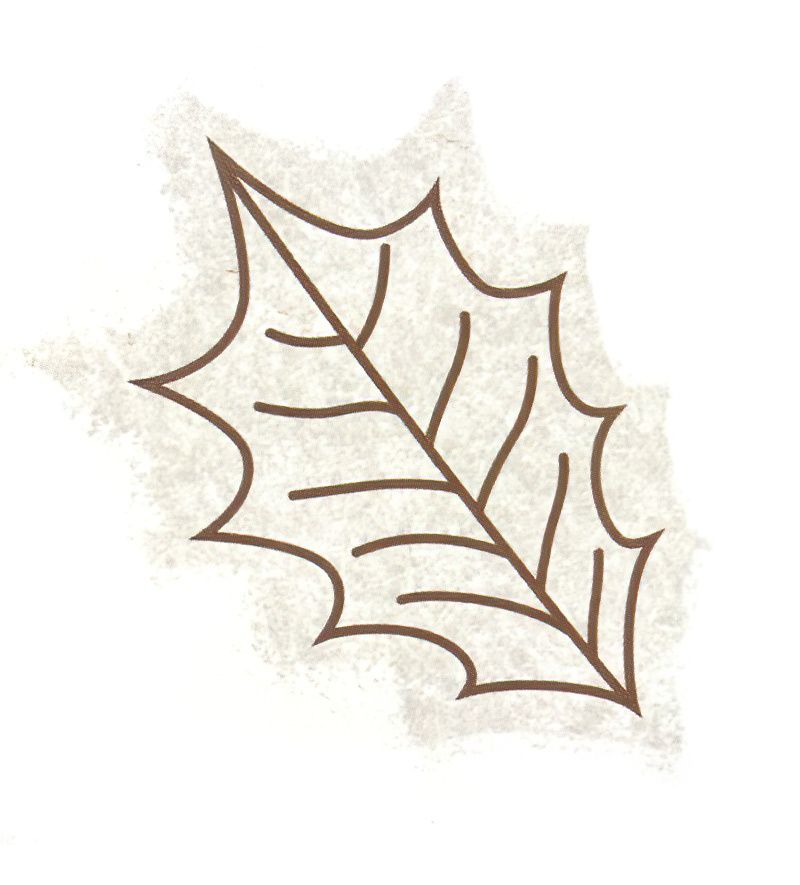
Step One — Craft The Holly Leaves
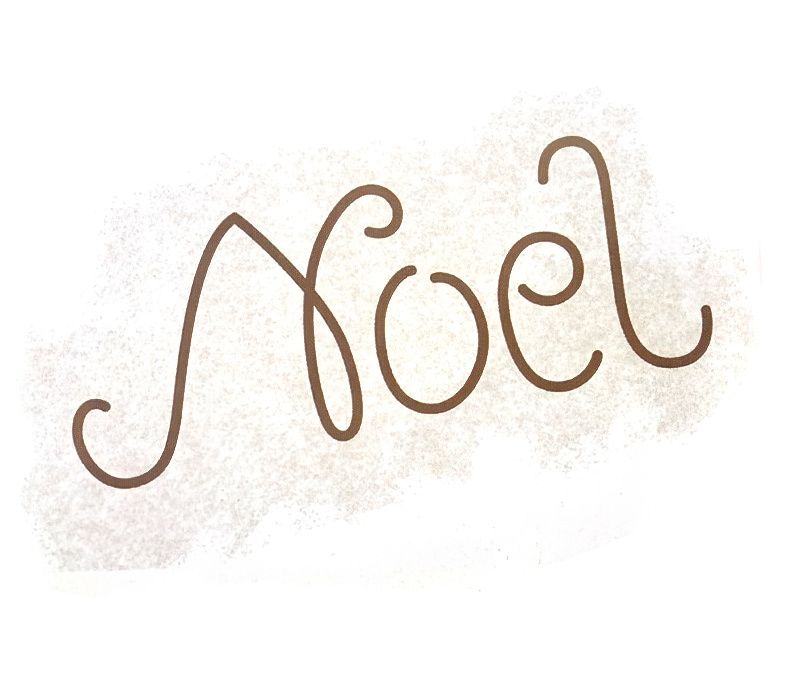
Begin by tracing the word "Noel" and the holly leaf motif. Transfer the holly leaf onto Bristol board, cut it out, and trace it onto the ivory felt 16 times.
Cut out the leaf motifs along your markings. Embroider veins on eight of the leaves using a running stitch with silver stranded cotton. Attach a small silver bead to each leaf's point (10 beads per leaf). Join each decorated leaf to a plain leaf using invisible stitching.
Step Two — Create The Holly Berries
Craft six two-tone holly berries by cutting six strips of ivory felt (6cm x 4mm) and six strips of beige felt (5cm x 4mm). Place a small strip on top of a large strip and sew a medium-sized silver bead at the end of the large strip.
Apply glue along the small strip and roll it up with the bead in the middle. Craft single-color berries by cutting three strips of beige felt (10cm x 4mm). Apply glue along each strip and roll them up.
Finish Making The Felt Photo Album
Step Three — Make The Photo Album Cover
Cut a rectangle of beige felt measuring 19.5 x 49cm. Iron a 4cm fold at one end. Use ivory thread to sew the flap down on the right side at the top and bottom using a running stitch close to the edge.
Test the jacket for size, fold in the flap at the other end, and trim it to measure 4cm.
Remove the sketchbook from the jacket and sew down the flap in the same manner as before.
Step Four — Assemble The Felt Photo Album Jacket
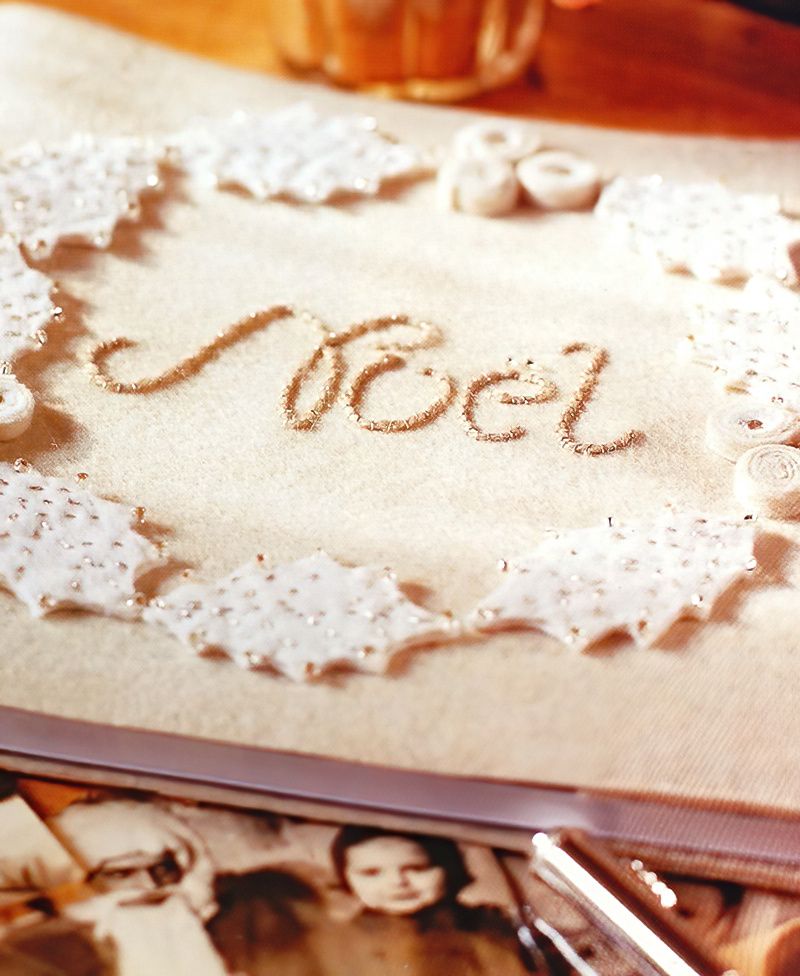
Mark out a 16cm square in the center of the front felt cover using tacking stitches. Place the Noel template within the square and transfer the lettering onto the felt.
Embroider the lettering using a couching stitch with the tapestry wool as the laid thread and the silver stranded cotton for the tying stitch. Assemble the holly wreath around the Noel text, ensuring it stays within the tacked lines.
Once satisfied with the design, carefully remove the tacking stitches. Lift each piece carefully and glue them using a fine-tipped brush, following the picture as a guide.


.jpg)


.jpg)