How To Make A Felt Angel Christmas Stocking
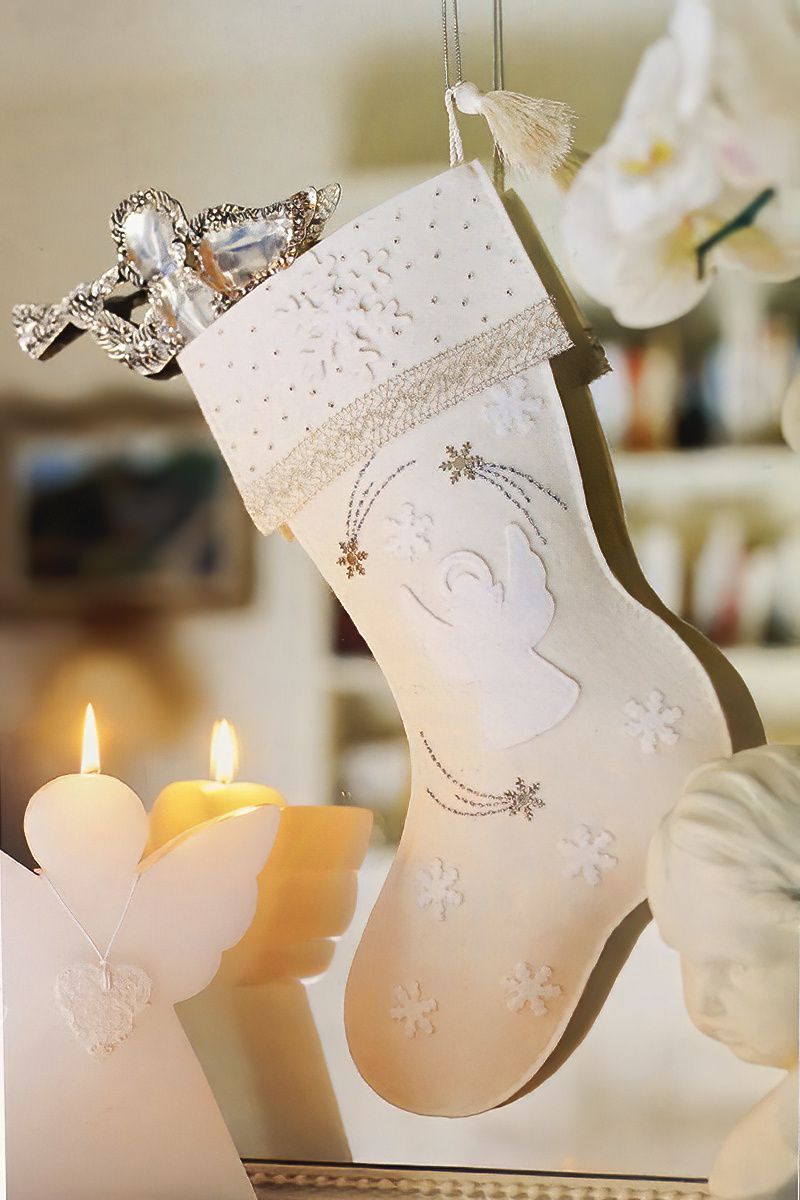
A Felt Angel Christmas Stocking is a charming and heartwarming addition to any holiday décor. Crafted from soft, plush felt, these stockings often feature an angelic design that radiates the spirit of Christmas. With intricate details and delicate stitching, these stockings bring a touch of celestial magic to your home during the holiday season.
The angel's serene face, graceful wings, and heavenly halo make it a symbol of hope, peace, and goodwill. Whether you purchase one ready-made or create your own with a DIY kit, a Felt Angel Christmas Stocking is not only a beautiful decoration but also a vessel of anticipation and joy, waiting to be filled with small treasures and surprises on Christmas morning. It's a cherished tradition that adds a touch of heavenly wonder to the festivities, reminding us of the true meaning of the season.
Materials Needed To Make A Felt Angel Christmas Stocking
- 50 x 40cm (20 x 15 5/8in) woven felt in ivory
- 50 x 40cm (20 x 15 5/8in) iron-on fabric
- 50 x 5cm (20 x 2in) sticky-backed synthetic felt in white
- 11cm (4 1/2in) square synthetic felt in white
- 20cm (8in) silver braid
- Seed beads in silver
- 3 metal snowflakes
- Tassel
- Medium-fine silver thread
- 2mm (3/32in) thick silver thread
- Sewing thread in white and ivory
- Sewing needle and beading needle
- Pins
- Snowflake punch
- Fabric glue
- Tracing paper
- Soft (2B) pencil
- Water-soluble fabric pen
- Paper scissors and embroidery scissors
- Iron
How To Start Making A Felt Angel Christmas Stocking
Step One — Prepare The Stocking
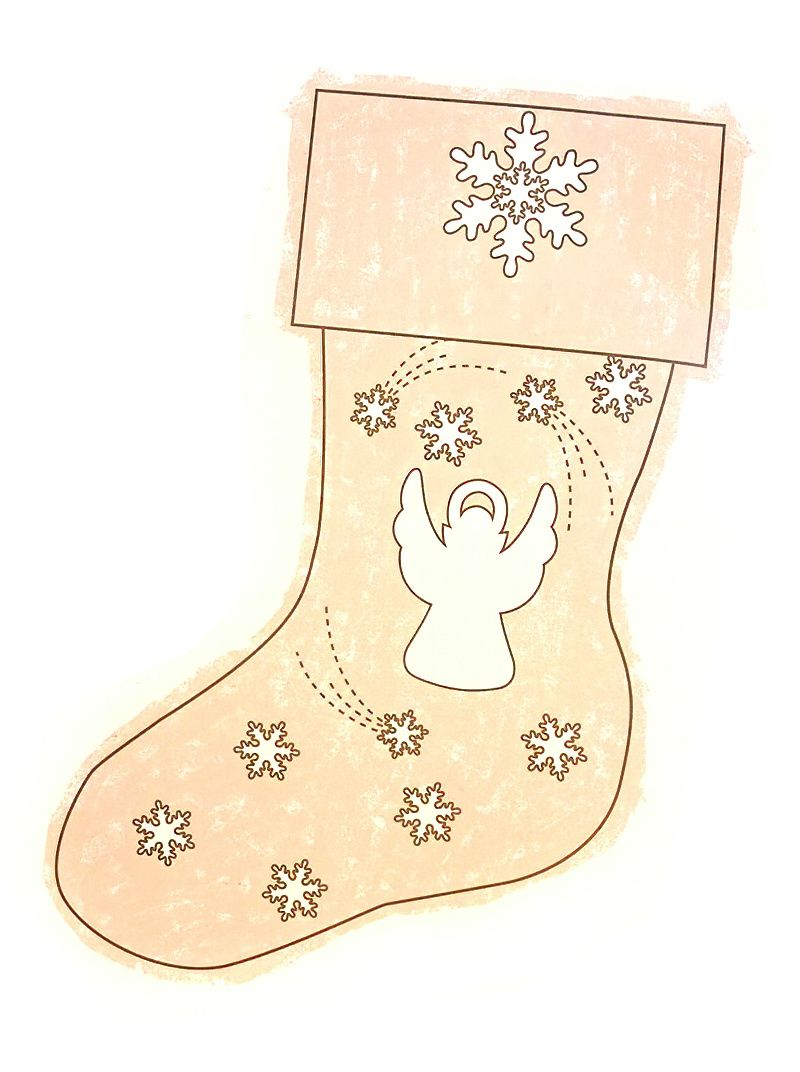
Enlarge the stocking template by the amount you want and cut it out. Trace the shape twice onto the reverse of the ivory felt using a fabric pen. Ensure that one stocking is a mirror image of the other.
Repeat the tracing process with the iron-on fabric, making the outline 1.5cm (5/8in) smaller. Iron the iron-on fabric stockings onto the reverse of the felt stockings using a hot iron.
Cut two rectangles, each measuring 16 x 9cm (6 1/4 x 3 1/2in), from ivory felt for the flaps.
Step Two — Create The Motifs
Attach the iron-on fabric to the square of white felt. Enlarge the angel and snowflake motifs by the amount you want. Trace the angel motif onto the white felt and the outline of the large snowflake onto the reverse of a piece of ivory felt.
Cut out these motifs carefully. Use a snowflake punch to create eight small snowflakes from the white sticky-backed felt.
Finish Making Our Felt Angel Christmas Stocking
Step Three — Attach The Pieces
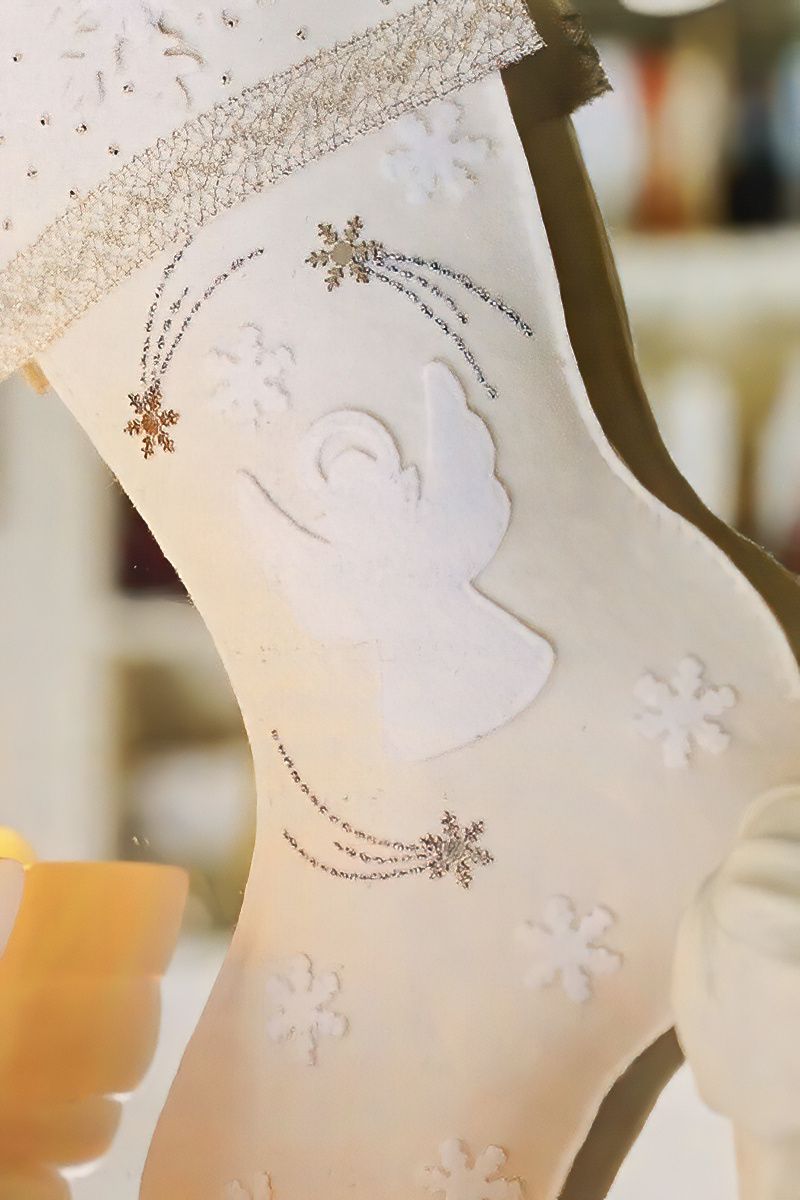
Use medium-fine silver thread to sew the silver braid onto the flap at the top of your stocking, folding the excess behind on the back. Glue the large felt snowflake in the center of the flap and sew silver seed beads at regular intervals all over the flap.
Glue the angel to the center of the stocking. For a neater finish, sew a small running stitch close to the edge all around the angel. Attach the three metal snowflakes as shown in the diagram using a tacking stitch across the base of each arm.
To create the snowflake trails, sew a running stitch with the 2mm (3/32in) thick silver thread. Remove the backing from the small white snowflakes and glue one to the center of the large felt snowflake on the flap. Glue the others directly onto the stocking.
Step Four — Final Assembly Of The Felt Angel Christmas Stocking
Pin the decorated stocking and the decorated flap together. Sew across the top, 3mm (1/8in) from the edge.
Repeat this step with the plain stocking and flap. Place the two stockings together and join them with glue or a running stitch, again 3mm (1/8in) from the edge.
Sew the tassel inside the stocking in the top right-hand corner.


















.jpg)
