Paper Diamond Decorations Are Fun for Any Occasion
How To Make Paper Diamond Decorations
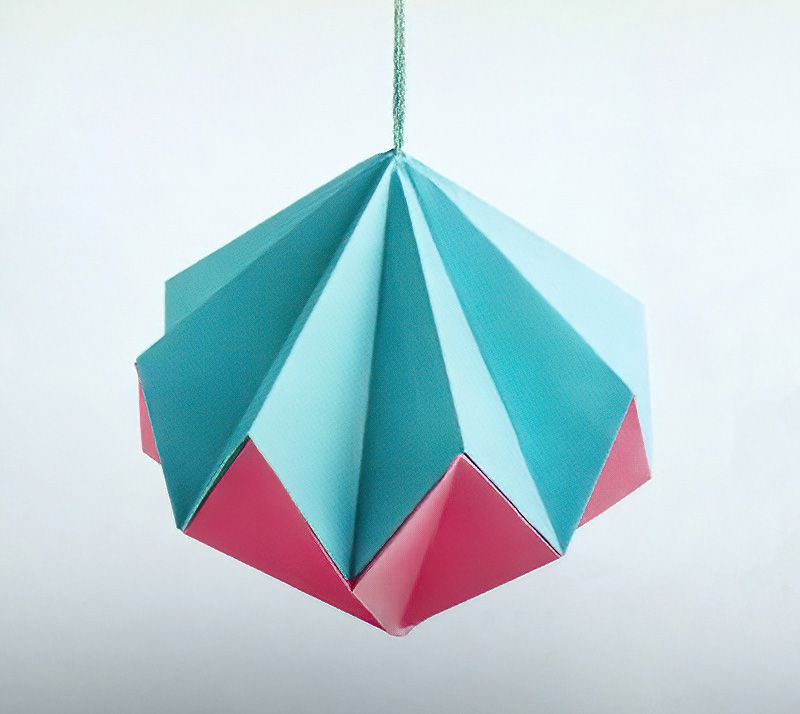
These origami diamond decorations may seem intricate, but once you've got the hang of the technique, you'll be crafting them effortlessly. They offer a chic twist to traditional ornaments, and you can customise them by using various paper colors and sizes to match your decor.
Have fun making your own paper diamond decorations.
What You Need To Make Paper Diamond Decorations
- Origami papers or any thin paper, two shades, both 170 x 170mm (6¾ x 6¾in)
- Scissors
- PVA glue and a paintbrush
- Embroidery thread, baker's twine, or thin ribbon
- Cocktail stick
Let's Start Making Paper Diamond Decorations
Step One
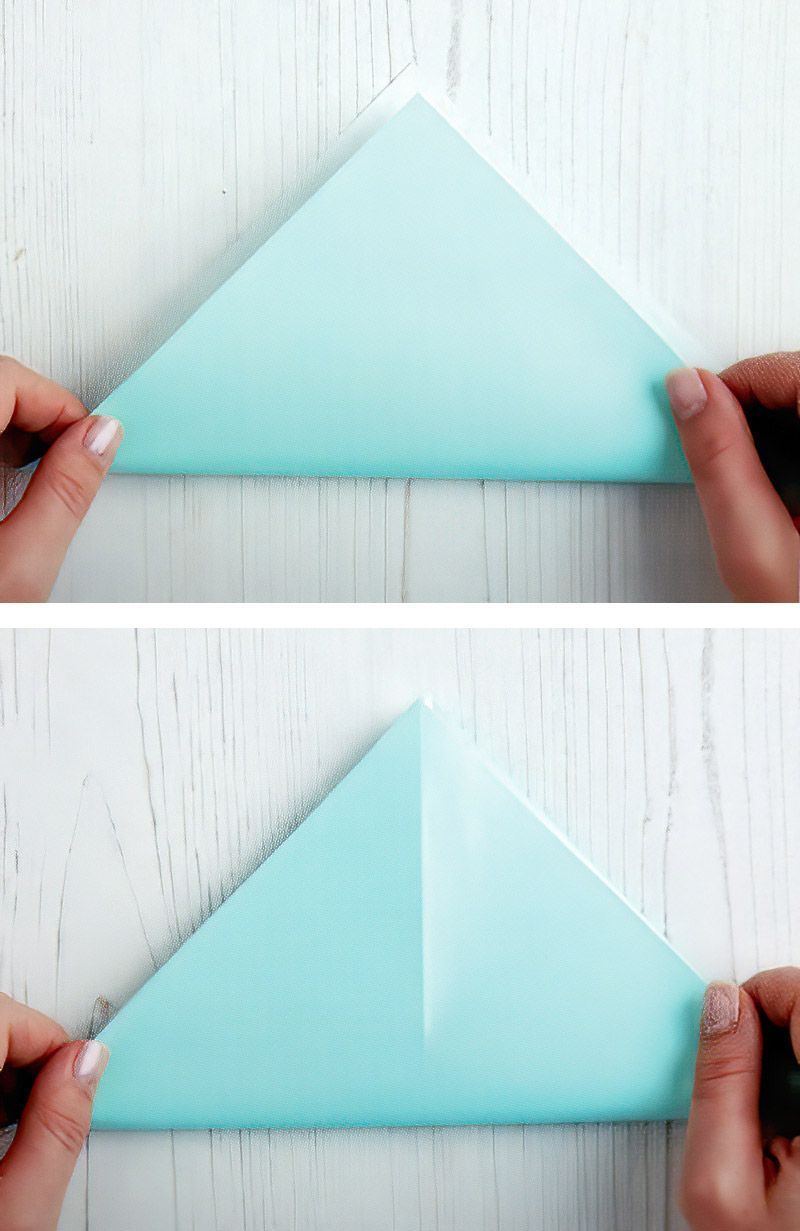
Begin with a square piece of paper. Fold it diagonally from one corner to another, then unfold.
Step Two
Fold the square diagonally in the other direction while keeping it folded.
Start Folding The Papers
Step Three
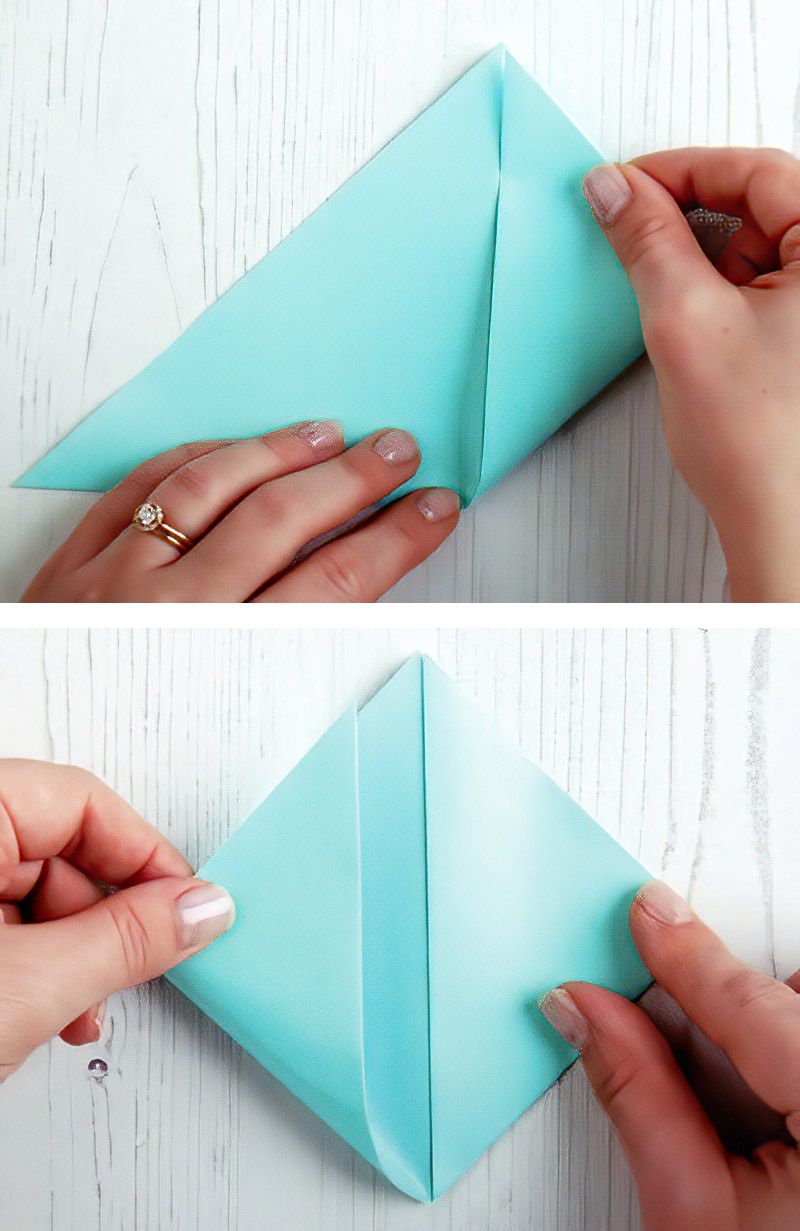
Position the triangle with the base facing you, take the right point up to the top point, and fold.
Step Four
Now, take the left point up to the top point and fold.
Continue Carefully Folding The Papers For Our Diamonds
Step Five
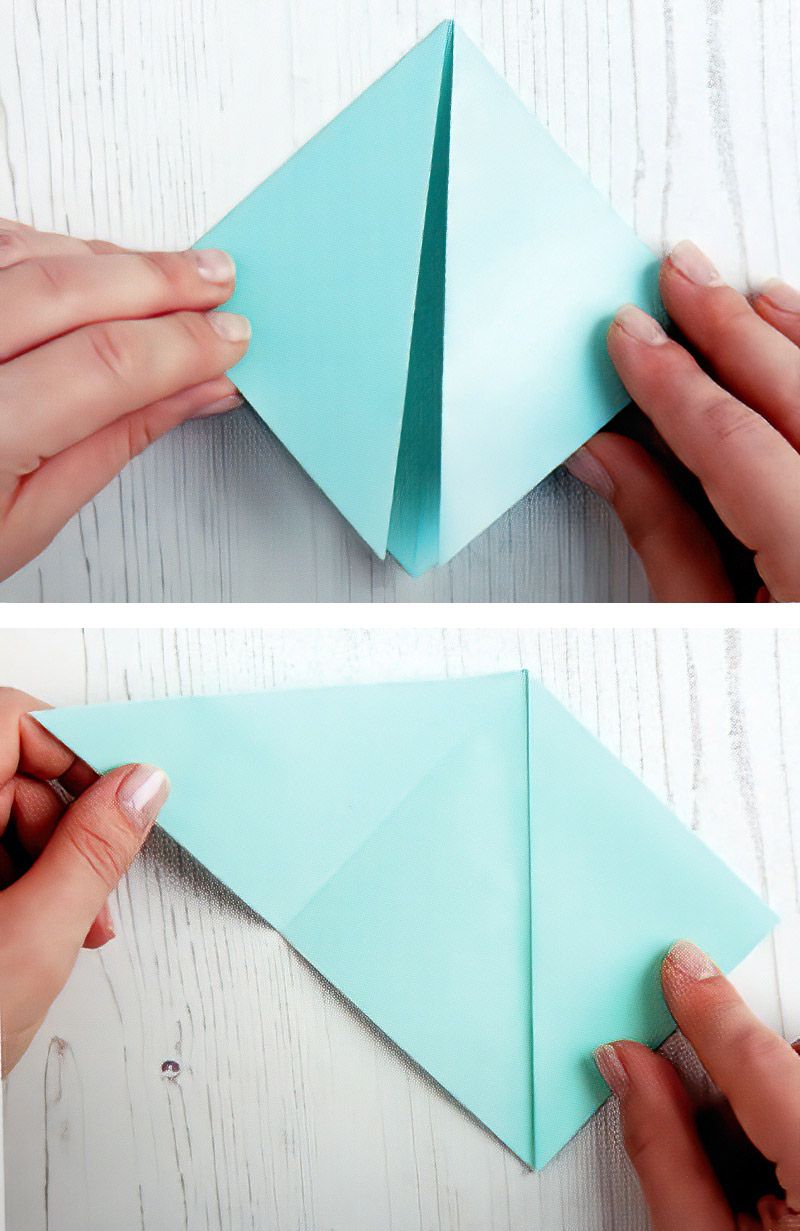
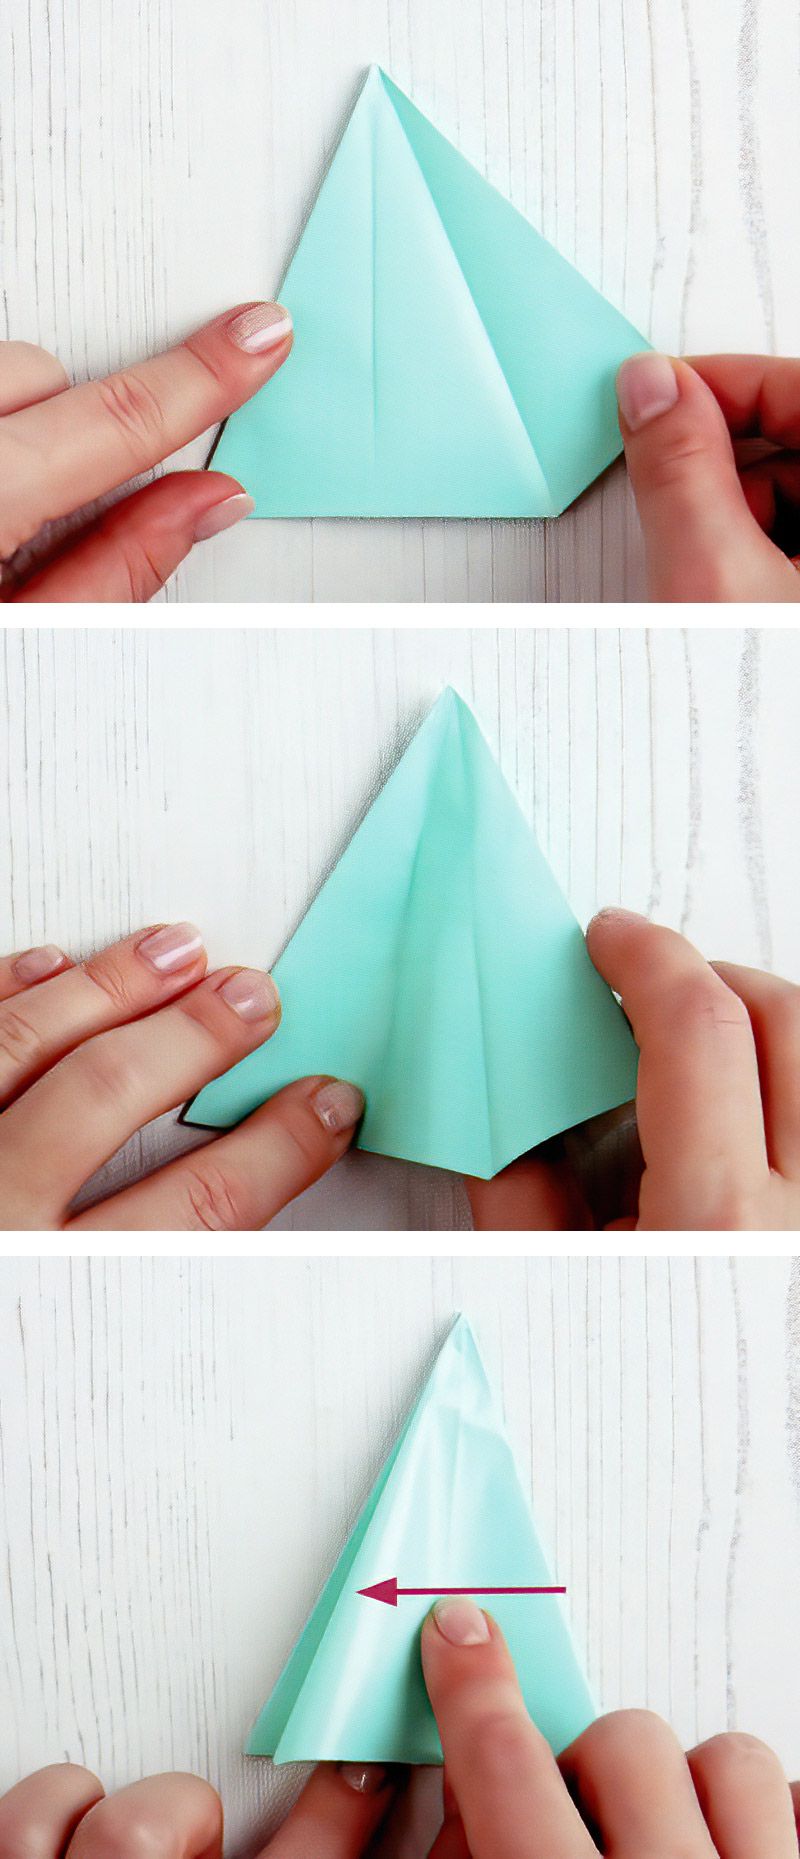
Rotate the diamond shape 180 degrees so that the open end points toward you.
Step Six
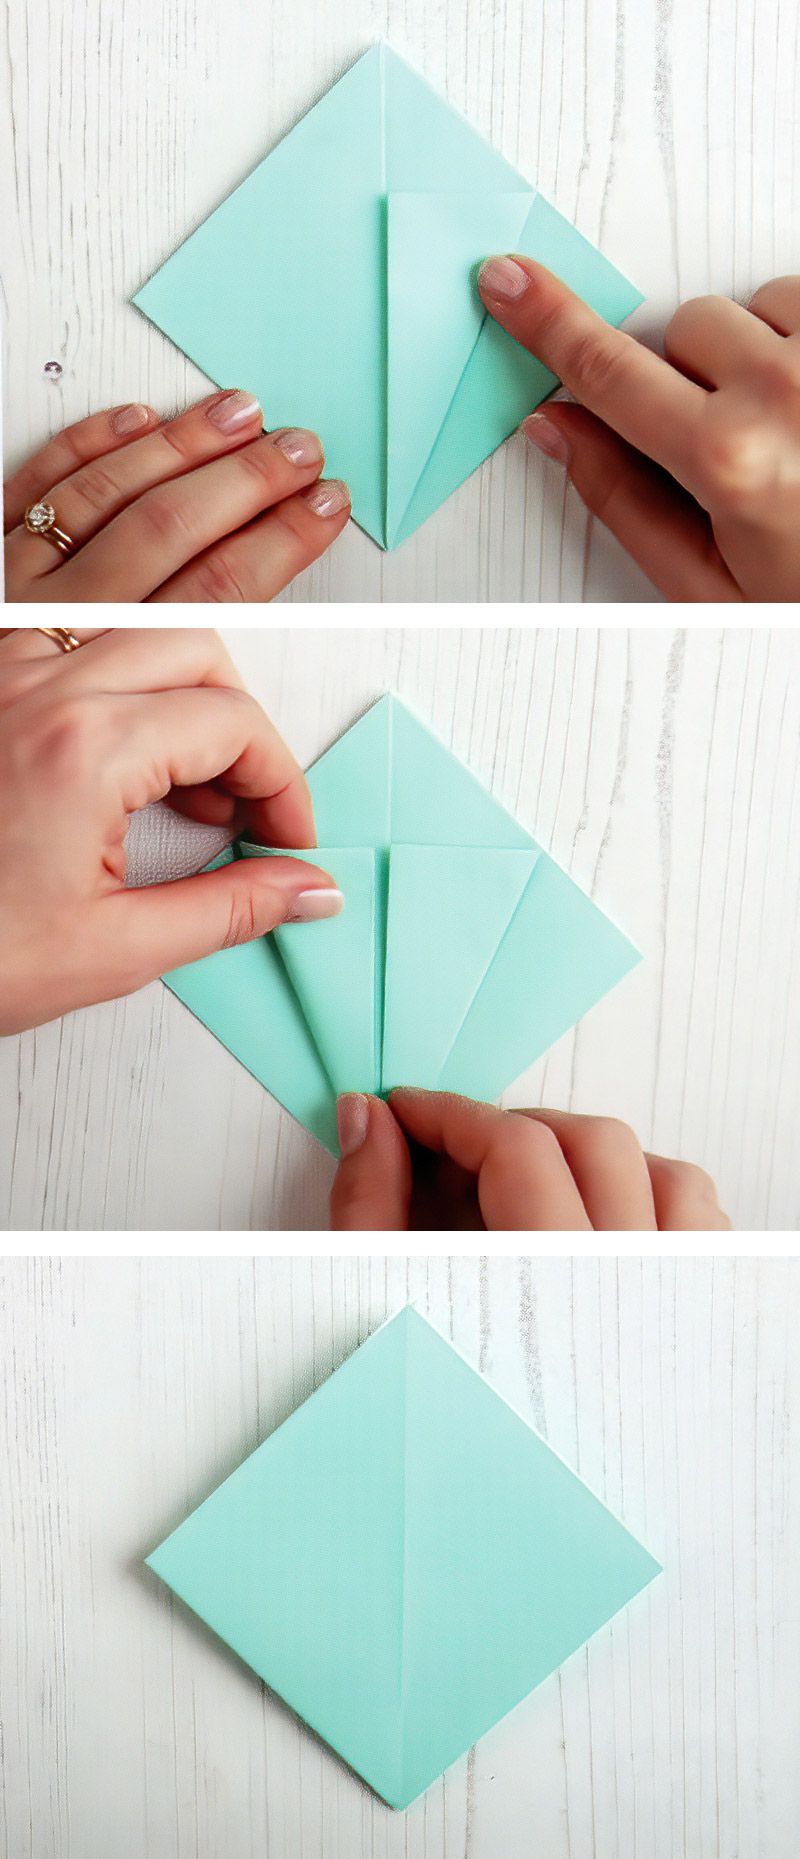
Open the left side of the diamond.
Carefully Insert Your Fingers
Step Seven
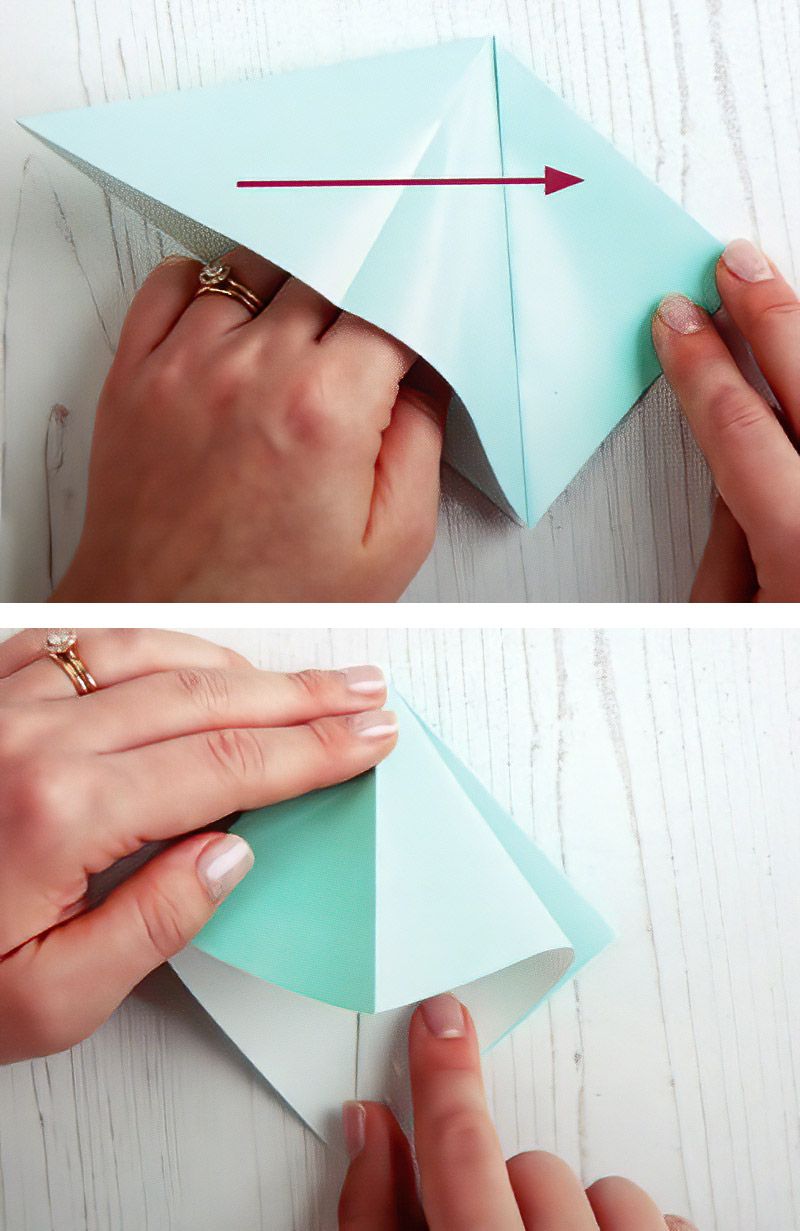
Insert your fingers inside the left half of the diamond.
Step Eight
Push the left half of the diamond towards the right edge.
Make Sure The Creases Are Neat
Step Nine
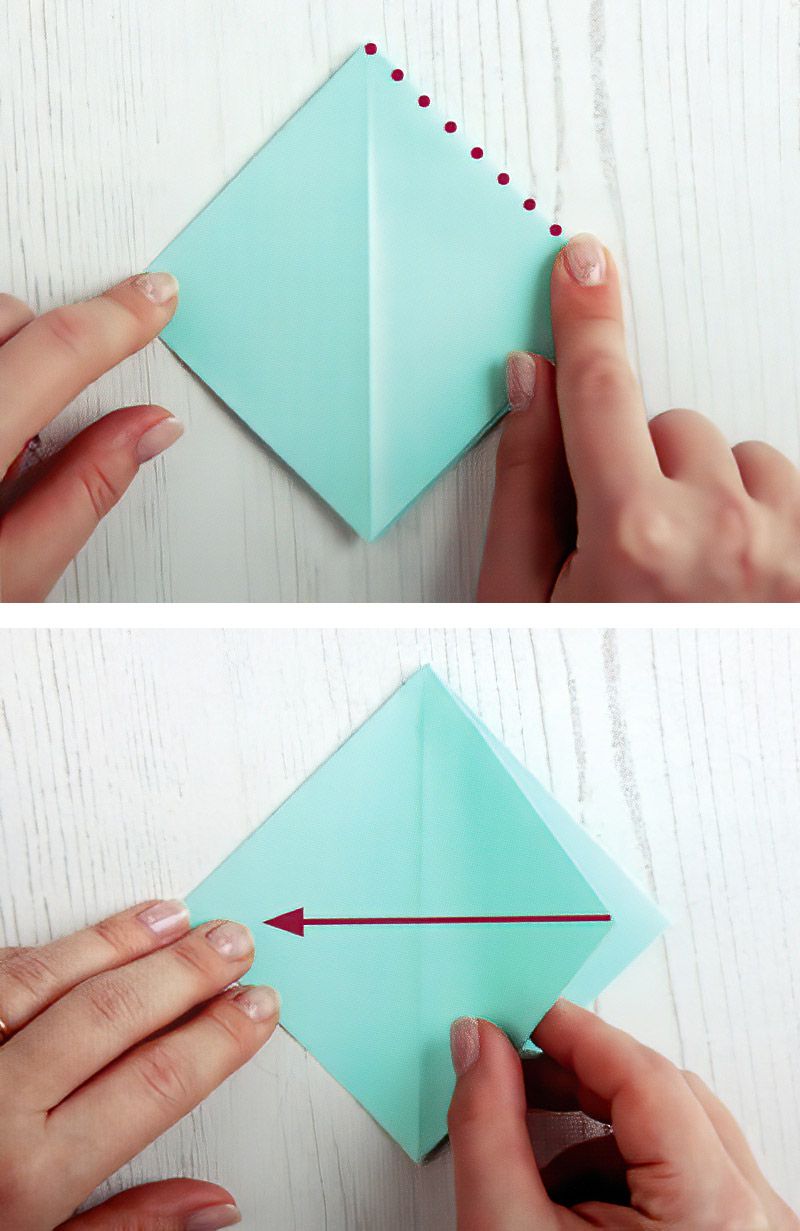
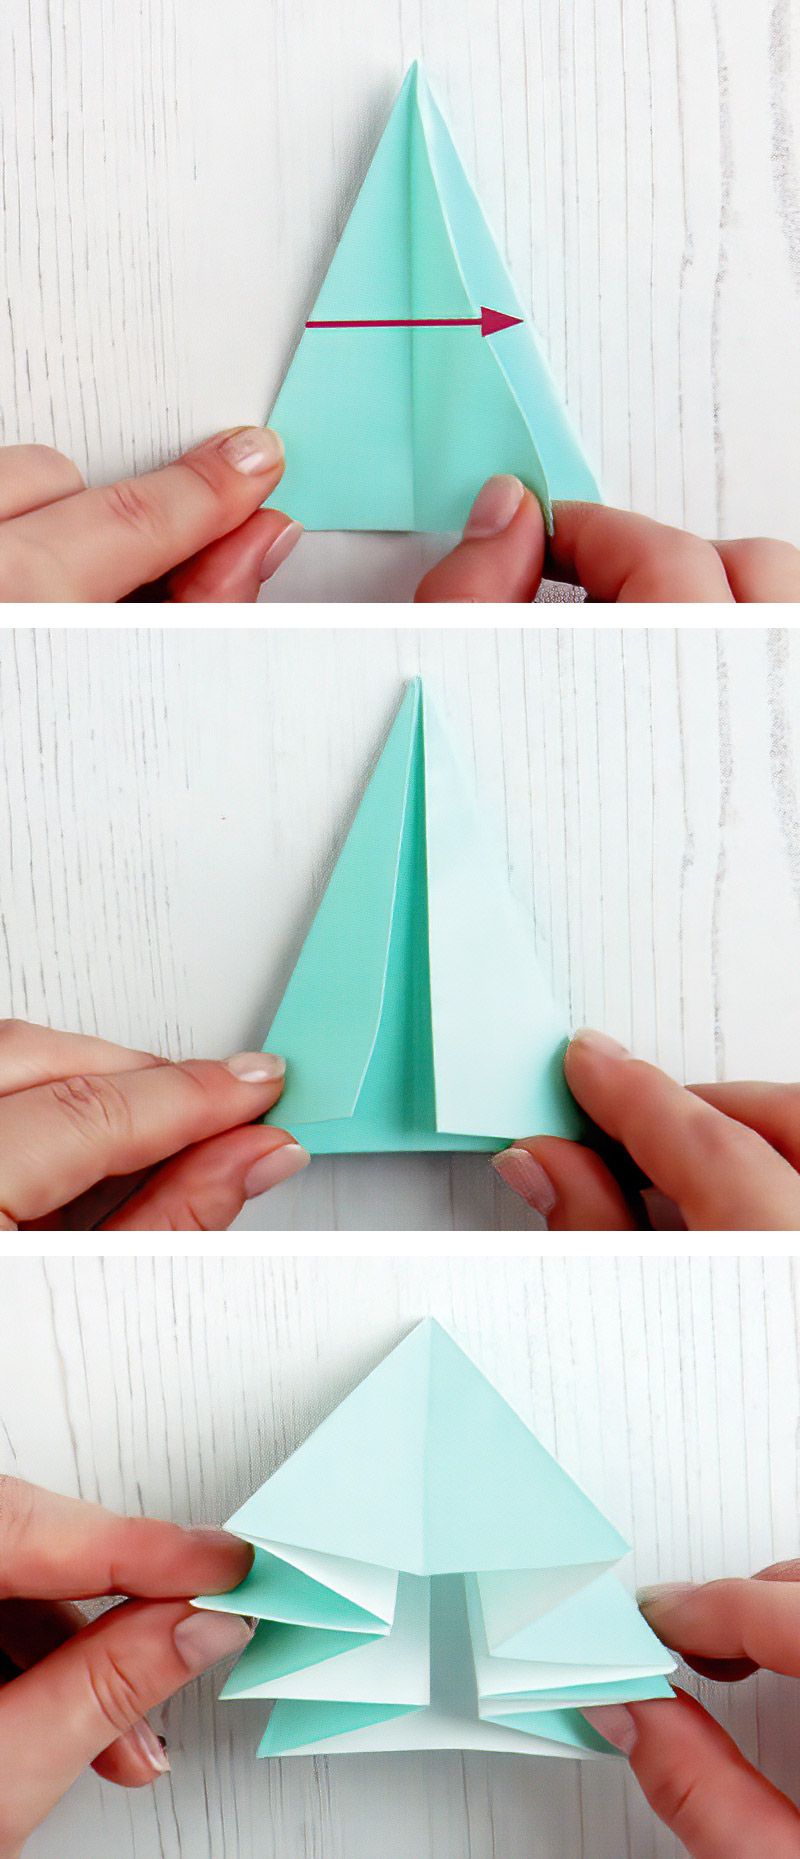
Press along the crease.
Step Ten
Fold the right side's top flap back over to the left side, like turning a page.
Take Your Time To Get Your Folds Accurate
Step Eleven
Press along the crease.
Step Twelve
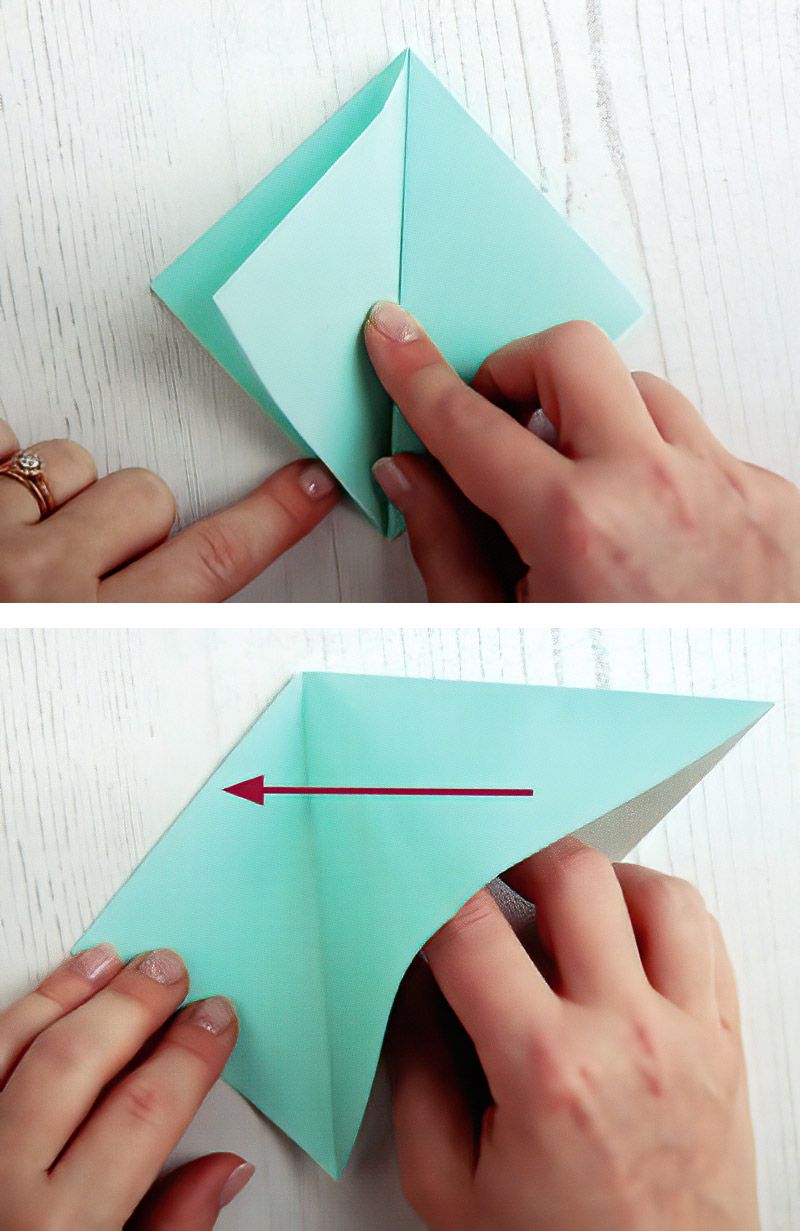
Repeat steps 7 to 11, starting from the right side. Slide your fingers inside the right half of the diamond.
Continue Making The Paper Diamond Decorations Tutorial
Step Thirteen
Push the right half towards the left-hand edge.
Step Fourteen
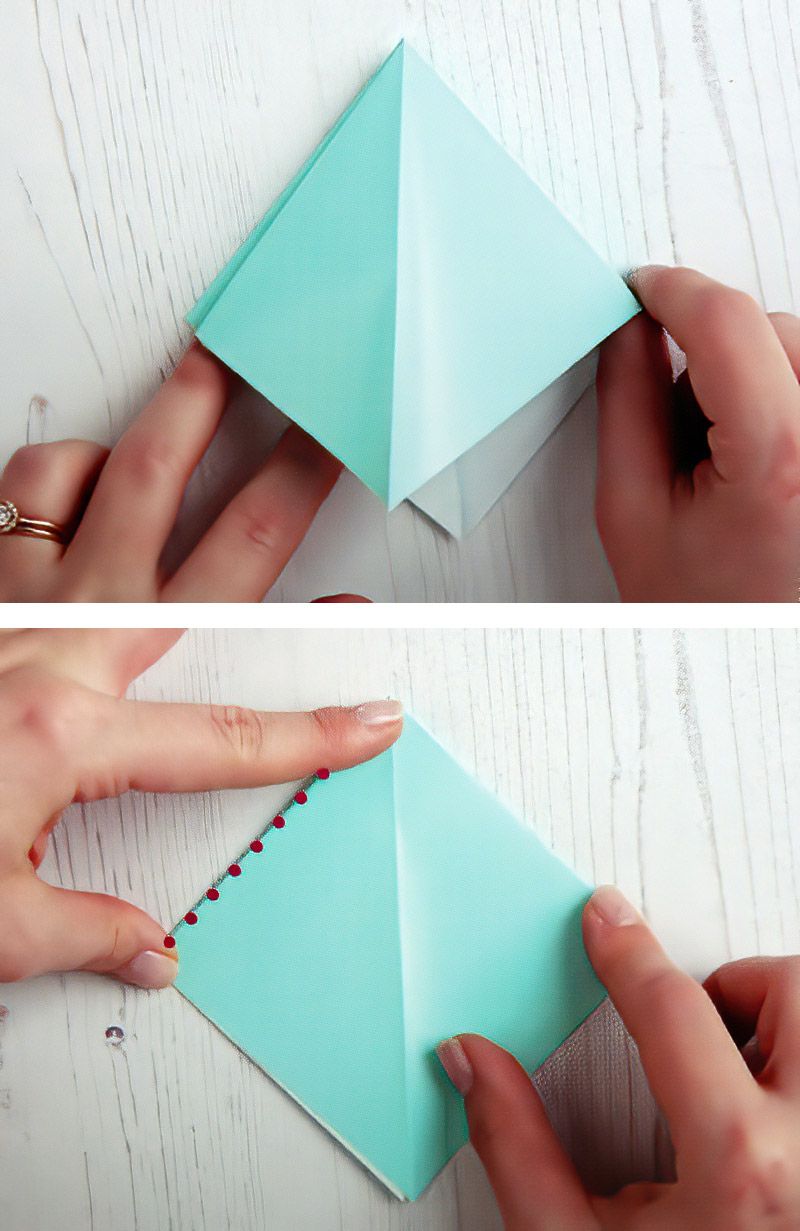
Press along the crease.
Nearly Half Way Through The Paper Diamond Instructions
Step Fifteen
Repeat steps 12 to 14, starting from the left side, folding the left side's top flap back over to the right side. Press along the crease.
Step Sixteen
Rotate the shape so that the open side of the diamond faces away from you.
Now We Start To See The Diamond Shapes Emerging
Step Seventeen
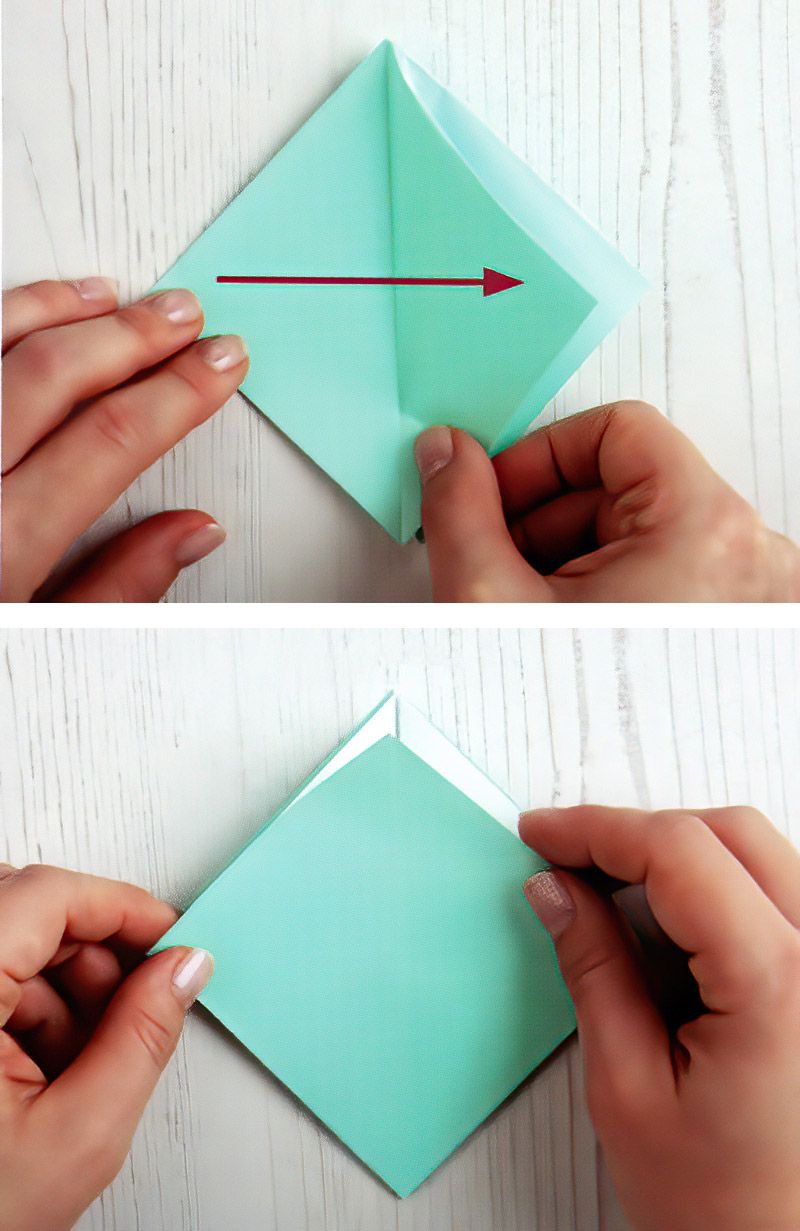
Fold the lower right side up and toward the central crease.
Step Eighteen
Repeat for the lower left side.
Step Nineteen
Flip over the shape.
Carefully Trim Our Paper Diamond Shapes
Step Twenty
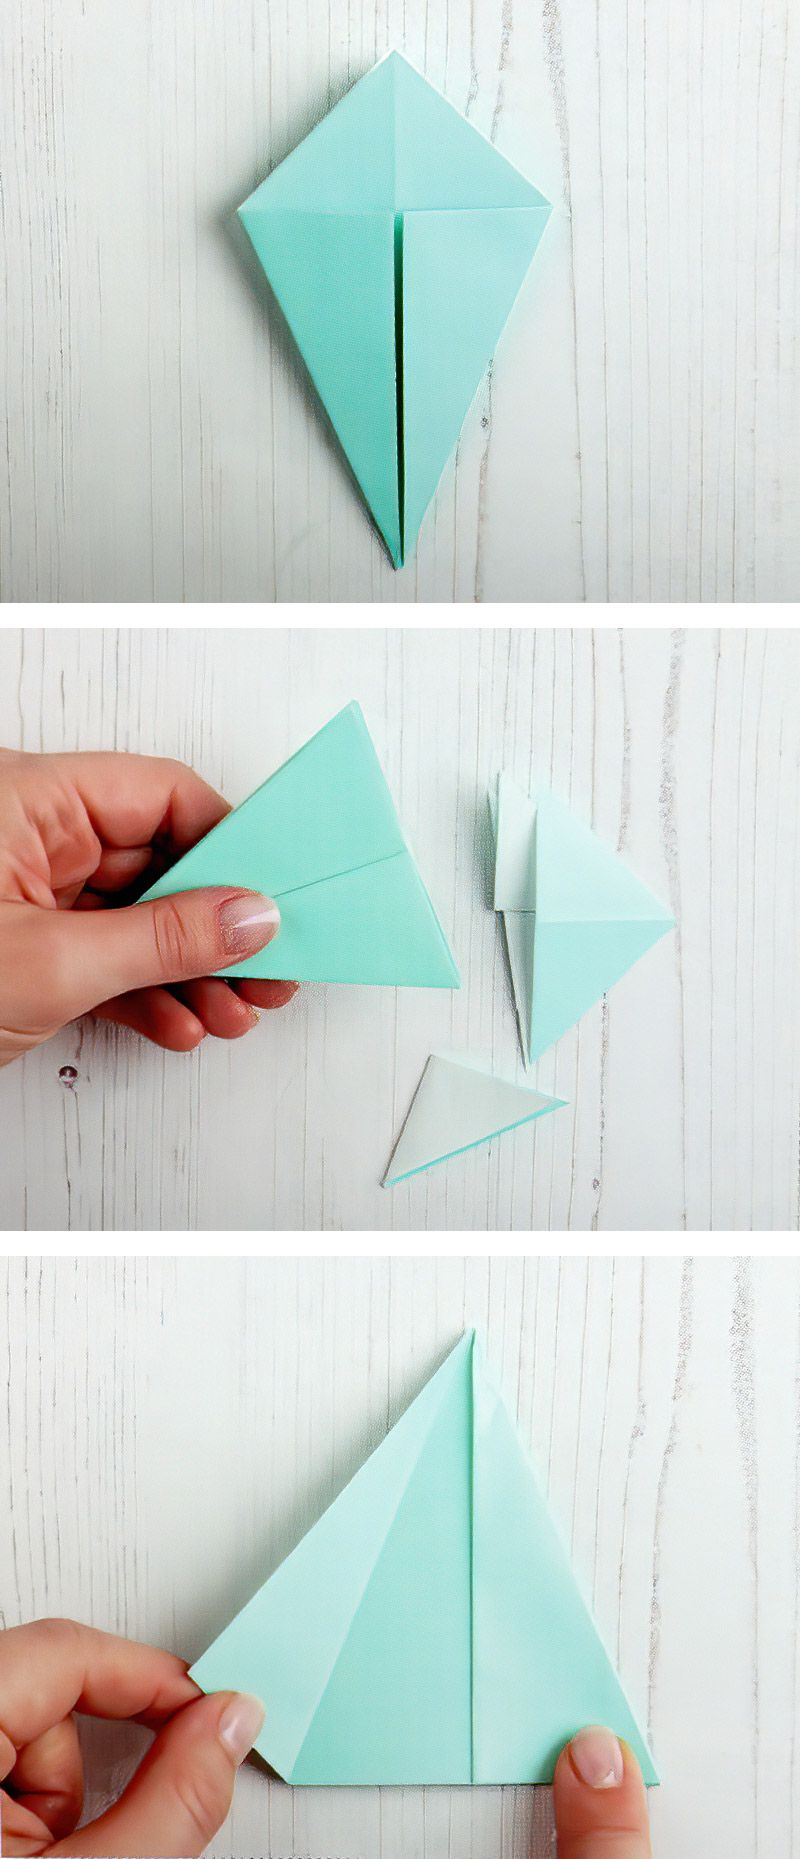
Repeat steps 17 and 18 on the reverse side of the square, resulting in a kite shape.
Step Twenty One
Trim off the excess triangles from the top.
Step Twenty Two
Repeat the technique from steps 6-8. Open out the left-hand section.
Take Your Time To Get Your Folds Accurate
Step Twenty Three
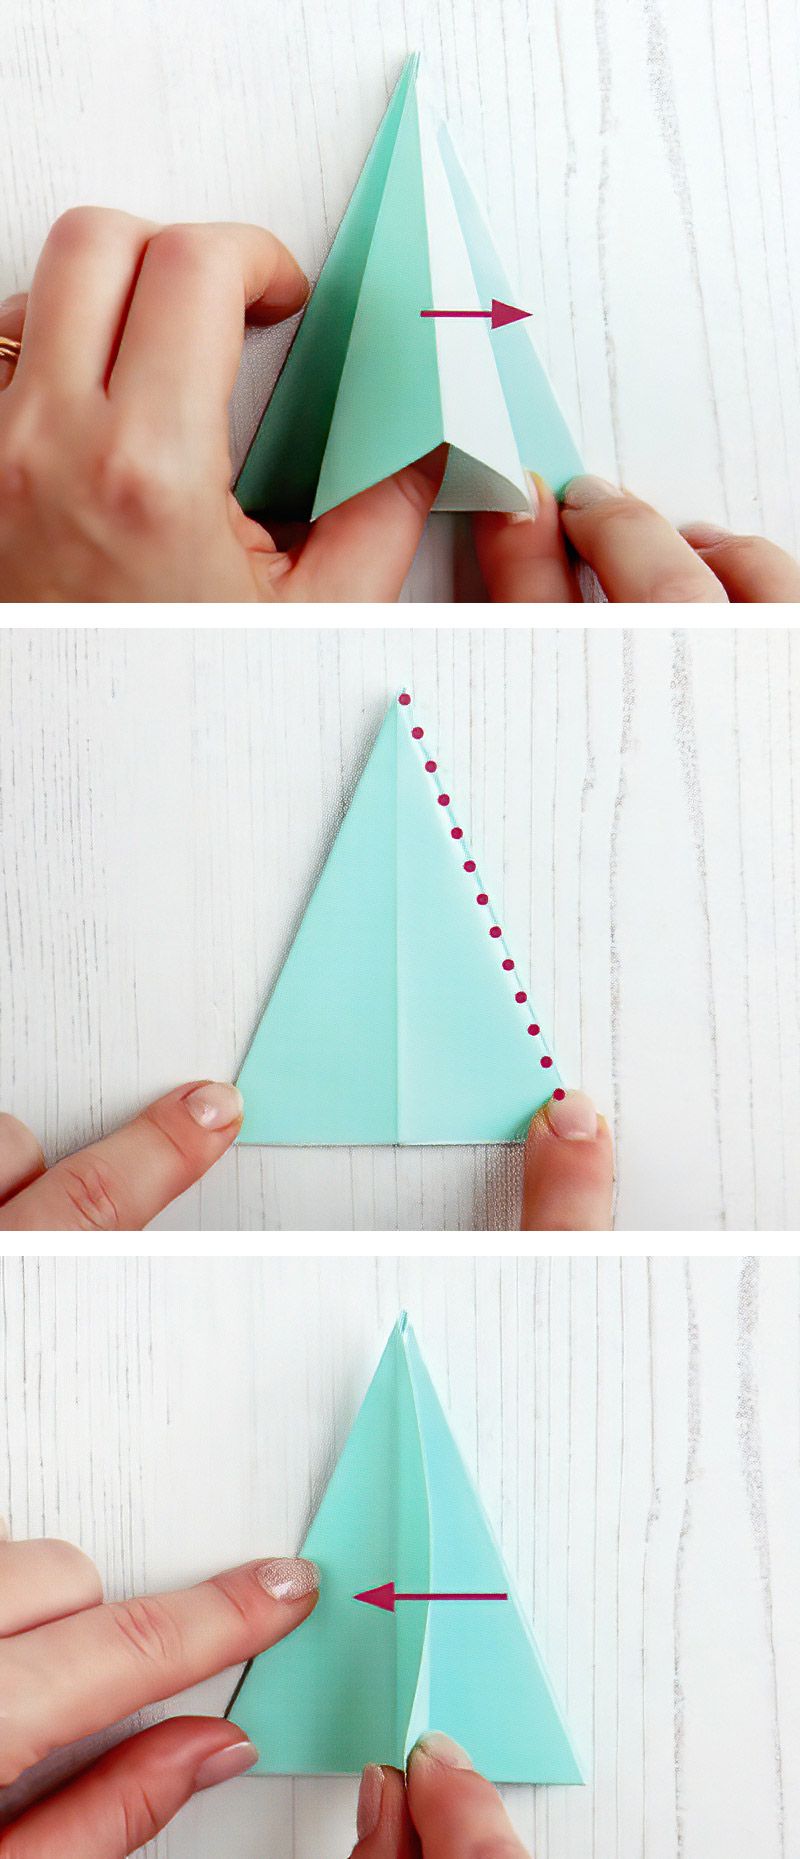
Unfold the piece you just folded out and fold it over to the right.
Step Twenty Four
Press along the crease.
Step Twenty Five
Fold the right edge back across to the left.
Paper Diamond Decorations Are A Little Complicated But Still Fun To Make
Step Twenty Six
Open up the right-hand section.
Step Twenty Seven
Fold it up and over to the left edge again.
Step Twenty Eight
Flatten the section, then press along the crease.
Now We Are Nearly Finished Making Our Paper Diamond Decorations
Step Twenty Nine
Fold the left edge back over to the right.
Step Thirty
Turn the whole triangle over. Begin by folding the left edge back across to the right edge and repeat steps 22-29.
Step Thirty One
Once the entire piece is folded correctly, the base of your triangle should look like a concertina.
Hopefully You Can Start To See The Diamond Shape Emerging
Step Thirty Two
With the base of the triangle facing you, fold the bottom-right corner up against the central crease.
Step Thirty Three
Fold the bottom-left corner up to the central crease in the same way.
Step Thirty Four
Turn over your triangle and repeat steps 32 and 33 for all the bottom corners.
Step Thirty Five
Fold the small triangles created from the folds in steps 28-29 inwards, and press the creases.
Step Thirty Six
Repeat step 35 all around the shape.

Finally We Can Complete Making Our Paper Diamond Decorations
Step Thirty Seven
Make an identical shape in a different color by following steps 1 to 36.
Step Thirty Eight
Create a hole at the top of one of your origami shapes, which will be the top of your decoration.
Step Thirty Nine
Cut a 300mm (11¾in) length of embroidery thread, double it up, and tie a knot in one end.
Step Forty
Thread the looped end of the thread through the hole, using a cocktail stick to assist if needed.
Step Forty One
Once the thread is pulled through, apply glue to the knot to secure it inside the shape.
Step Forty Two
Apply glue to two of the points of your first paper shape, then align and hold the second paper shape in place until the glue sets. Continue gluing around the edges, attaching two or three points at a time, until you've created a complete diamond. Let it dry, then hang up your diamond decoration.
Paper Diamond Decorations Tips
Consider working on several decorations simultaneously; by the time you've completed a few sections of each, the first one will be strong enough to work on again.
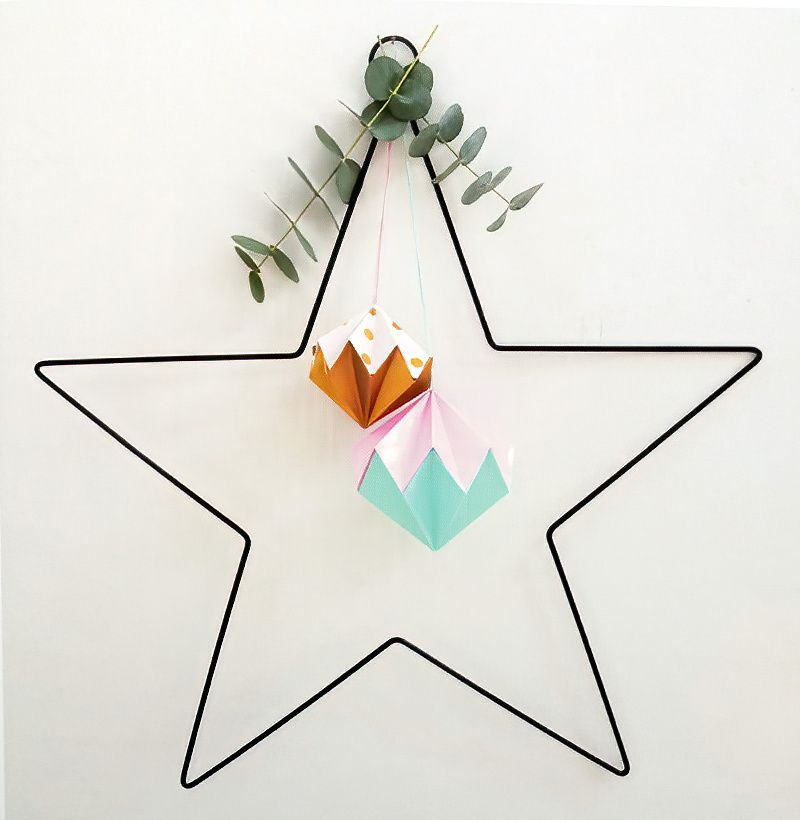
You can group a couple of diamond decorations and string them up with festive foliage for added charm.
These decorations can also be appealing at events like weddings or baby showers, crafted in various colors to suit the occasion.



.jpg)

