Why Not Make A Decoupage Waste Bin
I always have so much rubbish to throw away in my craft room. I use as many scraps as I can so I don't waste anything. But I still need a bin. So I decided to make one using some simple crafting materials.
Cardboard and brown parcel wrapping paper are really useful materials to have to make things with. You can choose any designs that you like for yours. And you don't necessarily have to use it as a bin, you can use it for storage of larger craft materials and pieces of crafting kit.
Make these fun decoupage waste bins for your friends and family. It does seem like an odd gift. But you will be surprised how much they are appreciated.
To Make This Decoupage Waste Bin You Will Need
Materials
- Heavy Weight Corrugated Cardboard
- Gummed Paper Tape
- PVA Glue
- Paper
- Wallpaper Paste
- Brown Wrapping Paper
- Sheet of Gold Patterned Wrapping Paper
- Acrylic Spray Varnish
Equipment
- Compass
- Pencil
- Metal Ruler
- Craft Knife
- Cutting Mat
- Sponge
- Large Decorators Paint Brush
- Containers for PVA Glue and Wallpaper Paste
Making The Base Of The Cardboard Decoupage Waste Bin
Step 1
Start by using compasses to draw a circle with a diameter of 26cm / radius of 13cm onto the cardboard. Then divide the circumference of the circle into six equal sections. Do this by reducing the radius of the compasses to 6cm, and use the pencil to mark six intersecting arcs. So that the circle is now divided into 12 equal sections.
Then join all of the marks to make a 12 sided shape. And cut the shape out using a craft knife and cutting mat.
Step 2
Then cut out a sheet of corrugated cardboard measuring 78cm X 35cm. Make sure that the corrugations run vertically down the sides of the bin. Now, divide this piece into 12 equal sections that are 6cm wide. Use a ruler to draw a line 5cm from the top edge. And then carefully score along all of the lines.
Making The Top Of The Decoupage Waste Bin
Step 3
Fold over the 5cm strip that you left across the top of the bin to create the top lip boarder of the decoupage waste bin.
Step 4
Now, cut 12 equal strips of the paper gummed tape and stick them to each of the 12 edges of the bin base. These can be moistened with a damp sponge to help them stick more.
Putting The Bin Parts Together
Step 5
Now, turn the base over and use the gummed tape to attach the sides of the bin to the base of the bin. Bend the sides along the scored lines to fit the base.
Step 6
Then, use the paper gummed tape to join the side seam where the edges join, and taking the tape over the top edge and down the inside of the bin. And then seal the cardboard with a coating of diluted PVA glue.
Papier Mache and Decorating Process
Step 7
Next, tear some paper into strips and soak them in the wallpaper paste. I would recommend applying four to five layers of papier mache inside the bin and outside the bin. Leave to dry thoroughly, this may take a little time. Then apply a final coat of papier mache using brown parcel wrapping paper.
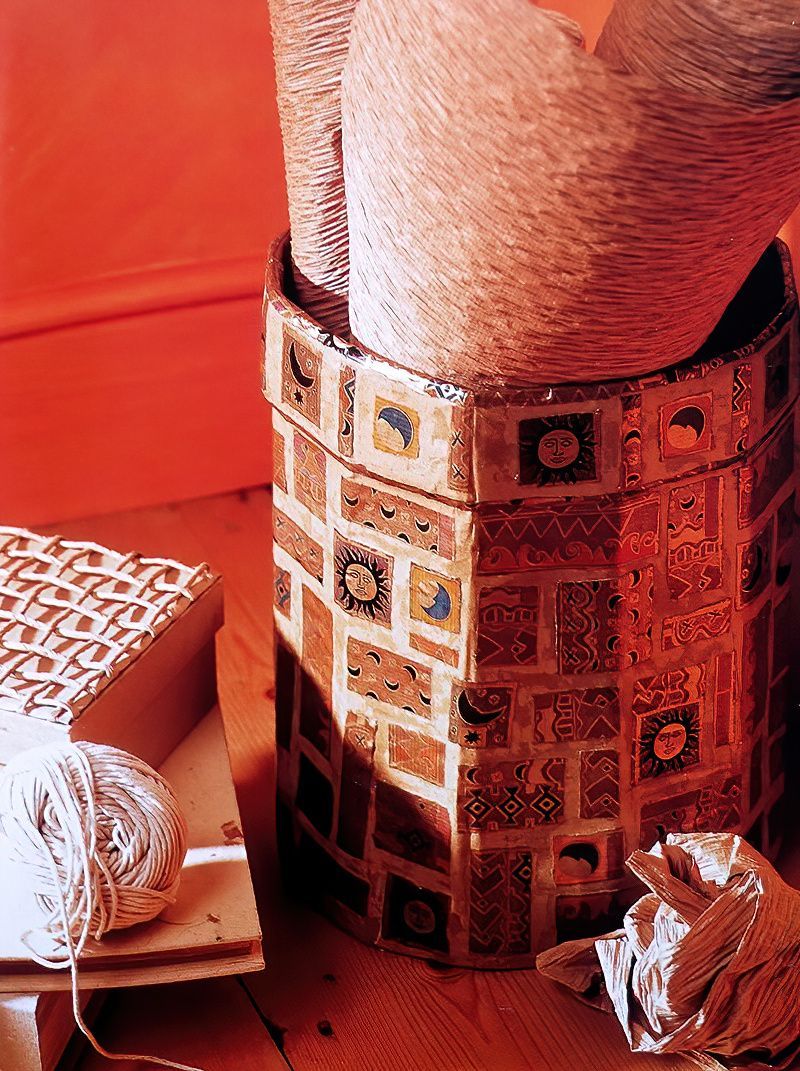
Leave to completely dry again. Then you can decorate your bin in any decorative papers and pictures that you like.
Step 8
Stick the pictures on with normal PVA glue, you don't need to dilute it this time. Arrange them in any way that you wish.
Finishing Off A Decorative Decoupage Waste Bin
Step 9
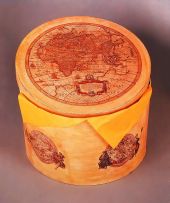
Finally, tear off some narrow strips of gift wrap, and stick them to the top edge of the bin, and just underneath the lip, to make it stand out a bit more. Then add a layer of protection to the bin using acrylic spray varnish. And leave to dry before use.
Decoupage Waste Bin Conclusion
And there is our bin complete. It may seem like an odd gift. But actually it is nice to disguise our waste bin. They basically now just look like a really fancy box and that's a good thing. So have fun and please let us see what you create.
Create your own studio and add some pictures then tell us down below.















.jpg)
