Decoupage Mirror Frame Is A Must Make Project
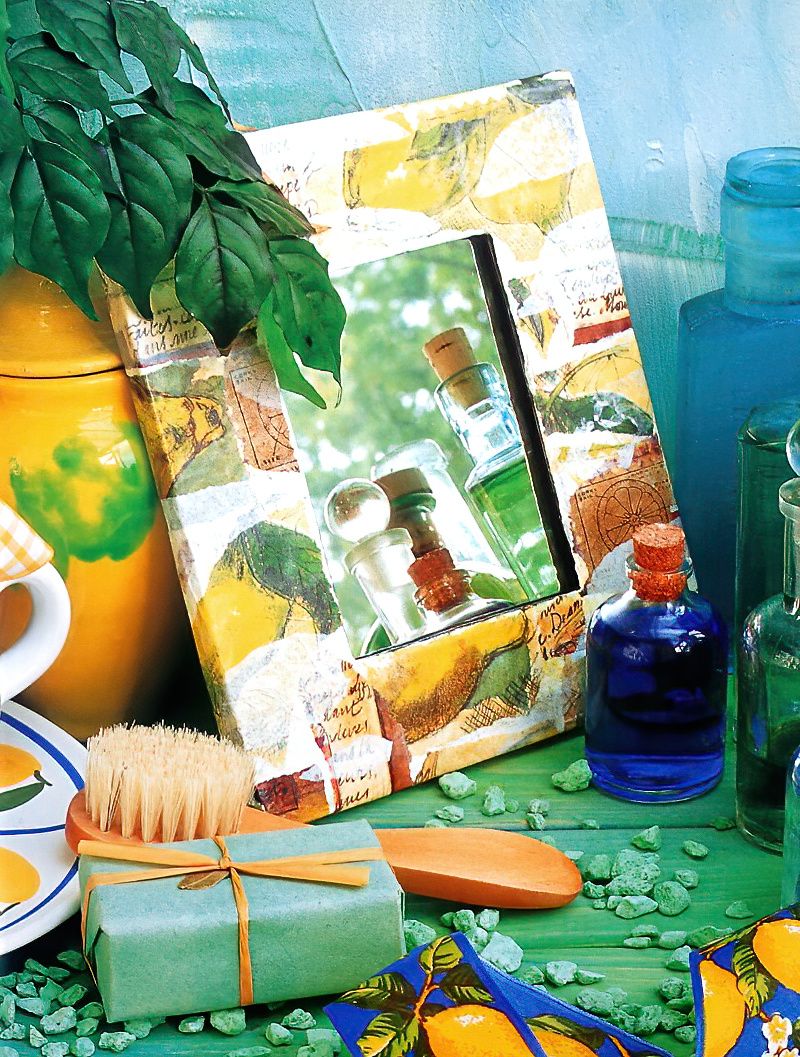
This is a really fun, quick and easy decoupage project that you can use for either a mirror frame or a picture frame. You can choose any design or pictures that you like to decorate the frame.
Additionally, it can be done with any type of paper, print outs, photocopies, magazine cut outs, etc. This can really help personalise your decoupage project.
Find a cute mirror frame, get your children involved and make a crafting project you will enjoy everything.
To Make A Decoupage Mirror Frame You Will Need
Materials
- Corrugated Cardboard
- Mirror 15cm X 18cm
- Wallpaper Paste
- Newspaper
- Acrylic Paints
- Paperclip
- Acrylic Gesso
- Gift Wrap
- Scraps of Printed Paper
- White Tissue Paper
- Matt Acrylic Varnish
Equipment
- Craft Knife
- Cutting Mat
- Metal Ruler
- Container for Wallpaper Paste
- Medium Artists Paint Brush
- Natural Sponge
Start With The Fun And Messy Bit
Step 1
Begin by cutting out two 16.5cm X 20cm rectangles from the corrugated cardboard. Then lay the piece of mirror in the middle of one of the pieces of cardboard and cut some strips of cardboard to fit around it.
Do this down the two sides, the top and the bottom. Now cut the centre out of the other piece of corrugated cardboard rectangle and leave a 4cm border all the way around.
Step 2
Next, coat all of the pieces of cardboard with the wallpaper paste and leave everything to dry. Then tear the newspaper into strips and coat with wallpaper paste. And cover the front of the frame.
Now stick the cardboard spacers into position on all four sides of the back panel piece. Then cover this with more papier mache strips and leave to dry. Repeat a second time and leave to dry again.
Our decoupage mirror frame project is coming together.
How To Make A Simple Decoupage Mirror Frame
Step 3
Once the papier mache is completely dry, paint the inside surfaces of the frame with black paint to minimalize any potential reflection that the mirror could cause once assembled.
Step 4
Now, open out the paperclip and thread one end through the papier mache at the middle back of the frame. Then paste strips of newspaper over the paperclip, leaving the top part showing to create a hook.
Making A Decoupage Mirror Frame
Step 5
Next, attach the front of the frame to the back of the frame with more strips of newspaper pasted on. Stick folded strips over the top of the frame to either side of the opening to add further strength to the frame. When dry, paint the frame with acrylic gesso.
Step 6
Once dry, sponge thin yellow paint or a colour of your choice onto the entire frame, and allow it to dry thoroughly. Then sponge the whole frame in green paint or another colour of your choice. This will create a pretty mottled effect.
Decorating The Mirror Frame
Step 7
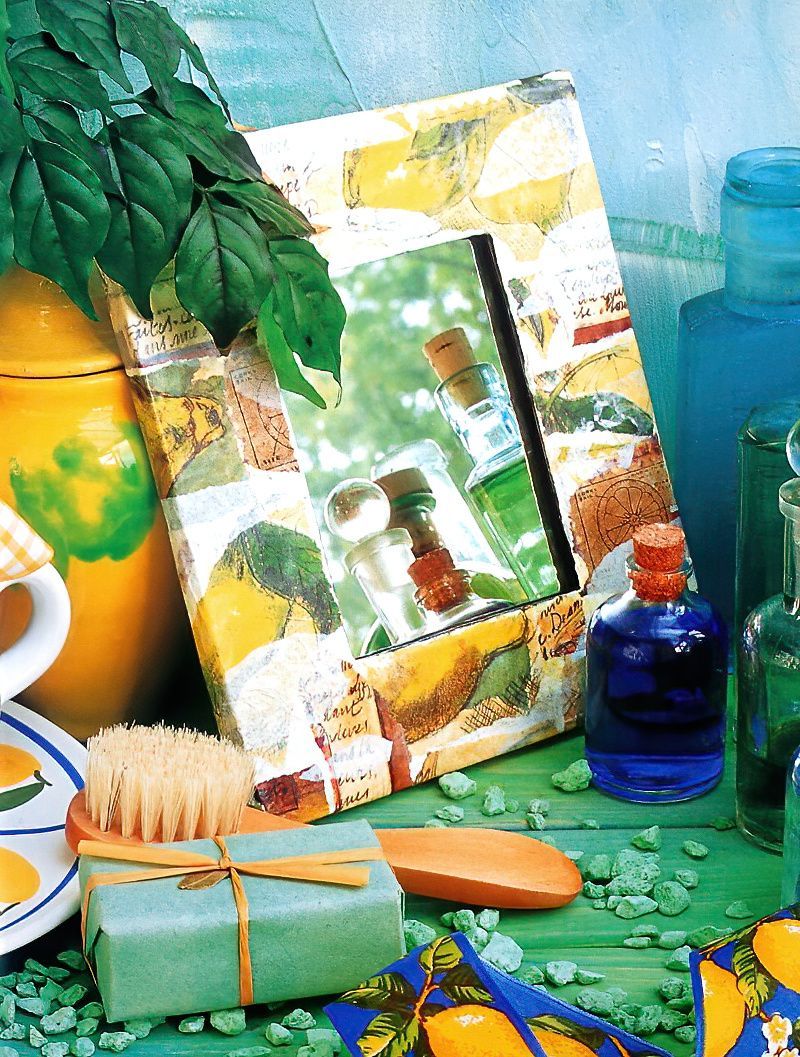
Now for the decoration. Tear off the lemon designs from the wrapping paper. You can use any design that you like. Then arrange the designs over the frame. If you have any gaps between your design, in my case lemons, fill in the gaps with other small pieces of printed paper. Glue everything into position.
Step 8
Then to soften the design a little, tear small pieces of white tissue paper and glue them onto the frame. If you like, you can crinkle them a little and overlap some of the pictures. Once the whole frame is dry, apply two coats of matt varnish and leave to dry again. Finally slide the mirror into the top of the frame.
Decoupage Mirror Frame Conclusion
I really like this project. Lots of crafting projects, we love making and love enjoying showing them off. But them we pop them away in a safe place. My own decoupage mirror frame I actually use every day. And I know the few we have made for others also get used many times a day.
So if you want to give a gift, that will brighten up someone's life and also be very practical. This is a great crafting project to try.

















.jpg)
