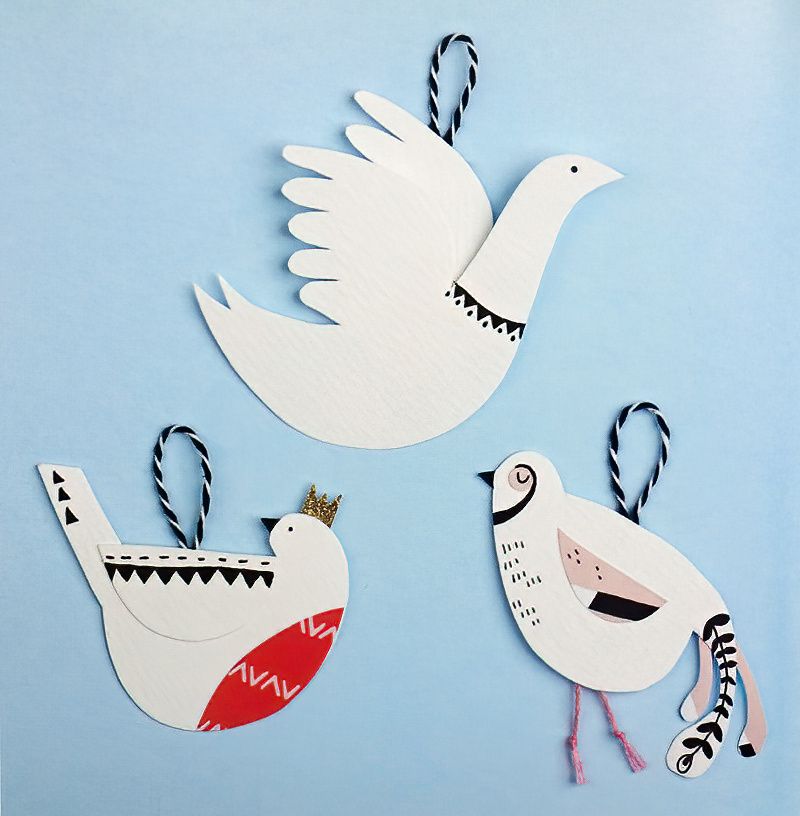
How To Make Paper Bird Decorations
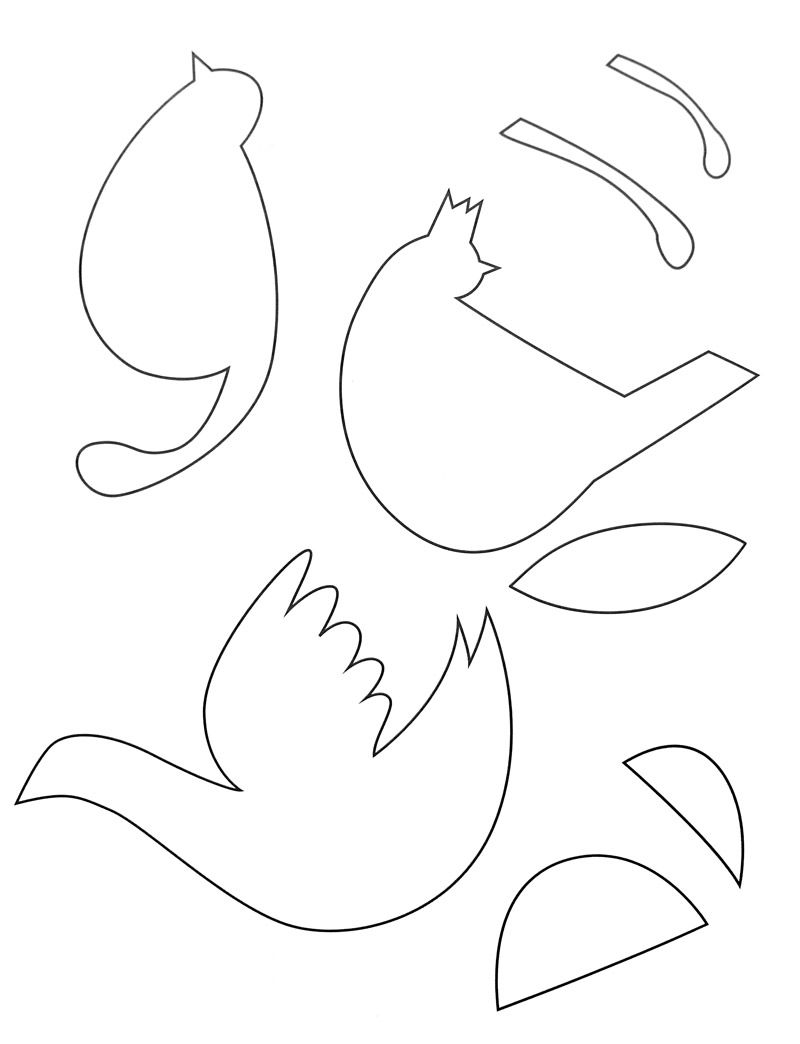
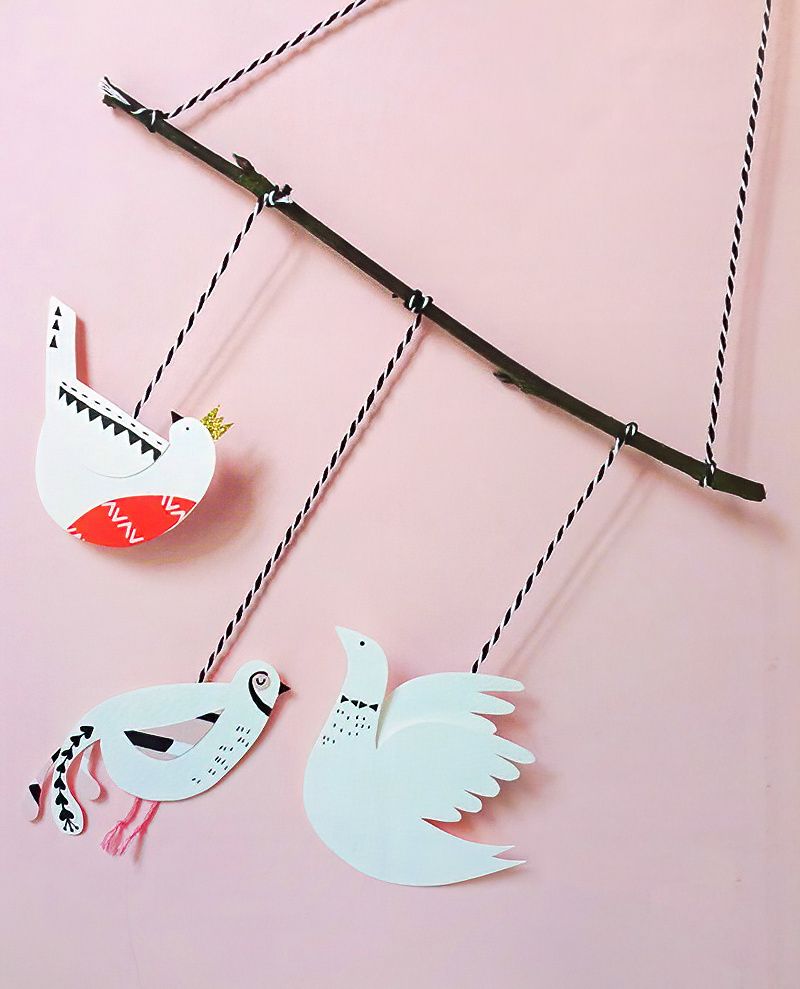
Add a touch of elegance to your Christmas tree with these delightful paper birds! We've demonstrated how to create the partridge (which is the most intricate of the three). Templates for all three birds, the partridge, dove, and robin, along with their wings and tails, can be found below.
For a contemporary look, we've chosen a monochrome palette with a hint of colour for our birds. However, you can unleash your creativity by using multi-coloured, gold, or silver papers, or even opt for more realistic colours to personalise your own paper bird decorations.
What We Need To Make Paper Bird Decorations
- Thin card or watercolour paper
- Patterned paper or wrapping paper
- Tracing paper and pencil
- Thin card for template
- Small craft scissors
- Glue stick
- Black fine liner pen
- Black and white baker's twine
- Pink embroidery thread
- Sticky tape or washi tape
- Hole punch
Start Making Paper Bird Decorations With A Template
Step One
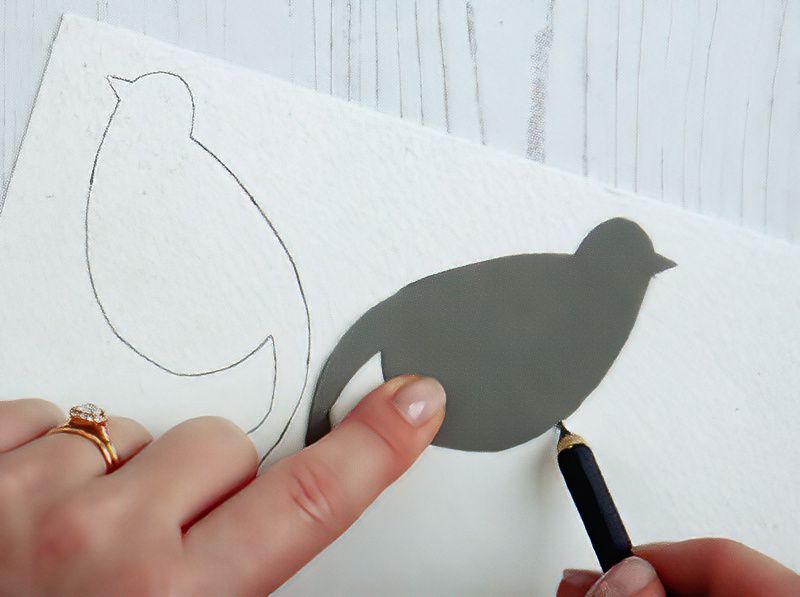
Begin by tracing the partridge body template from above onto thin cardstock. Resize the bird templates to the right size on your computer then print out. You can actually also search the internet for "bird shapes" and see if you can find some more unusual shapes to make paper bird decorations.
Draw around this shape onto watercolour paper. To create the back of your bird, flip over the template and draw around it again.
Start Cutting The Shapes Of Our Paper Bird Decorations
Step Two
Carefully cut out the two bird shapes using small craft scissors.
Add More Details To Our Paper Bird Decorations
Step Three
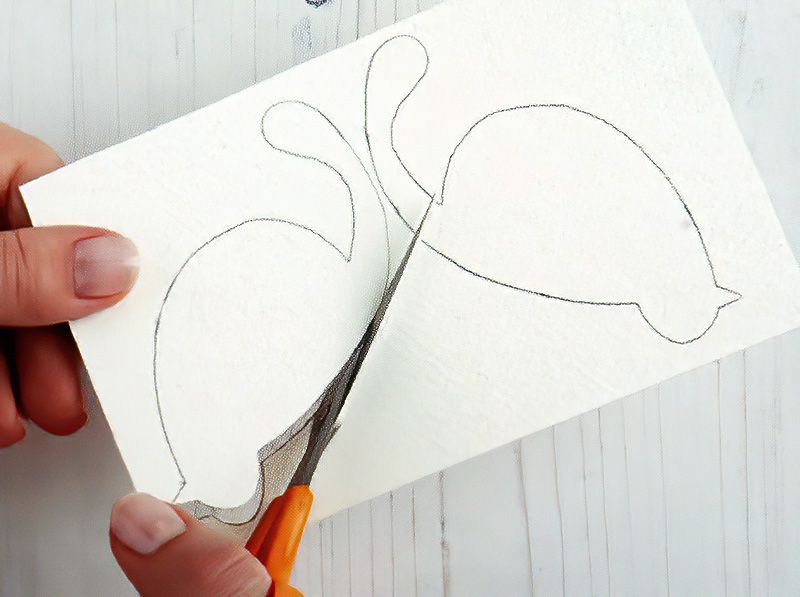
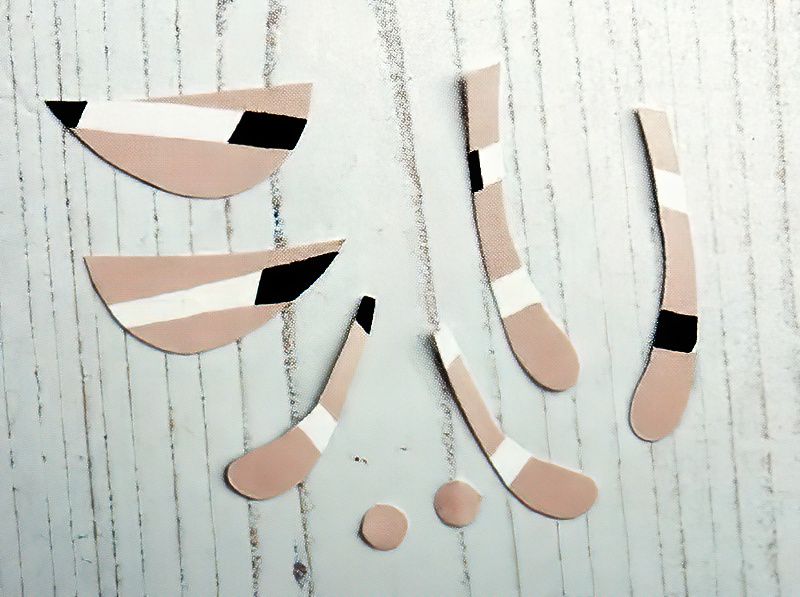
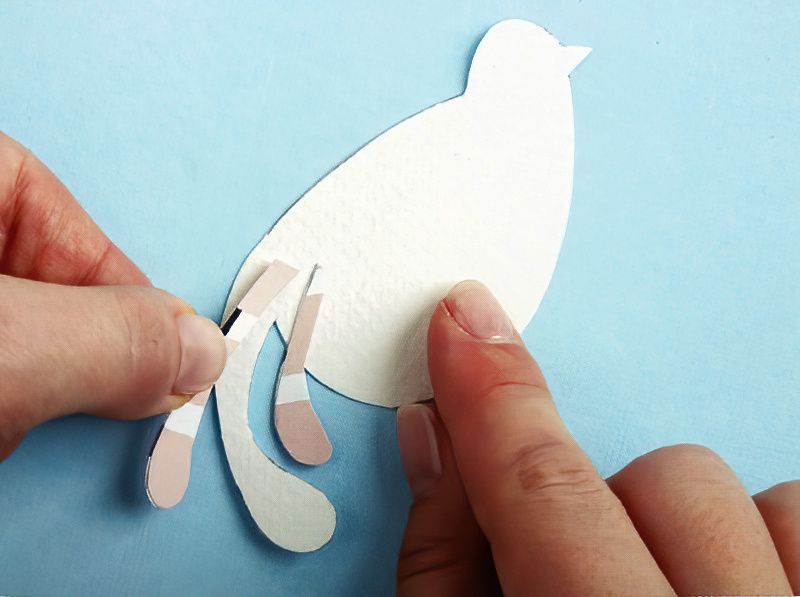
From patterned paper, cut out two wings and four tail feathers. Use a hole punch to create circles for the eyes from the same paper.
Start Assembling Our Pretty Birds Made From Paper
Step Four
Assemble the tail feather parts by matching their shapes and sizes so that they are patterned on both sides. Position the tail feathers on the reverse side of your first partridge cut-out, one on either side of the bird's actual tail. Secure the tail feathers in place with glue.
asdasd
Step Five
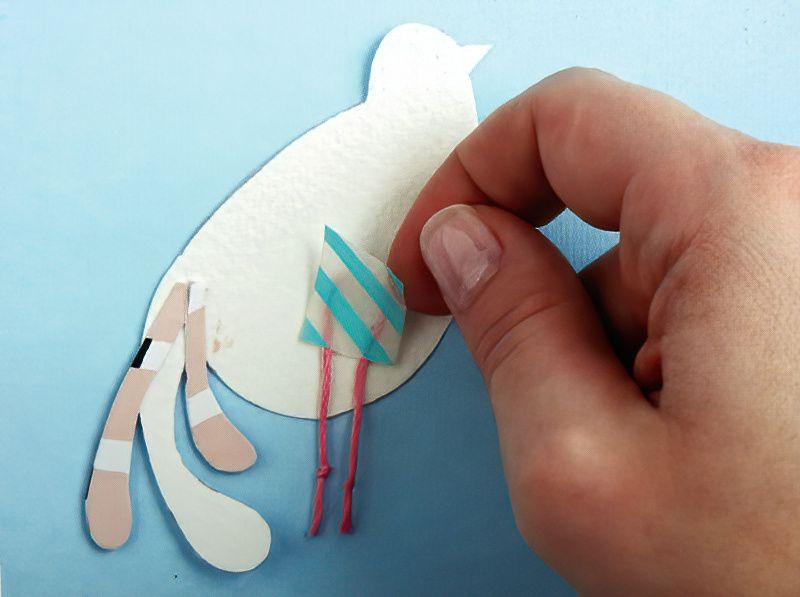
Cut an 80mm (3 1/4 inch) length of pink embroidery thread and tie knots at both ends. Fold the thread in half and affix it to the back of the bird using a piece of sticky tape (washi tape works well).
Add More Details To Make Our Paper Birds Unique
Step Six
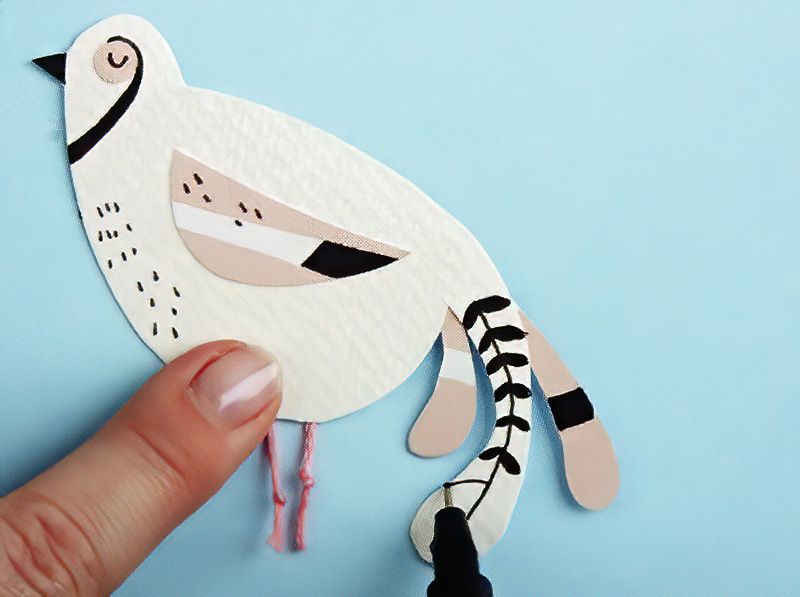
Attach the wings and eyes to the front of your bird. Enhance the details with a black fine liner pen. Colour in the beak, draw an eye, create a design over the tail, and add a few specks here and there to mimic feather details.
Add A Loop To Hang Our Paper Bird Decorations
Step Seven
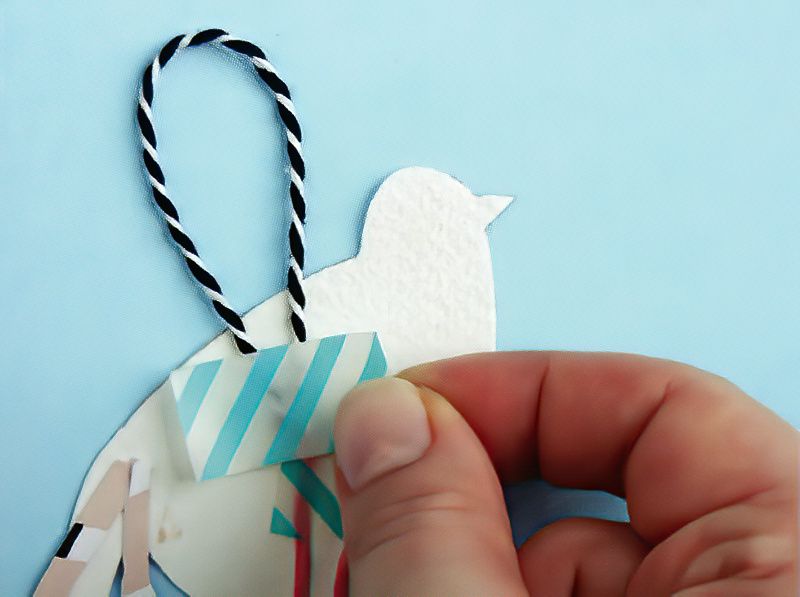
Cut a 100mm (4 inch) length of twine, fold it into a loop, and secure it at the back of the decorated half of your partridge with a piece of sticky tape or washi tape.
Finish Making Our Paper Bird Decorations
Step Eight
Finally, glue the front half of the partridge to the back half using a glue stick. Sandwich the twine between the two halves to ensure it's securely in place for hanging.
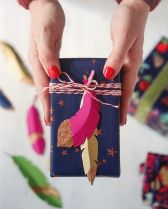
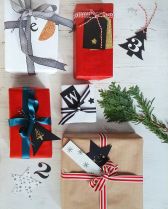
Create a Paper Bird Gift Tag
Our birds are incredibly versatile and can be used for various Christmas decorations. They're perfect for place cards on the Christmas table or can be hung on the back of each guest's chair. As shown here, they also make charming gift tags for your presents.
For a Festive Bird Mobile
Instead of adding loops, attach lengths of twine to your birds and tie them to a twig to fashion an adorable, festive bird mobile.


.jpg)