Make Cute Card Advent Calendar Houses for Christmas
How To Make Card Advent Calendar Houses
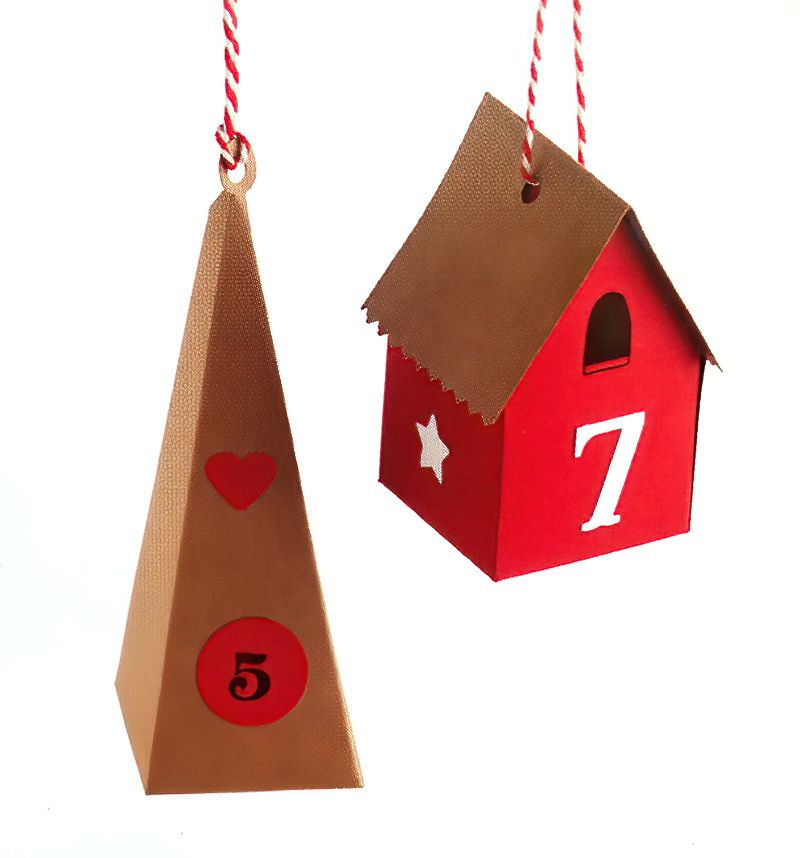
Craft an Advent calendar that remains captivating year after year. These charming cardboard houses can be filled with delightful treats, heartfelt messages, or cherished keepsakes. Customise each tiny box to add a touch of novelty.
Whether adorning your Christmas tree, suspended by twine above a cozy bed, or elegantly lined up on a side table, these houses are bound to enchant both adults and children alike.
Advent Calendar Houses Variations
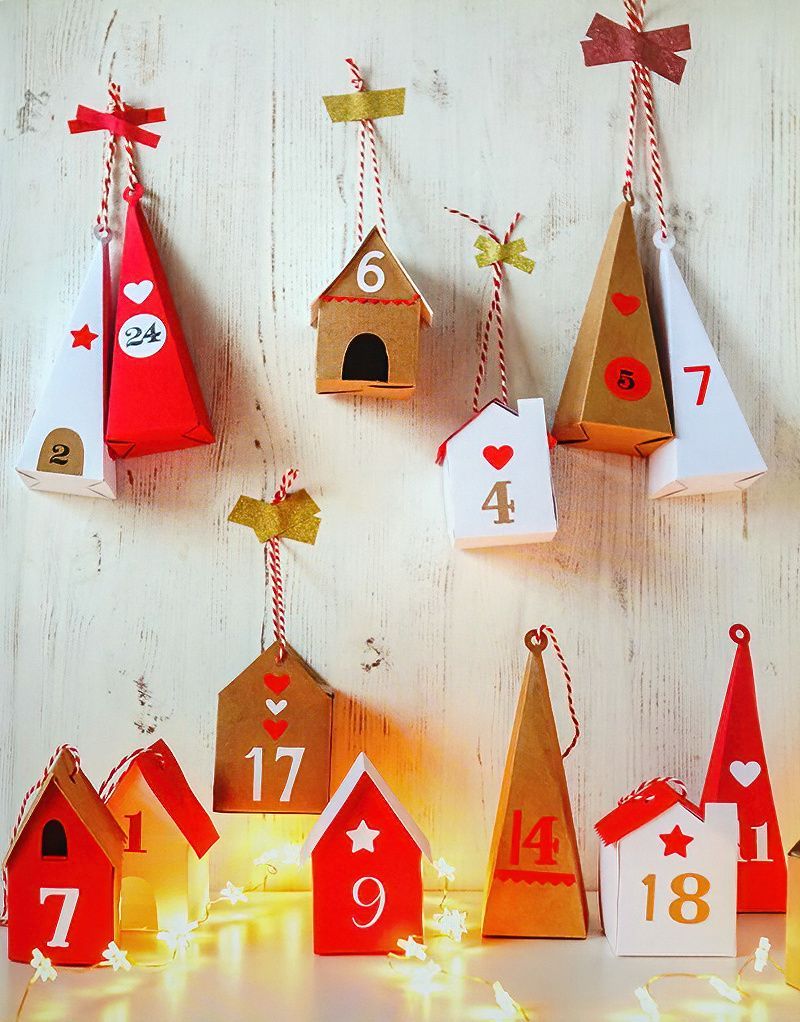
There are four distinct house styles, each with its unique charm. You can choose to create all four styles, making six of each, and include a special house for December 25th. Alternatively, you can focus on one or two designs – there are no rigid rules to follow.
Things We Need To Make Card Advent Calendar Houses
- Thin cardstock in white, kraft (brown), and red measuring 297 x 210mm (11 3/4 x 8 1/4in)
- Red and white paper
- Tracing paper and a pencil
- Scrap card for templates
- A ruler
- Scissors
- Craft knife
- Cutting mat
- Scoring tool
- PVA glue and a paintbrush
- Hole punch
- Baker's twine
- Heart, star, and circle paper punches
- Cricut machine and mat (optional)
- Rubber stamps (numbers, stars, or any Christmas-themed designs)
- Black and red ink pads
- Black fine liner pen
- Decorative edging scissors

Creating the Tall Advent Calendar Houses
Step One
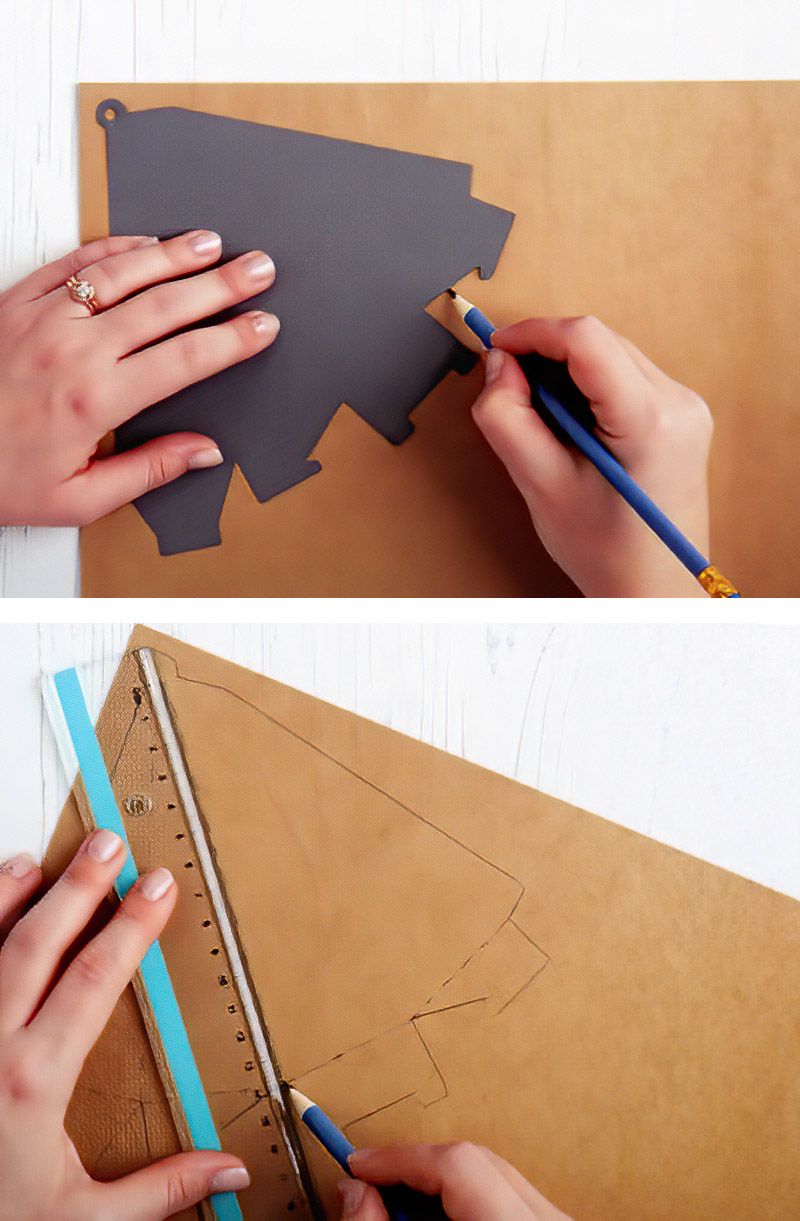
Trace the template from page 103 onto cardstock. Then, pencil the outline onto thin kraft cardstock.
Step Two
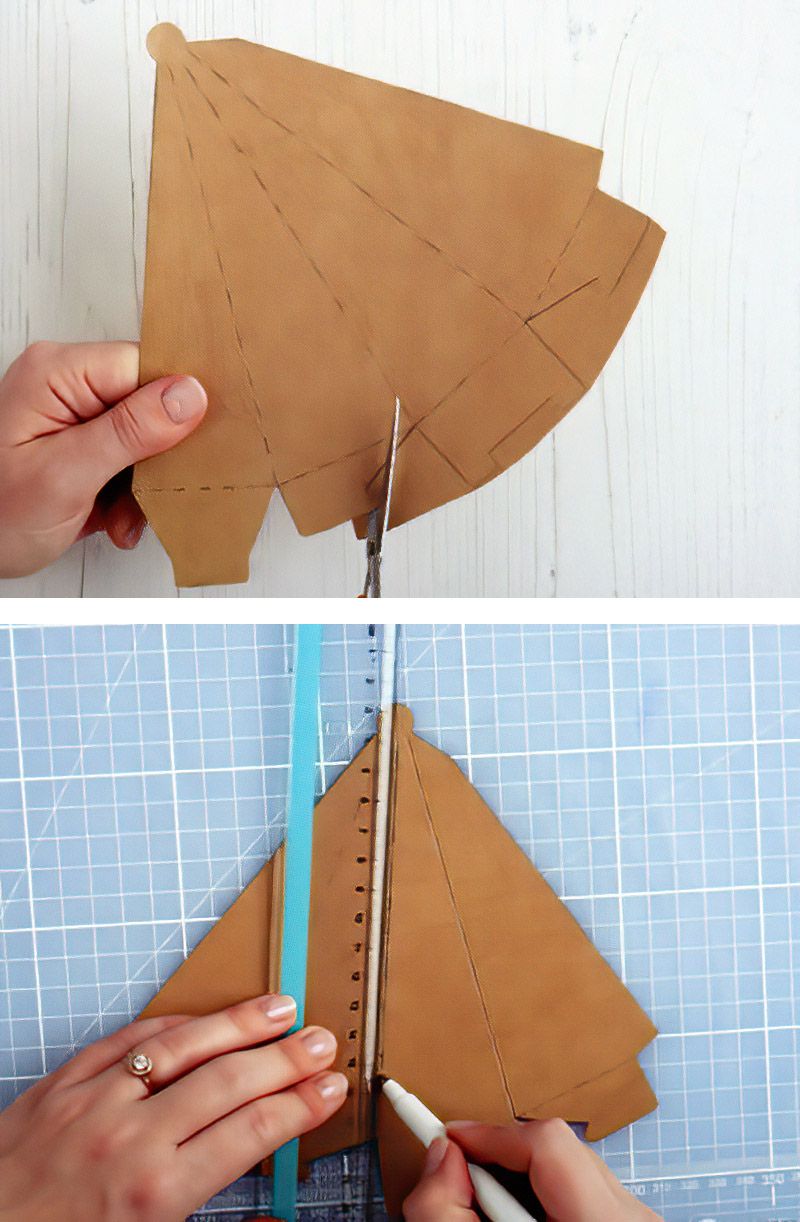
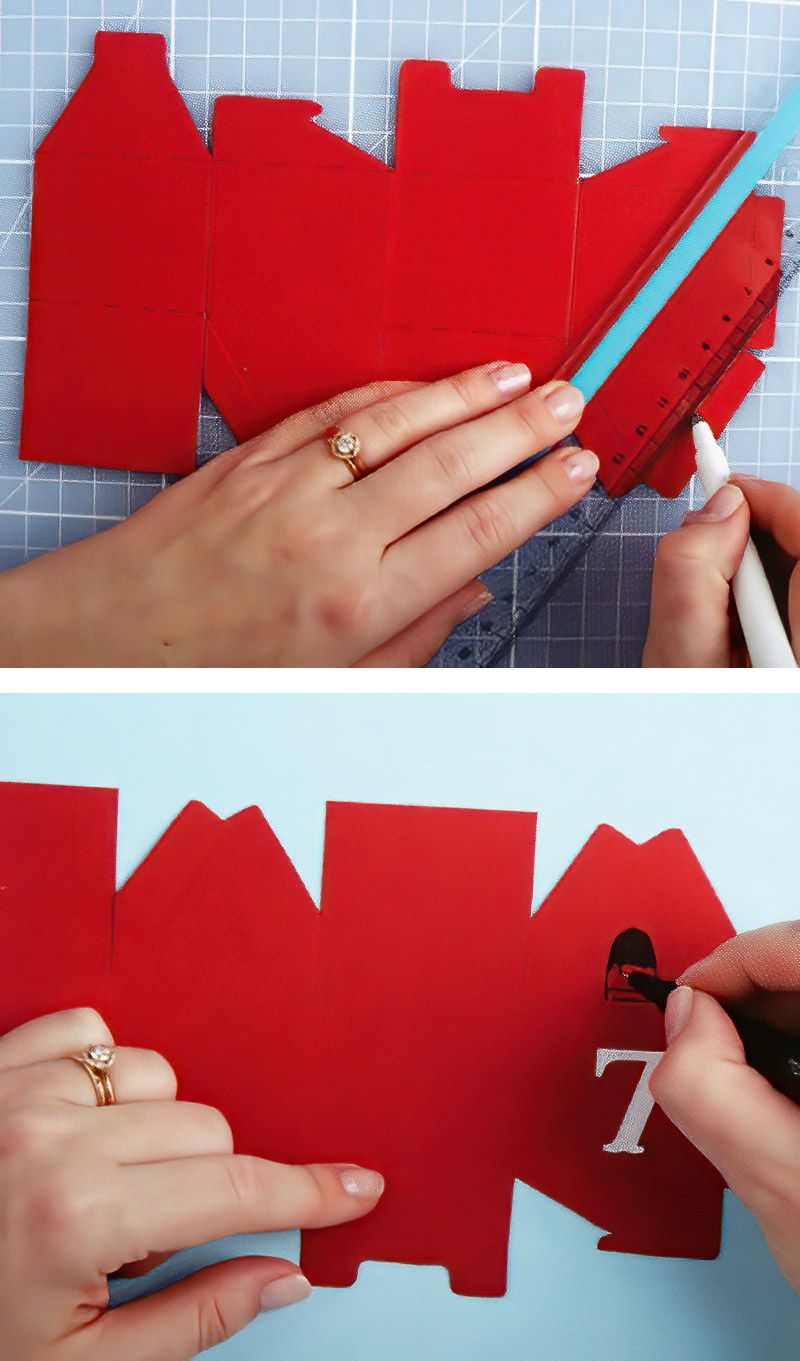
Mark the score lines as dotted lines using a ruler
Crease The Card To Make It Easier To Fold
Step Three
Cut out the house, employing large scissors for the general shape and smaller craft scissors for intricate details like the underside flaps.
Step Four
Score along the marked lines using a ruler and scoring tool. Set the house aside for step 7.
Decorate Our Advent Calendar Houses
Step Five
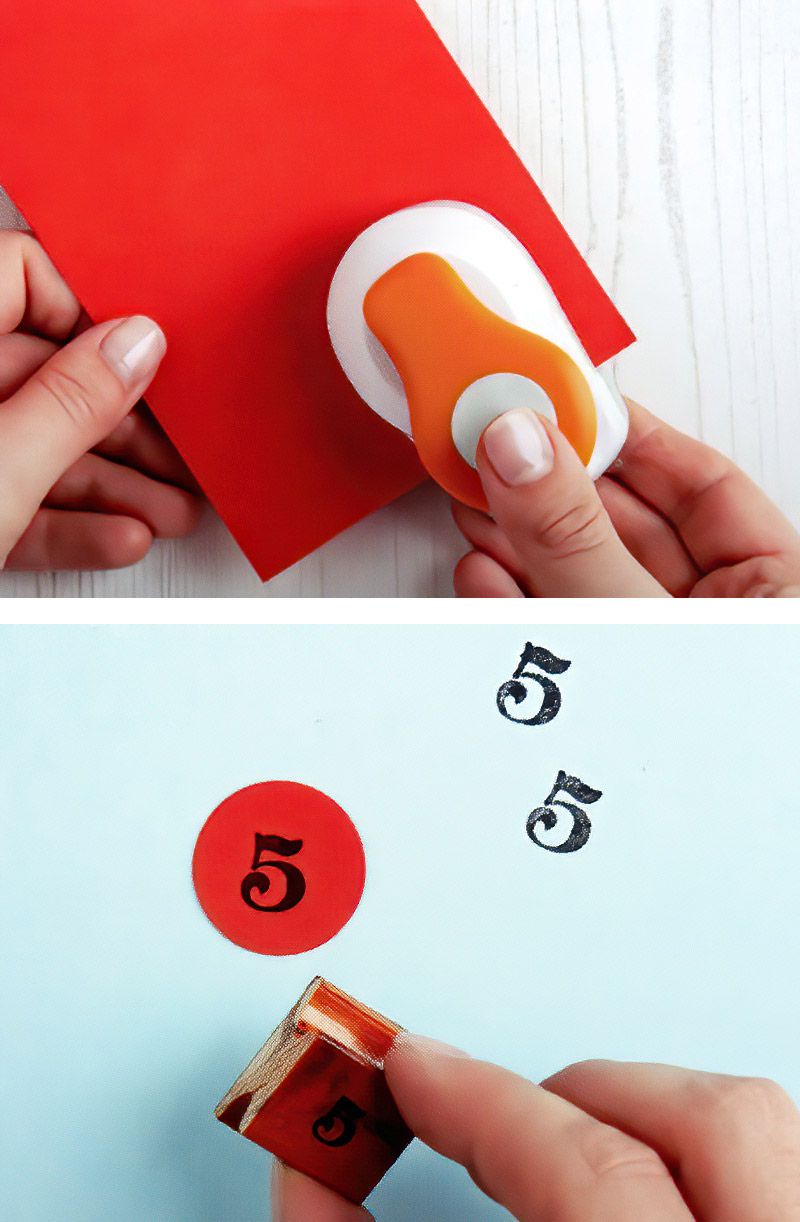
Punch out or cut out (using a glue stick as a template) a 25mm (1in) diameter circle from red paper.
Step Six
Use a number stamp with ink to stamp the circle.
Advent Calendar Houses Tutorial
Step Seven
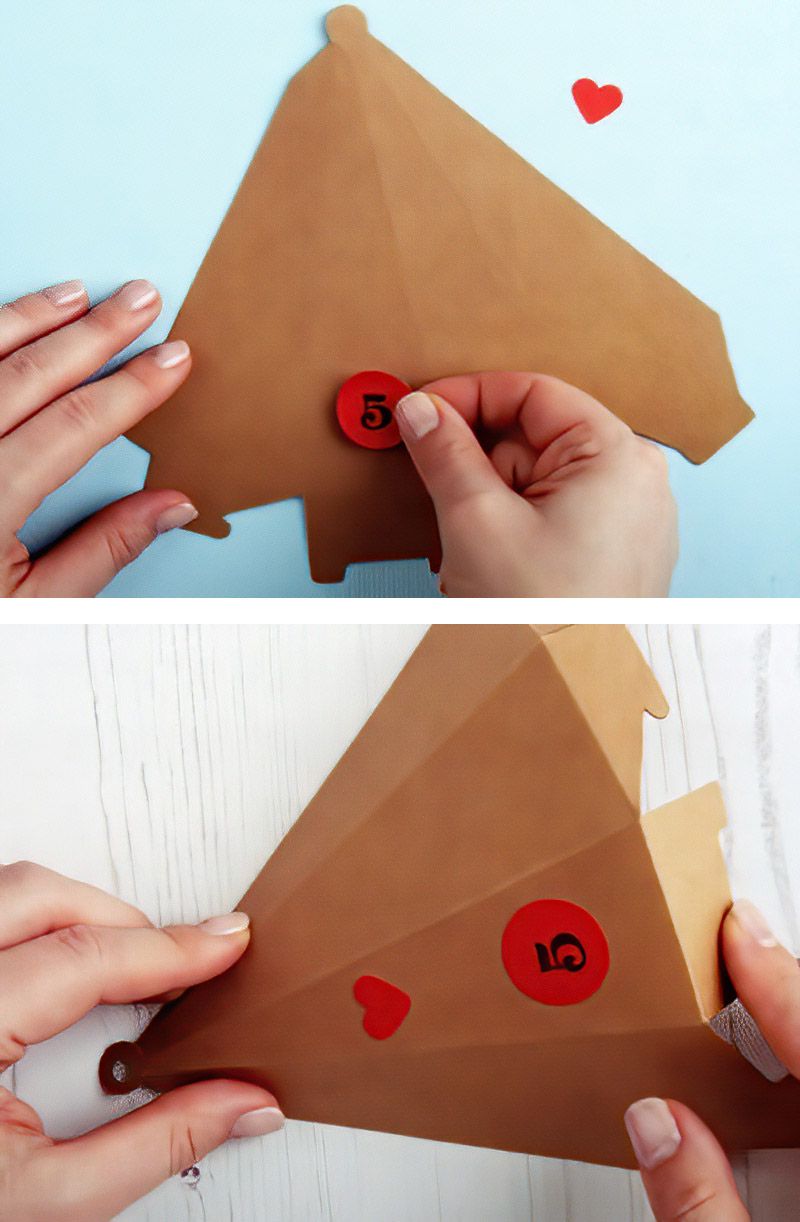
Glue the numeral onto the front side of the house (with the largest flap). Optionally, adhere a small punched-out heart or star.
Step Eight
Punch or pierce a hole at the top of the circle. Following the score lines, fold down the underside flaps and in the scored edges.
Finish Making The Tall Advent Calendar Houses
Step Nine
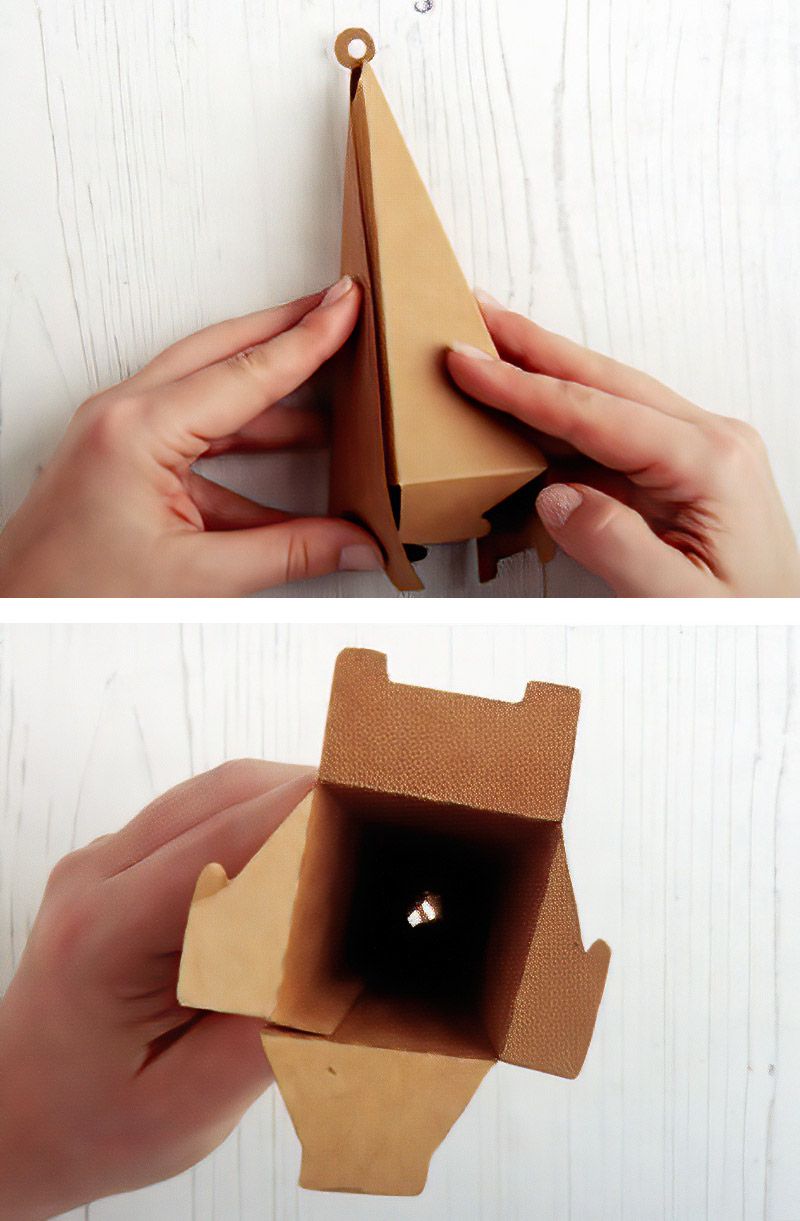
Assemble the house; this design doesn't require glue – the flaps neatly interlock.
Step Ten
Fold up the bottom flaps in the order indicated above, providing an opportunity to insert a small gift or message.
Creating the Short Advent Calendar Houses
Step One
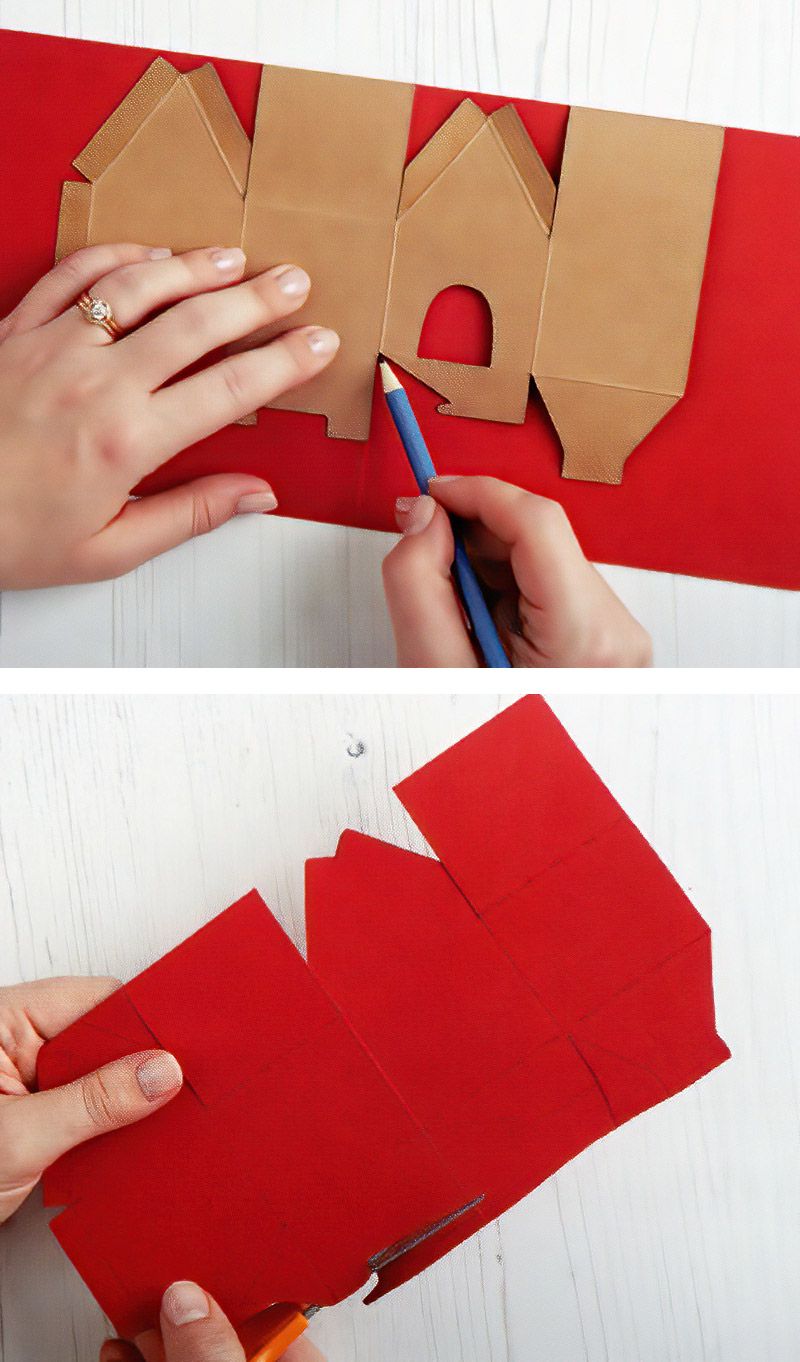
Trace the template from page 104 onto scrap cardstock. Outline it in pencil on thin red cardstock, marking the score lines as dotted lines.
Step Two
Cut out the house, using large scissors for the main shape and smaller craft scissors for finer details. Optionally, create a window using a craft knife.
Start Making The Short Card Advent Calendar House
Step Three
Score along the marked lines with a ruler and scoring tool.
Step Four
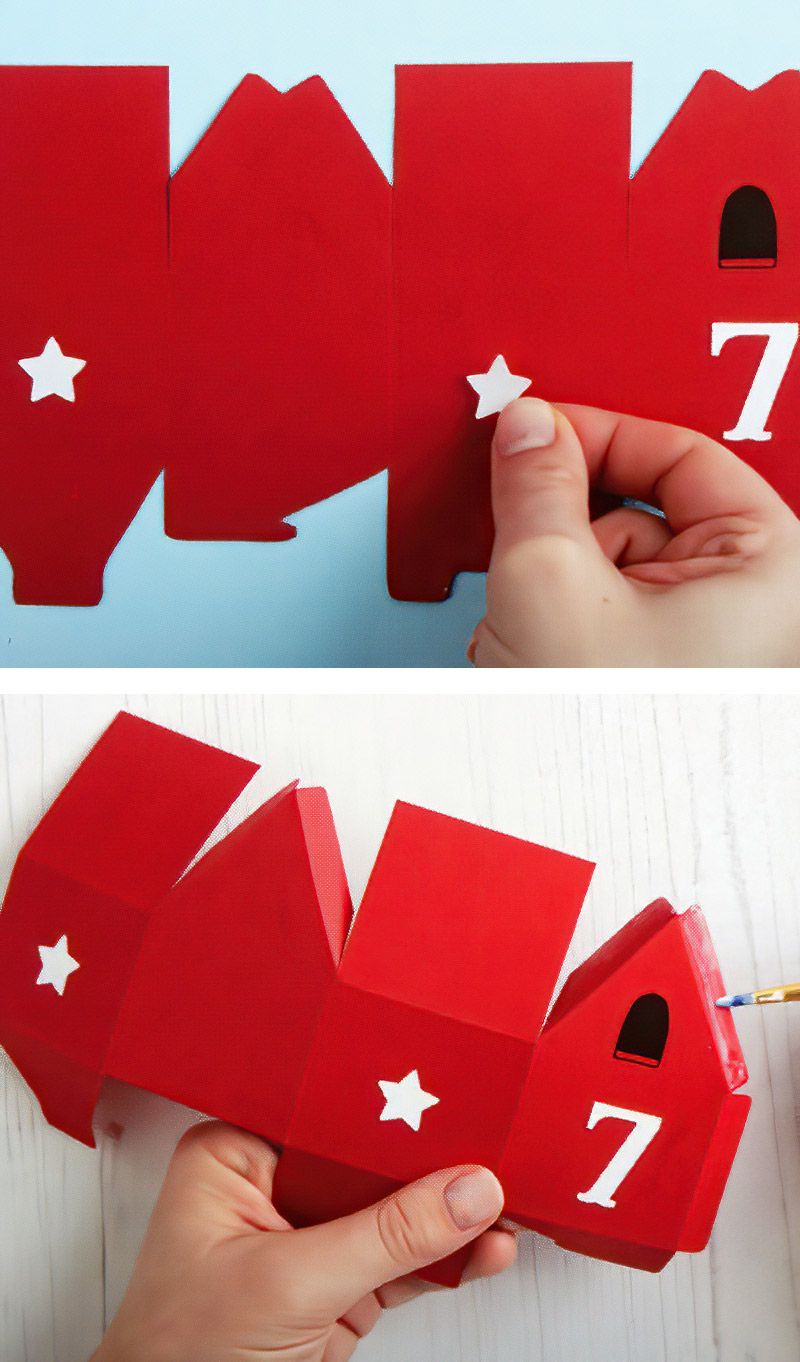
Attach a thin white-paper numeral to the front of the house. If you don't have a Cricut machine, use a stamp or hand-draw the number and cut it out. If a window hasn't been cut out yet, draw it with a black fine liner pen.
Start Decorating Our Short Advent Calendar Houses
Step Five
Cut or punch out two small white stars from the same paper and adhere them to the side walls of the house. Utilize the template above.
Step Six
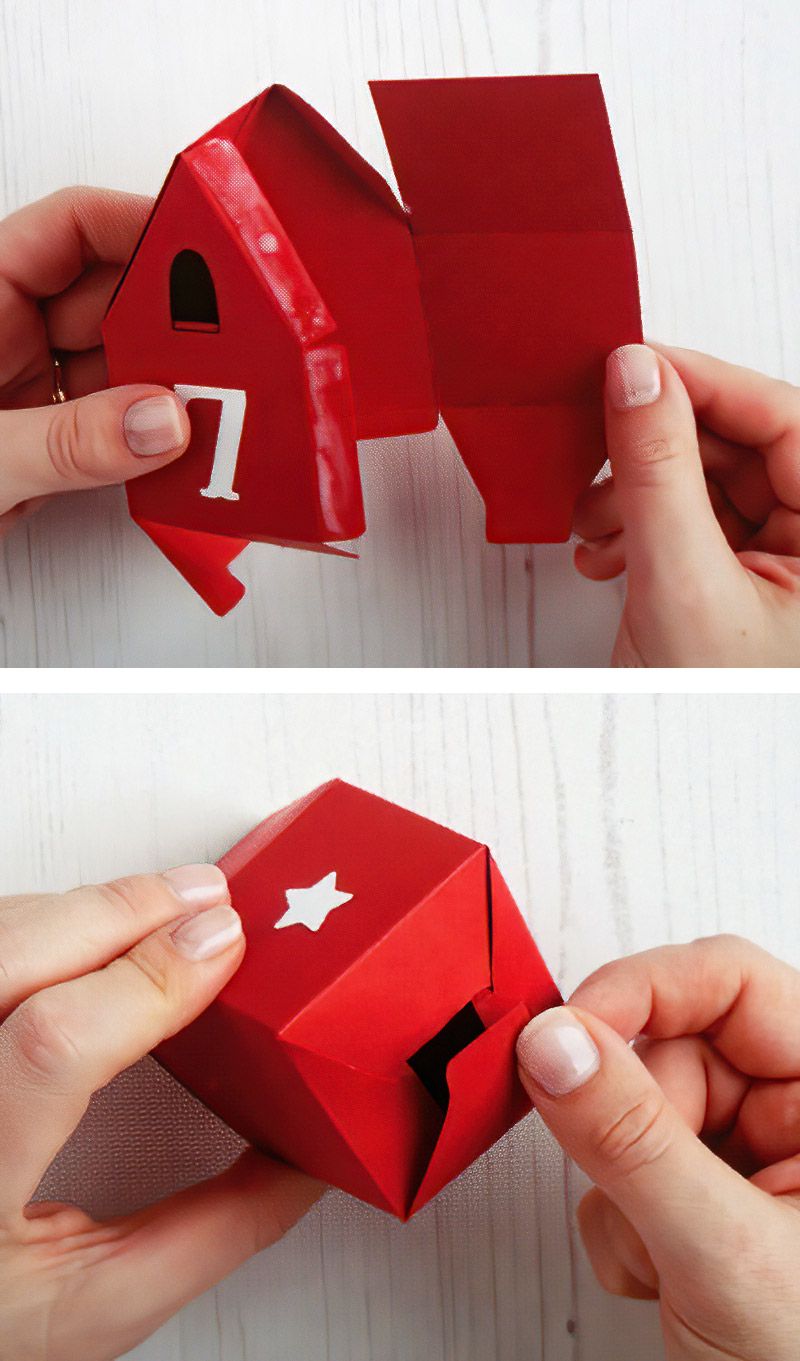
Fold the scored flaps inward and apply glue to the outside right edge of the house.
Finally Assembly And Glue The Short Advent Calendar Houses
Step Seven
Fold the left edge around and affix it to the right edge.
Step Eight
Fold up the bottom flaps following the same order as the tall Advent house.
Make The Roof For The Short Calendar Houses
Step Nine
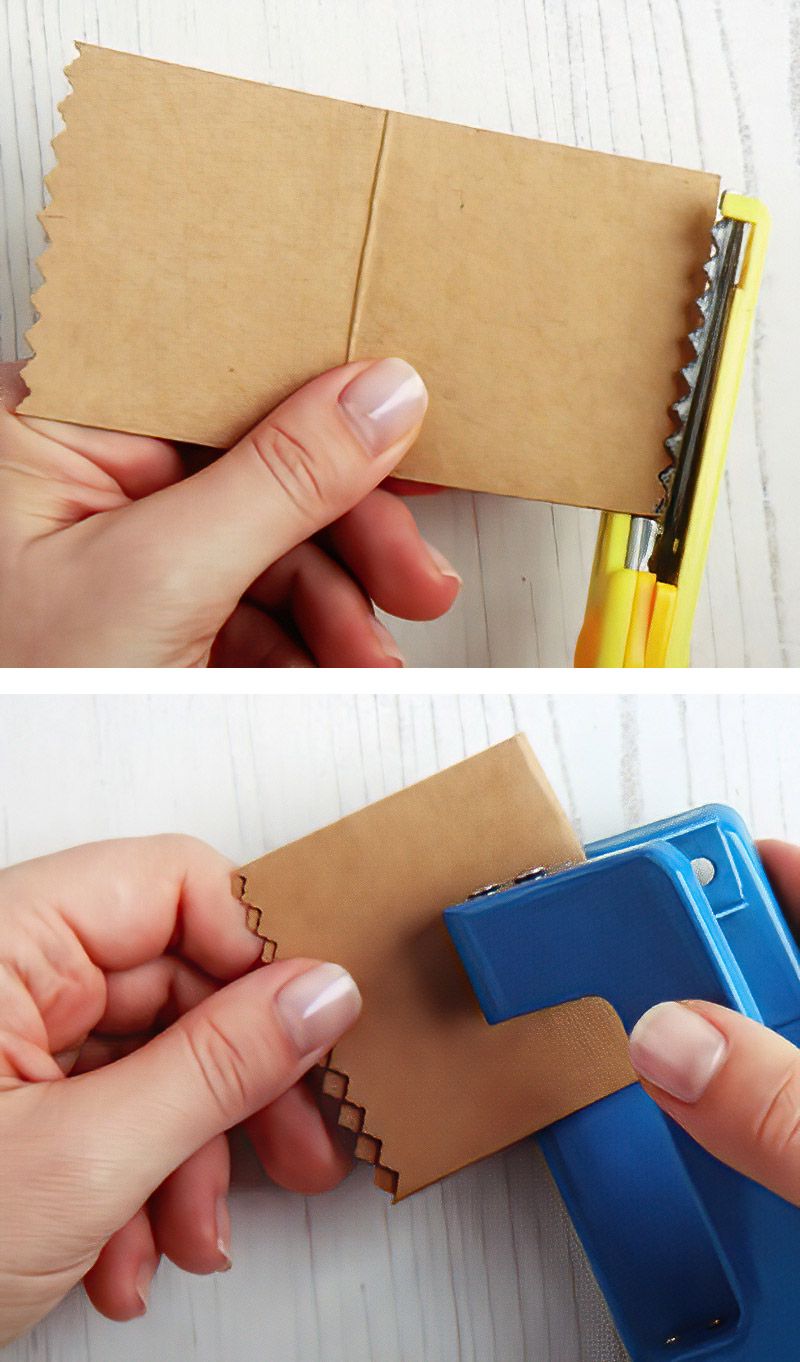
Trace and cut out the roof template. Score down the center, fold the roof in half, and trim both edges with decorative edging scissors.
Step Ten
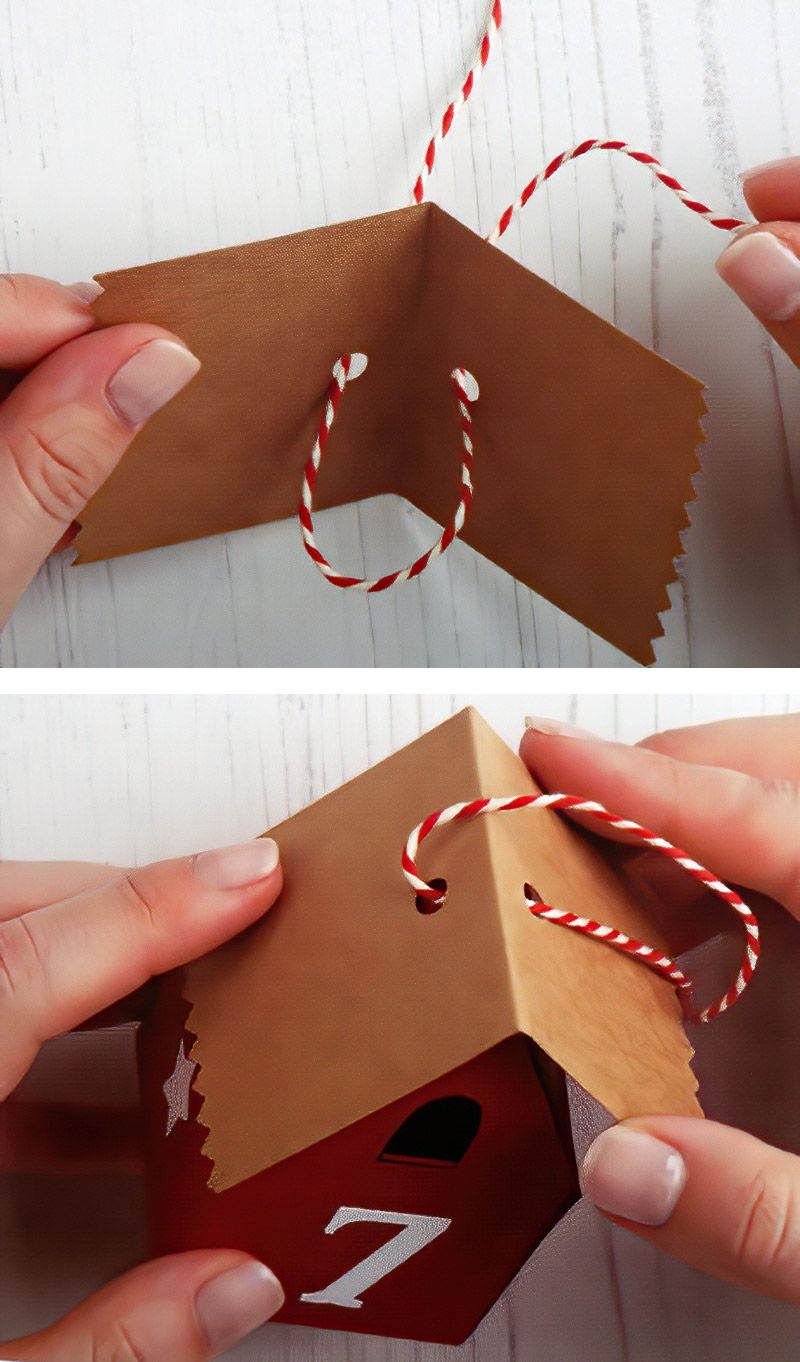
Fold the roof over and punch a hole centrally through both halves at the top.
Finish The Advent Calendar Houses Projects
Step Eleven
Thread a 200mm (7 3/4in) length of red and white baker's twine through the two holes in the roof. You can leave some houses without twine so they can rest on a surface.
Step Twelve
Apply PVA glue to the top of the house. Position the roof in place and press it down, smoothing out any air bubbles. Allow the roof to dry before hanging your house.
Make a Tealight Holder
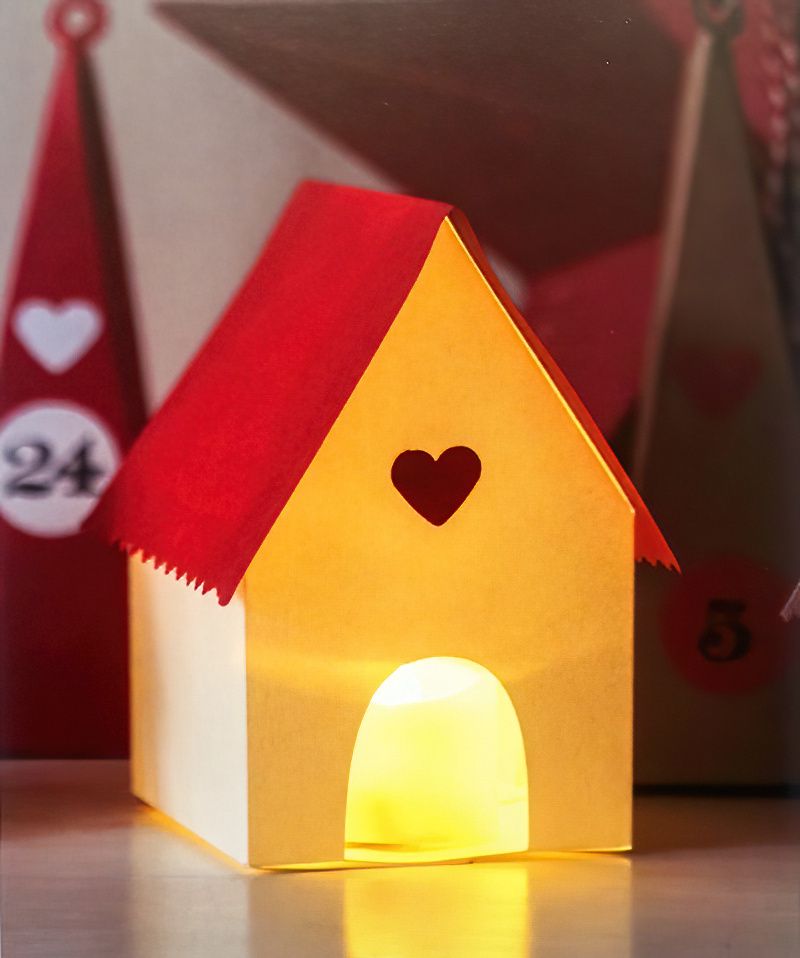
Transform one of the houses into a magical tealight holder. Enlarge the house template on page 104 by 133% and follow the instructions on pages 74-75 to construct it. Open the bottom of the house and insert an artificial tealight (ensure it's switched on before placing it inside). Voila, you have a charming glowing house. You can create an entire miniature village of houses, each with a battery-powered tealight.
Warning: Do not use real flame tealights; they pose a fire hazard and should be avoided.
Enhance the Festive Atmosphere
String up your Advent houses using washi tape and adorn them with twinkling fairy lights to create a warm and inviting holiday ambiance.
















.jpg)


