Make A Simple Wooden Mirror Frame For Fun
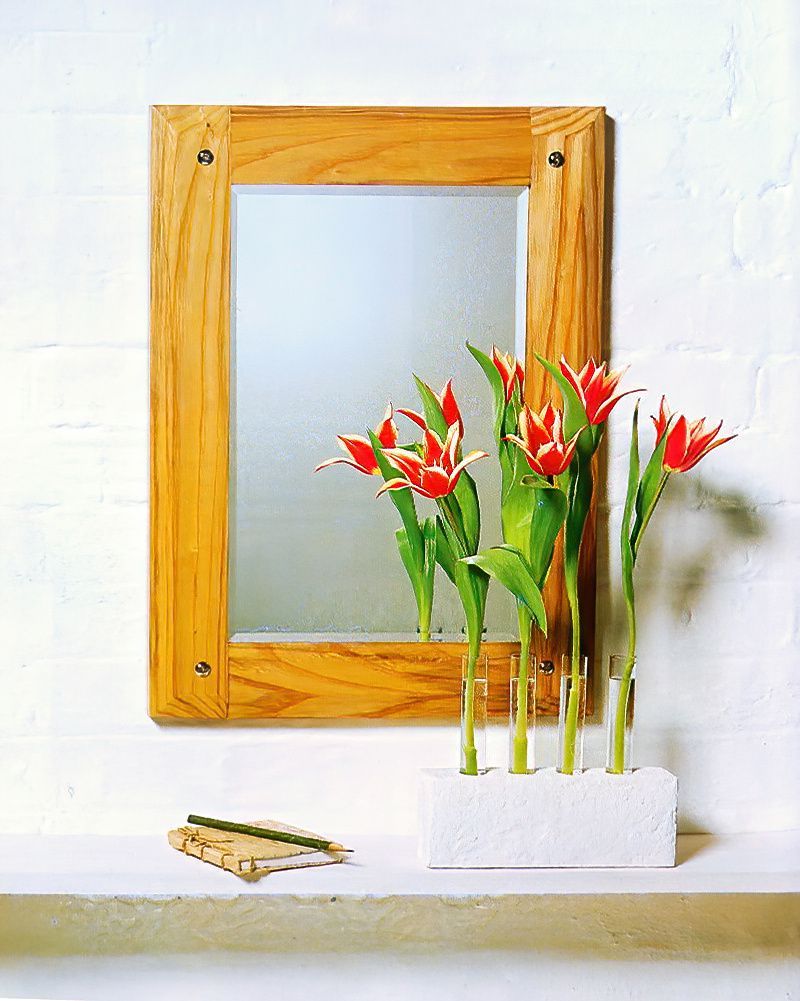
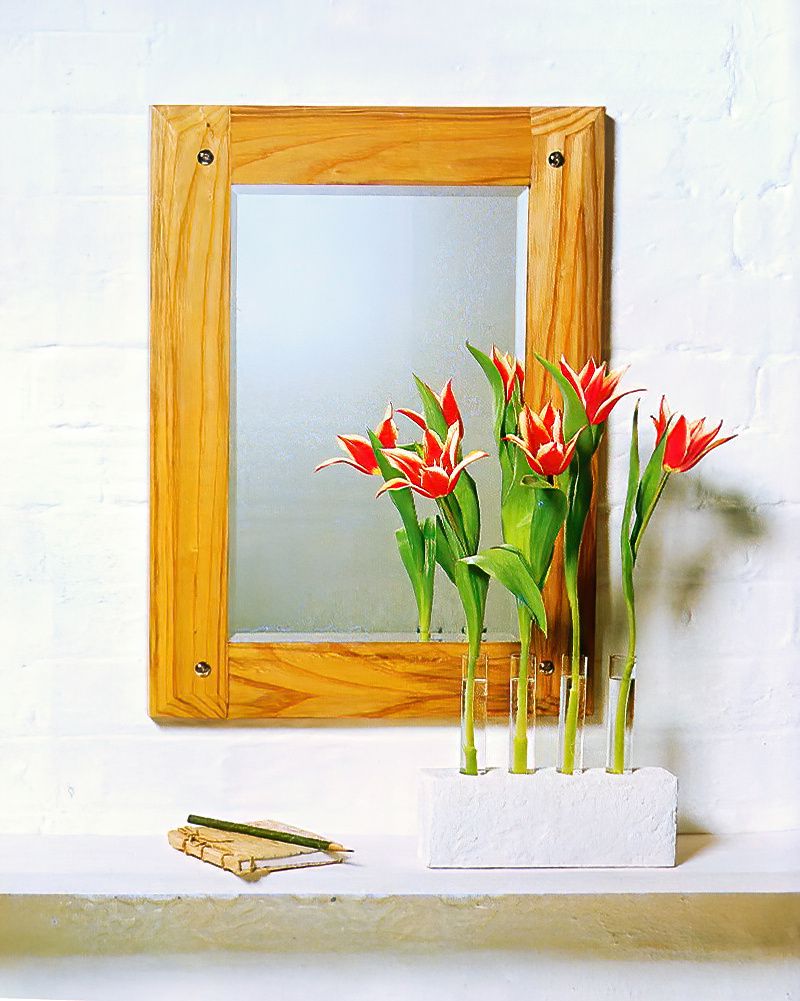
If you have a plain mirror without a frame lying around, you can make a simple wooden mirror frame for it using some plain and simple hardwood. Additionally, add a bevelled edge to the wood to make a more detailed mirror frame. I used solid ash wood for mine, but any hardwood would be sufficient if you have some leftovers that are long enough to make the frame out of.
If you choose to, you can add more detail and embellishments to the bevelled mirror frame to personalise it a bit more. That is entirely up to you.
Materials & Equipment For A Simple Wooden Mirror Frame
- 75mm X 30mm Hardwood (or sufficient for your chosen mirror)
- Mirror to Fit
- 4 25mm Barrel Nuts
- Fixing Attachment
- Bevelled Chisel
- Tenon Saw
- Circular Saw Bench
- Plane
- Sharp Block Plane
- Bradawl
- Wide Bladed Screwdriver
- Clear Wood Polish
How To Start To Make A Simple Wooden Mirror Frame
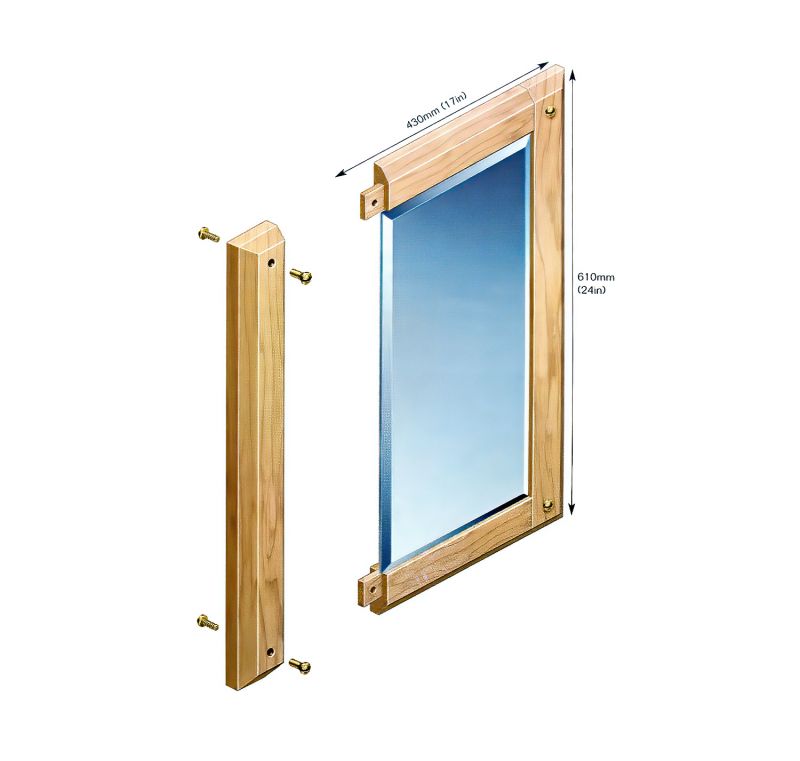
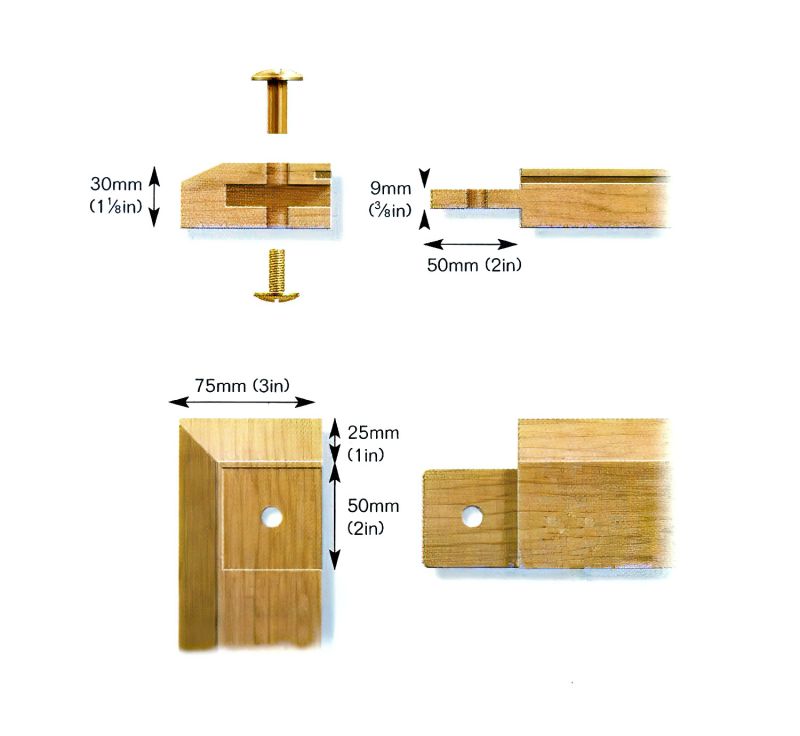
Above are the diagrams with the measurements and how to fit the mirror frame together around a plain mirror. It would be useful to refer to these diagrams when working through the steps to make your own simple wooden mirror frame. If you want to, you can work with different sizes if your mirror is a different size, but refer to these as they will fit together the same.
As you may see, the simple wooden mirror frame is fitted together using mortise and tenon joints with a barrel nut device to connect them together. A barrel nut is a sleeved nut which is inserted into the cheek parts of the mortise and they are locked together by the blade of the tenon.
Cutting The Mortise And Tenon Joints
Step 1
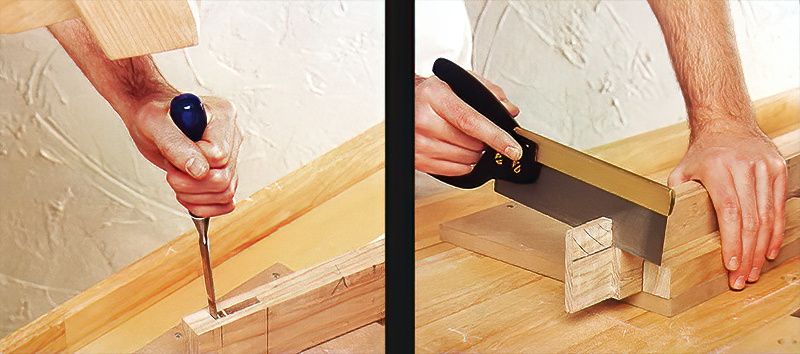
Start by cutting the frame pieces to a length to suit the chosen mirror. Then set out the mortise and tenon joints to the dimensions given on the diagram at the top. Then deduct 6mm all the way around from the overall size of the mirror to get the internal measurements of the simple wooden mirror frame. Then cut out the mortise to a depth of 50mm, cleaning up the corners using a bevelled chisel.
Step 2
Now you will need to cut a 25mm haunch to each tenon using a tenon saw so that the blade is 50mm square. Then pare down the tenon to become a loose sliding fit with the mortise. Make sure that it is not too tight. Take the corners off of the tenon to stop it from damaging the bottom corners of the mortise joint.
Making Bevelled Edges For A Simple Wooden Mirror Frame
Step 3
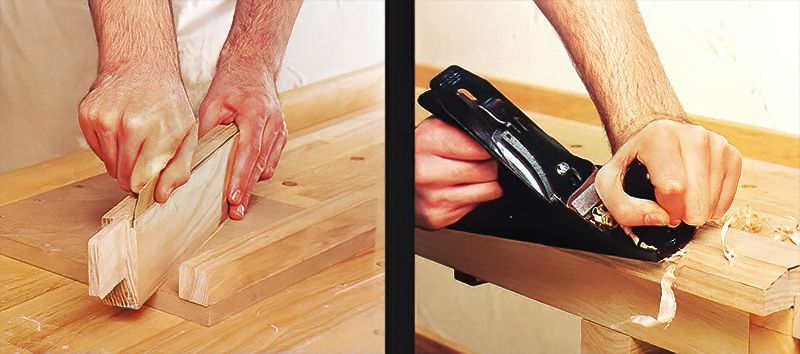
The next step is to cut a slot on the internal edge of each component part to hold the mirror. The exact dimension of this will depend on the thickness of the mirror glass that you are using, along with the size of the bevelled edge. This particular mirror frame needs a slot of 3mm wide and 6mm deep. This is carefully cut on a circular saw bench.
Step 4
Now, you will need to plane a 25mm bevel onto the outer edge of each of the four frame parts. Make sure that all of the bevelled edges match perfectly all the way around. This can be finalised properly after the next step once the frame is fitted together. This will allow you to see any discrepancies.
Fitting The Frame Joints Properly
Step 5
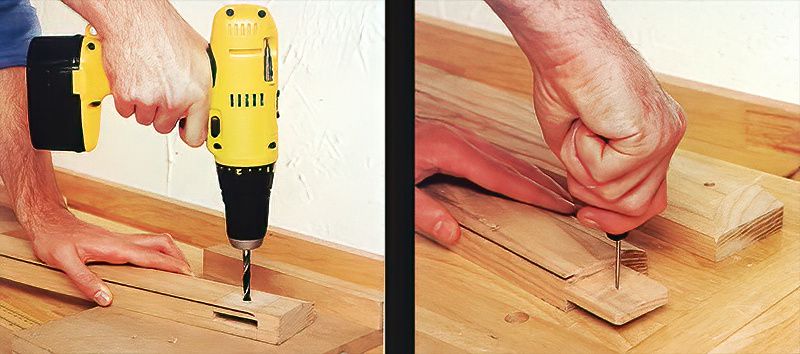
Before you assemble your frame, drill an 8mm through hole in the centre of each of the mortise joints. Make sure that you remove any of the waste that you have just drilled. Then insert the tenon, and use the same drill bit to mark the centre of the hole onto the blade. Then while the joint is still fitted together, mark the bevel that is needed on the ends of the upright pieces. And carefully finish off the corners with a sharp block plane.
Step 6
Next, take the mirror frame apart again to enable you to drill the matching holes in the tenons. To achieve a really perfect fit, ideally they should be offset slightly towards the shoulder. This will allow the joint to be drawn up once the barrel nut is in place. I would recommend using a bradawl to offset the centre by 1.5mm. Then ensure that the hole is drilled straight.
Assembling The Simple Wooden Mirror Frame
Step 7
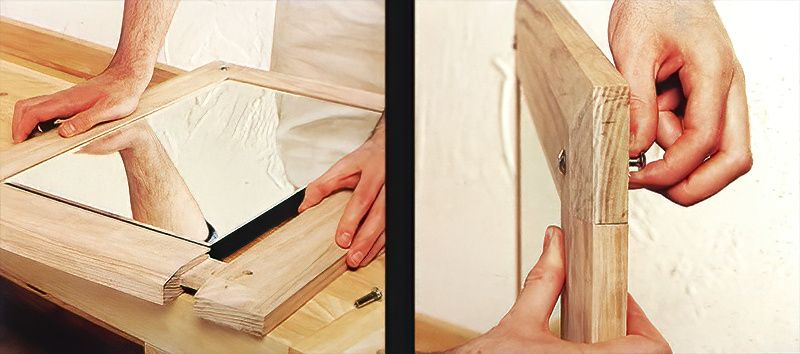
Now to assemble the frame. I would recommend first assembling it without the mirror to double check that everything still fits together perfectly. Then tap two of the barrel nuts into place. They should be drawn up tight into the shoulders. Then remove one side of the frame, slide the mirror into position, then reassemble the rest of the frame.
Step 8
For the final step, insert the male end of the connector from the back of the frame into its threaded sleeve and tighten it up with a wide bladed screwdriver. Fully secure the entire mirror frame, add a fixing attachment to the back, and apply some clear wood polish.










.jpg)

