Making A Wooden Magazine Rack
How To Make A Wooden Magazine Rack Tutorial
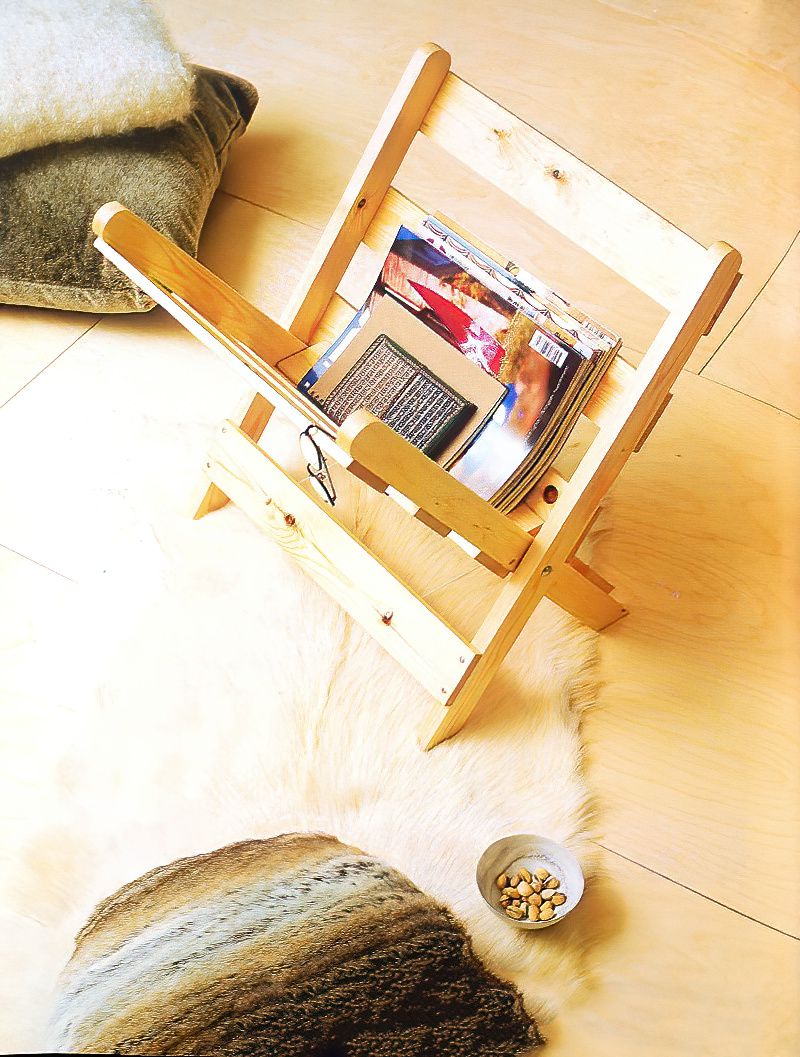
This is a really useful wooden magazine rack, perfect for placing next to your chair or sofa, or even bed. Especially if you are a magazine reader like my wife. She loves reading a good beauty and home magazine. This is a good project to make as it doesn't require lots of expensive tools.
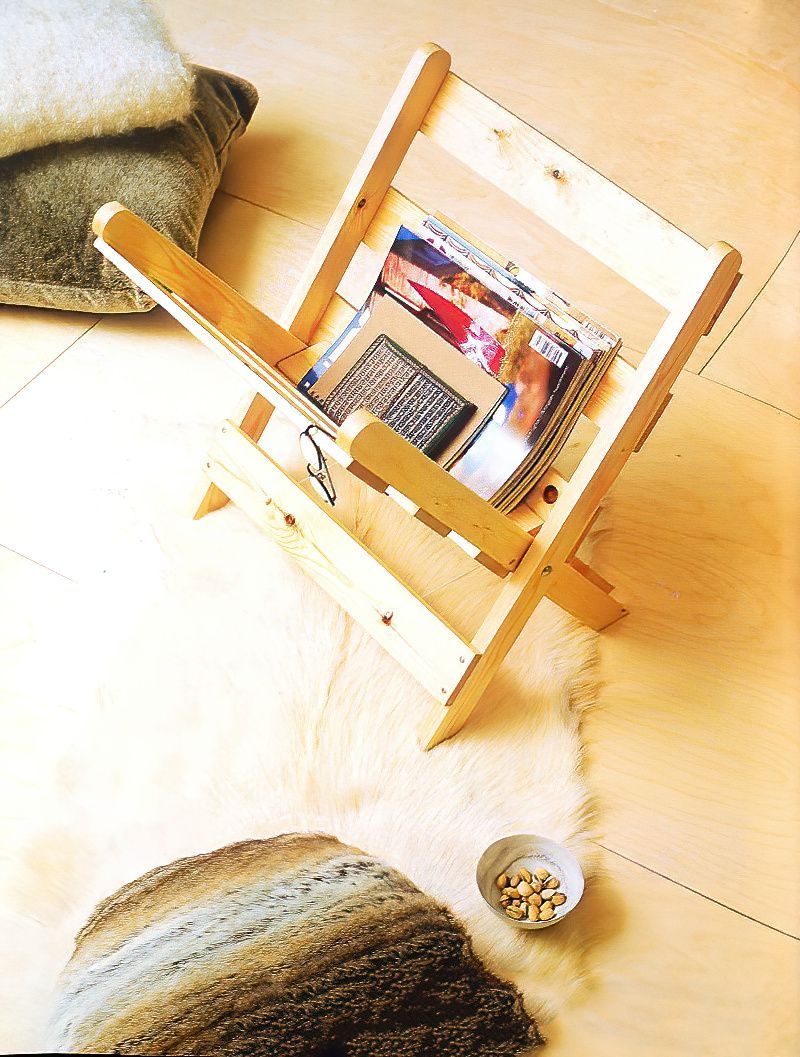
This particular wooden magazine rack has an interlocking design that allows it to be opened out to hold magazines or to be folded flat for storage.
Materials & Equipment
- 4.2m of 75mm X 12mm Planed Softwood (For Slats)
- 2.7m of 50mm X 25mm planed Softwood (For Legs)
- 6mm MDF (For Template)
- 16 25mm Brass Wood Screws
- 2 50mm Brass Wood Screws
- Panel Pin
- 2 65mm Coach Bolts, Nuts and Washers
- Thin Cord
- Pencil
- Drill
- Medium Grade Sandpaper
- Clear Varnish or Sealer
How To Start To Make A Wooden Magazine Rack
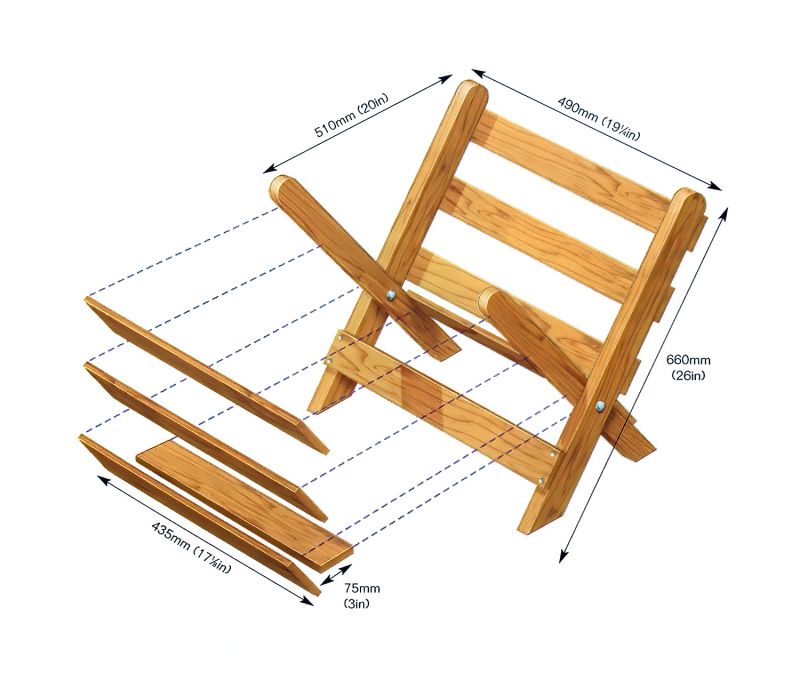
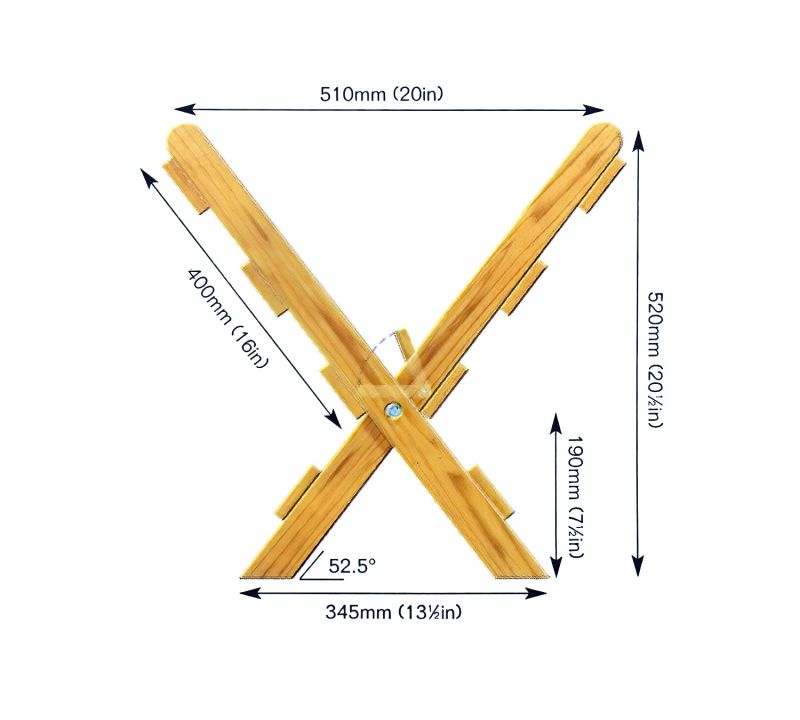
Above are the diagrams with the measurements and it shows how the wooden magazine rack fits together. Please refer to these diagrams as you go, as you will need to ensure that the measurements are correct for it to fit together properly. As you can see, the magazine rack consists of two separate assemblies that make the two sides of the rack. One of them slides inside the other one and are attached together with two bolts. This creates the folding mechanism.
This wooden magazine rack can be made to any size that you wish, however, if you use these diagrams, you will not need to calculate all of the angles. Draw it on to a sheet of MDF or Plywood to make a template.
Making Legs For A Wooden Magazine Rack
Step 1
Start by cutting the legs and the slats to the correct length following the dimensions on the diagrams at the top. The slats for the inner frame should measure 55mm, which is shorter than the slats for the outer frame. This will allow them to easily slide within the latter.
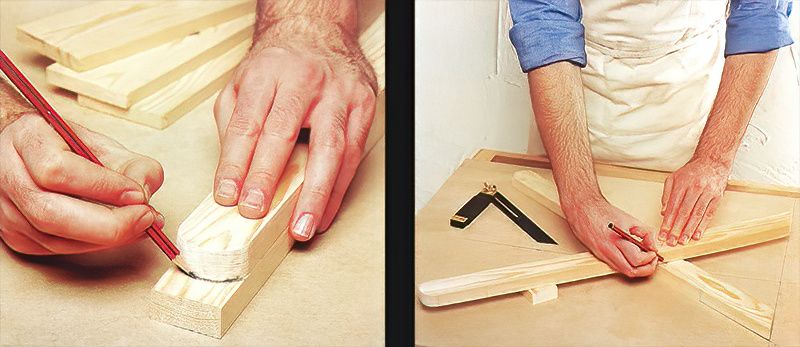
Then if you wish to, cut a rounded edge profile at the top of each of the legs. It is good to use the first on you cut as a template for the other legs, so that they will all be the same.
Step 2
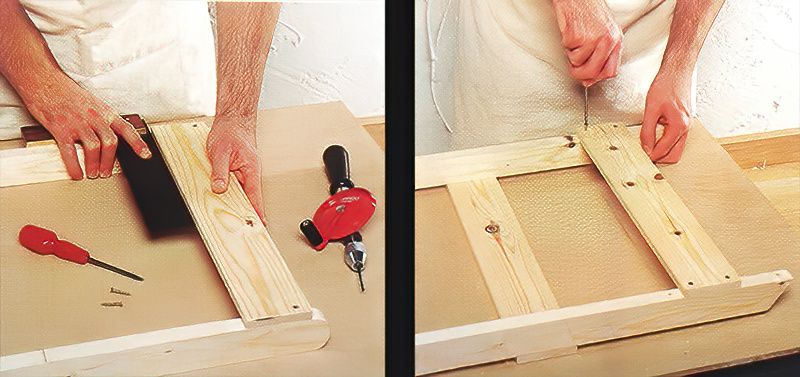
Next, lay each pair of the wooden legs over the template that you have drawn on the MDF or plywood, and mark on the position of the slats and the pivot point using a pencil. It is a good idea to support the leg on top by wedging a small offcut of wood under it to keep it level. Then drill a small hole through the pivot point of each of the legs.
Assembling The Frame For A Wooden Magazine Rack
Step 3
Now it is time to assemble the inner frame of the magazine rack. So insert one screw at each end of the top slat, then use a try square to ensure that the assembly is correct before you carry on. At this point, it is essential to make sure that the frames are completely square. And remember to ensure that the ends of the slats do not hang over the sides of the frame.
Step 4
Next, add the third slat, and then turn the frame over to attach the bottom slat into place. It will make the final assembly a lot easier if you leave out the second slat for now, as this can be added once the wooden magazine rack is bolted together.
Assembling The Outer Frame For A Wooden Magazine Rack
Step 5
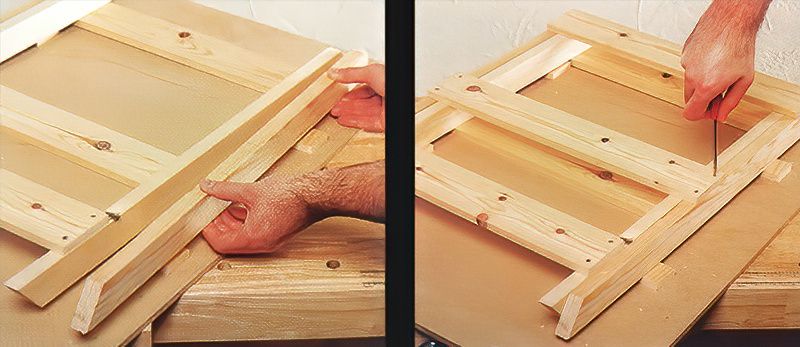
Now it is time to start working on the outer frame. Use the inner frame that you have just made as a jig for the outer frame. Carefully position the components, ensuring that the pivot holes are in line with each other. Then insert a small panel pin to keep the legs aligned in the right position while you are working. Refer to how the angled ends of the legs face in opposite directions.
Step 6
Next, use two offcuts of 12mm wood at each side to support the outer legs, to keep them at the same level. Then screw the top and third slats into place, making sure that they are square beforehand. Make sure that all four legs are parallel to allow the wooden magazine rack to open and fold freely.
Putting A Wooden Magazine Rack Together
Step 7
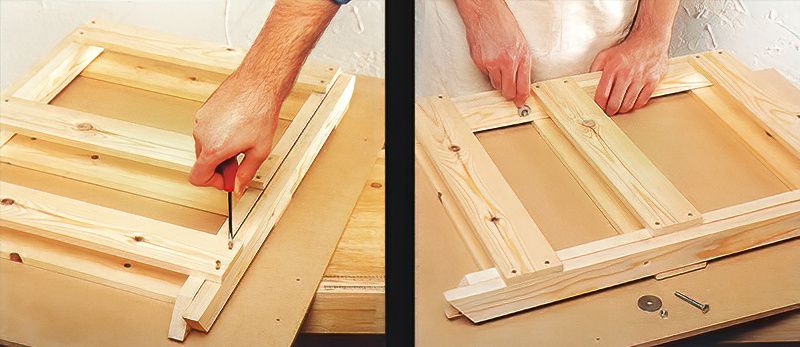
To fit the bottom slat, turn the assembly over. At this point in the process, the two frames should enclose each other, but should have the ability to slide apart if needed. This is the best time to clean up any rough bits using medium grade sandpaper. Then, if you choose to, apply a coat of clear varnish or sealer.
Step 8
Now, drill holes through the legs for the coach bolts, making sure that you use the pilot holes do guide the drill bit to avoid splitting the wood. Then insert a coach bolt into each side, and inserting a large washer between the moving parts. This will reduce any friction.
Then fit the nuts to the inside, but do not make them too tight as this can distort the framework. The bottom slat on the outer framework of the wooden magazine rack will act as a stop to hold the rack open.

A Handmade Wooden Magazine Rack
Step 9
Next, insert the bottom piece that will become the floor piece of the magazine rack. Make sure that you cut it to fit between the legs of the inner framework, and attach it into place using two long brass screws. The rack should pivot easily, allowing it to open and fold closed.
Then put in the remaining two second slats. You can also add a couple of lengths of thin cord between the bottom slats if you wish to secure the magazine rack in the open position.











.jpg)



.jpg)


