Owl Are Always Popular So Let’s Make These Fun Little Owl Gift Cards
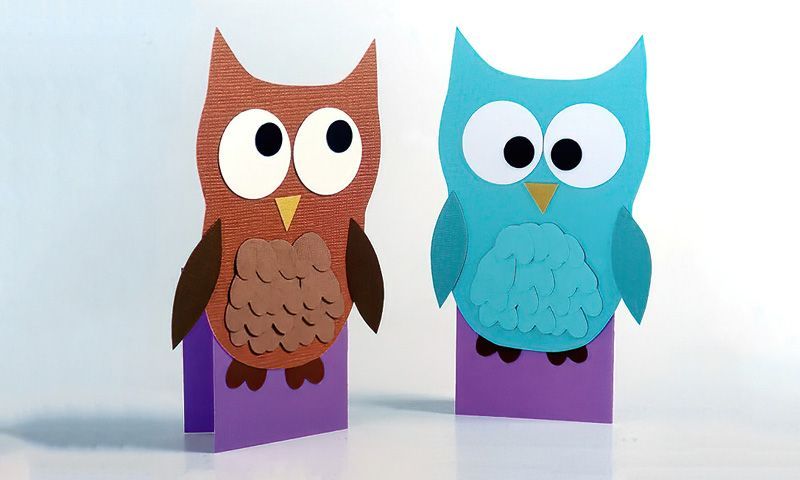
Once you know how to make the fun, happy little owls, I'm sure you will adapt them for any occasion. They make perfect owl gift cards but can equally be used as name tags or placeholders, or greetings cards or gift tags.
Let your imagine run wild with colours and designs. And let's create our own parliament of owls.
Things we need
- Basic paper craft tools
- Circle paper punch, size 2.5cm or 1 inch
- Heart shaped punch, 2.5cm or 1 inch
- Coloured papers, white, black, yellow, blue and brown 13 x 10cms or 5 and one quarter x 4 inches
- Coloured card, purple, turquoise and green, 13 x 10cm or 5 and one quarter x 4 inches
Note: You don't need the paper shape punches. Just use a steady hand and draw or print some similar design and carefully cut them out.
Let's Start Making Our Owl Gift Cards
Step One
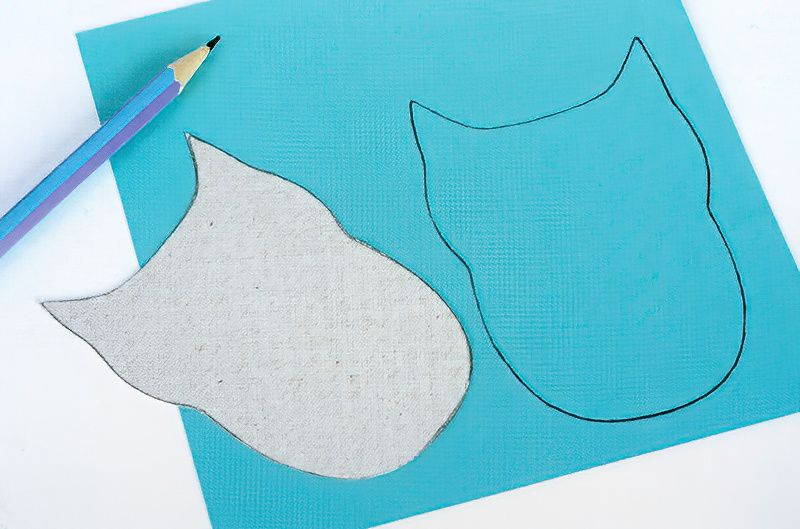
First we are going to create our very own owl shape template for our owl gift cards. Find a piece of scrap card from a cereal box or food packaging and draw a basic owl shape onto it. If you don't like your design, just throw it away and start again. Remember we are going to transfer it to the coloured card, so make sure your design is smaller than the coloured card you have.
Once you have your basic owl shape, as pictured and cut it out from scrap card. Then use this template to trace around onto the turquoise card. Trace as many owl as you might need. Cut out the bodies of your owl gift cards.
Remember, you can keep this owl shape for future projects. It's always handy to have a craft box or draw with left-over pieces from other projects. More often than not, these left-over pieces become something wonderful in their own right.
Why Are Owls So Funny?
Step Two
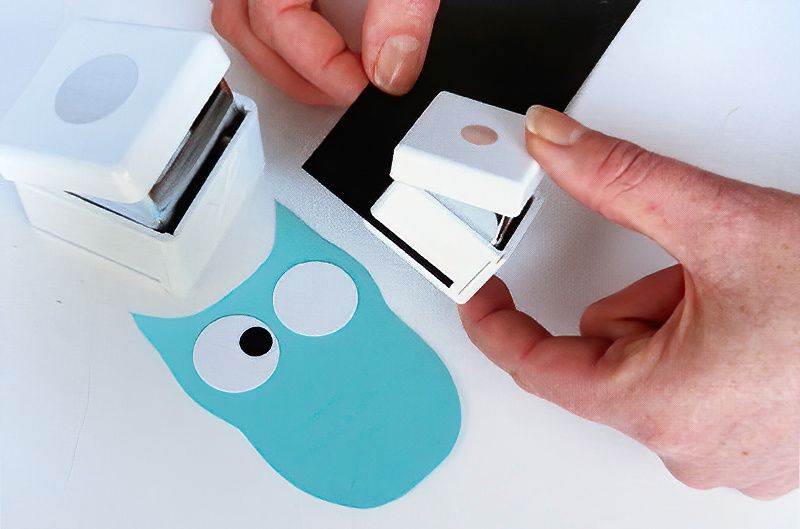
Using the 2.5cm or 1inch paper punch, start to punch out the eye shapes from the white paper. Remember if you don't have the right paper punch, have a go at simply drawing a round circle and carefully cutting it with scissors or a craft knife.
Now use the smaller paper punch to cut out the centre of the eyes from the black paper.
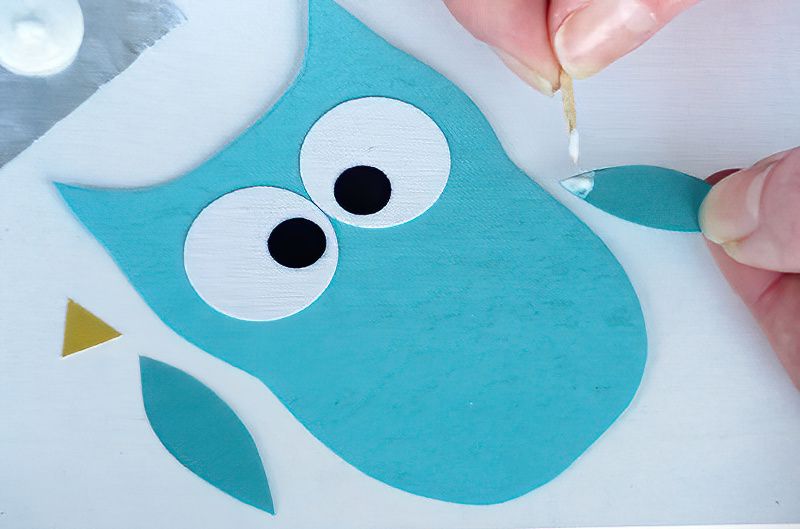
Use white glue and a cocktail stick glue the black circle on top of the white circles. Then glue the eyes on top of the owl's head. Angle the eyes to make your funny owl have a different expression.
Let's Gift Our Greetings Card Some Little Wings
Step Three
Now draw and cut out the wing shapes of your owl gift cards from the green card. Use a cocktail stick to more precisely apply white glue to the end of the wings and then glue the wings to the owls body.
Cut a small triangle from yellow card for the owl's beak. Then glue the beak in place. Remember, there is no right or wrong way to make your little owl character. Different sizes and shapes of bodies, eyes, wings and beaks will make all your owls look different and unique.
Add More Details To Our Owl Card
Step Four
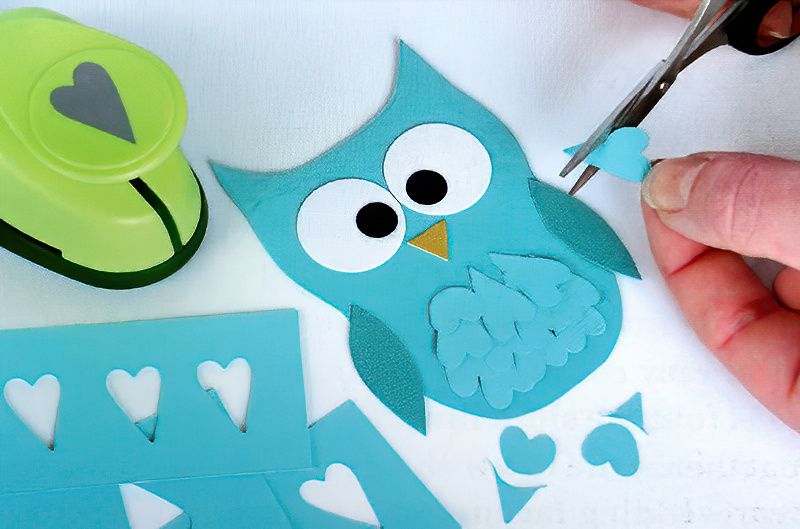
Now we are going to make the feathers for our owl gift cards. Use the heart-shape punch to punch out 14 heart shapes from the blue paper. Remember, you can just draw and cut with scissors if you don't have a heart-shaped paper punch.
Now look at the picture, we are going to glue the hearts onto the owl body. Starting at the bottom and going up. Each new row will be above the last and lay on top of the previous row to give an over-lapping feather effect.
So start by sticking a row of three upside-down hearts at the bottom of owl's body. Then a row of four upside-down hearts are the next row up. Then the third row is three upside-down hearts.
For the final layer, round off the point of the heart shape with some scissors. See the picture above. Then glue these at the top of the owl's chest.
Remember, if your owl is slightly bigger or smaller, the feathers do not need to be precise. Owl gift cards are meant to be fun, so layer all the feather up as far as you think looks nice. You can have some neat owls, but maybe some messy owl gift cards will be fun too.
Our Little Owls Need Some Feet
Step Five
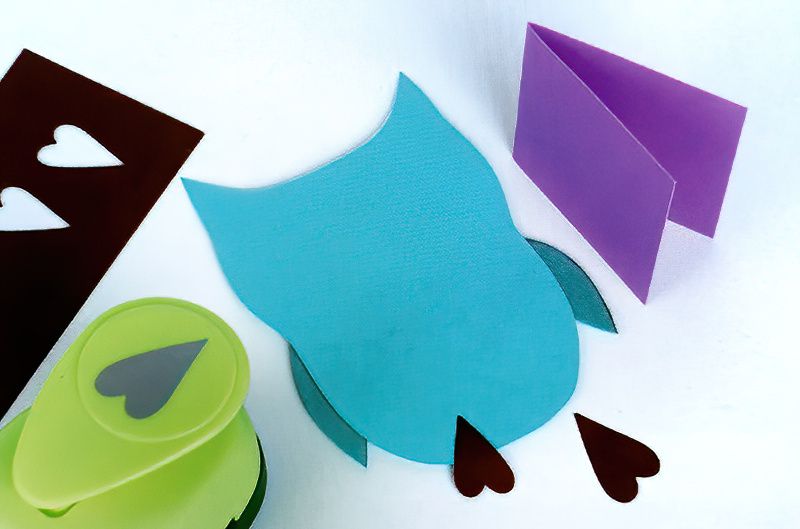
Once all the features and feathers are glued on to the front of the owl we can flip them over. Make two more heart shapes out of brown card. These will be the owl's feet. Our owl gift cards are nearly complete.
Use a cocktail stick to put glue on the point of the heart shaped feet and glue down to the back of the owl's body. Make sure the feet are hanging down below, so when we flip it back around we can see the owl's feet sticking out.
Final Assembly Of Our Owl Greetings Card
Step Six
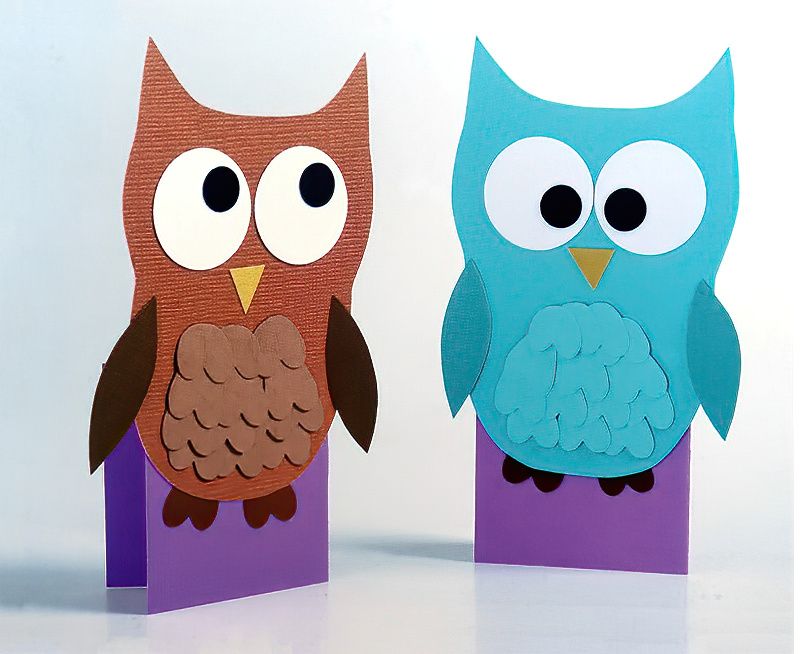
Finally, stick your owl friend onto their purple card. You can position the purple cards with the fold at the top or the side. And if you make the purple card much bigger, these owls will also make wonderful greetings cards or owl gift cards and tags.
Experiment with different colours and sizes and designs, this is a great way to use up some of your left-overs cards and papers from other projects.
Have fun experimenting with your fun owl friends. Now you know how to make an owl, you can make them for any celebration and use them in lots of different ways.



.jpg)

