Making A Simple Wine Rack Is A Great First Woodwork Project
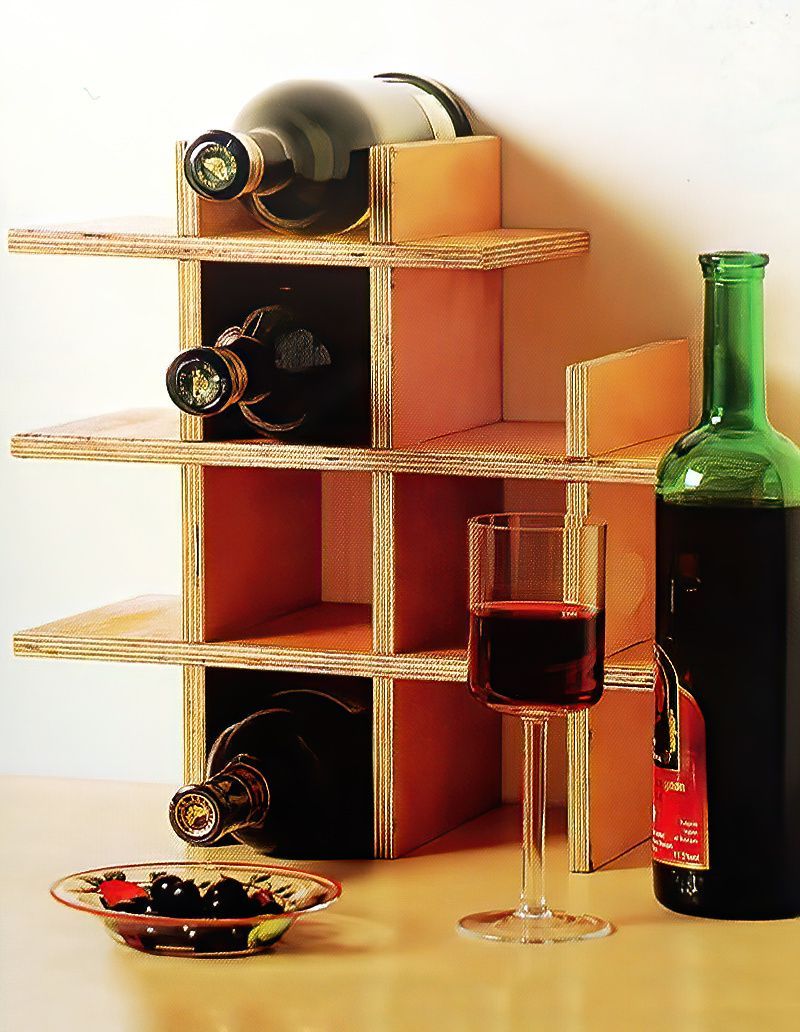
This wine rack is a really simple woodworking project, great for someone who wants to learn the basics of woodwork. You will need a piece of plywood, you can often find offcuts in DIY stores if you don't need much.
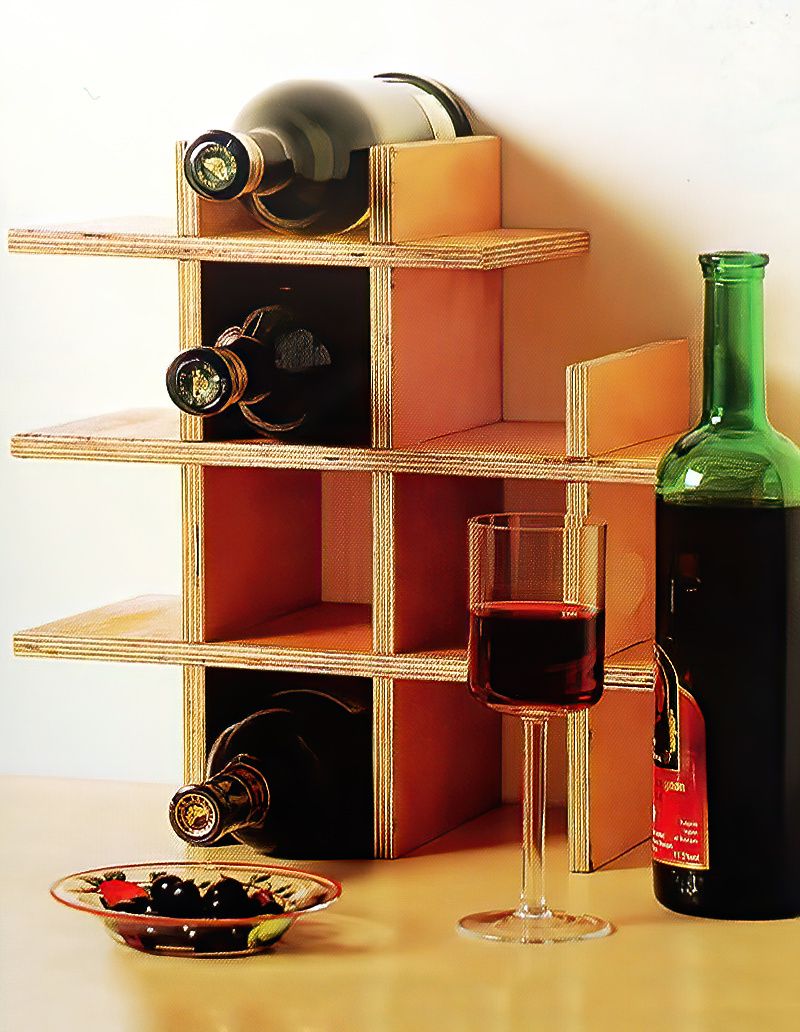
My wife loves a couple of glasses of wine in the evenings, so I made her this simple wine rack to store her bottles of wine. I think I might need to make her a bigger one soon. She is not an alcoholic honestly. I have the occasional glass also.
Materials & Equipment For Making A Simple Wine Rack
- 12mm Birch Plywood Measuring 760mm X 600mm
- Metal Ruler
- Sharp Heavy Craft Knife
- Saw or Jigsaw
- Clamp or Vice
- Smoothing Plane
- Medium Grade Sandpaper
- Sanding Block
- Pencil
- Chisel
- Mallet
- Paintbrush
- Clear Varnish or Clear Sealer
- PVA Wood Glue
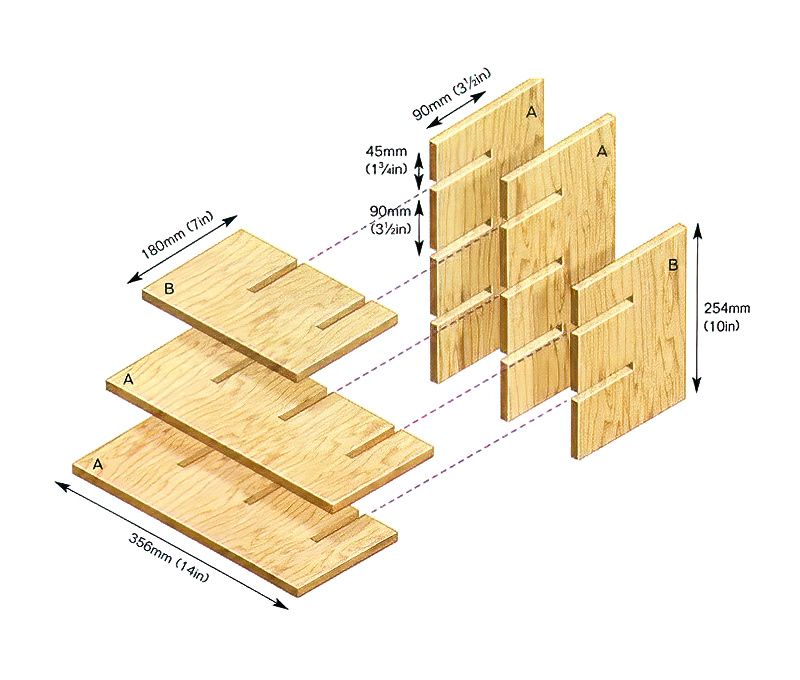
Above is a simple diagram of the wood measurements needed and how the wine rack will eventually fit together. So it would be good to refer to this drawing throughout the process, and especially at the beginning for the measurements and at the end when you come to assemble your wine rack.
Cutting Plywood To Start Making A Simple Wine Rack
Step 1
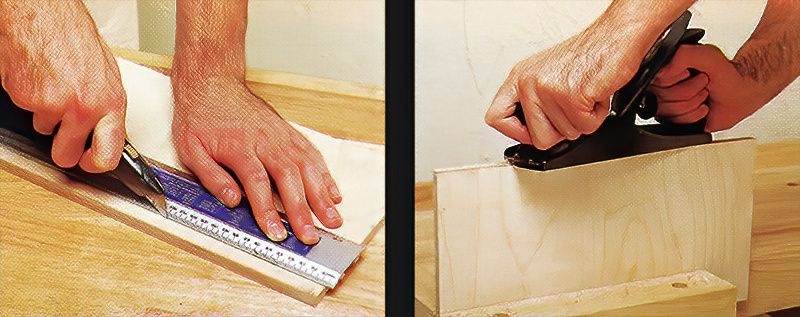
Start by cutting the wood panels to the correct size (you will need to refer to the measurements in the diagram at the start). To do this, use a saw or a jigsaw, whichever you have available, making sure that you keep it as straight and as square as possible.
When cutting across the end grain of the plywood, to get a neater finish, carefully score along the cut line with a sharp heavy craft knife. This will stop the saw from damaging or splintering the outer layers of the plywood.
Step 2
Next, firmly each of the plywood panels upright in a vice and trim down the plywood to the scored line using a smoothing plane. This will create a neat, square, straight edge all the way around. Then finish it off with some medium grade sandpaper on a sanding block. Make sure that you use long smooth strokes to ensure the edges remain straight.
Let's continue making a simple wine rack.
How To Cut Slots In Plywood
Step 3
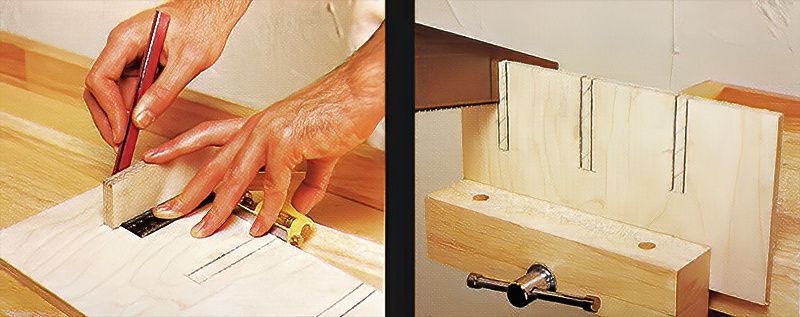
Next, draw in the lines for each slot as shown above copying the dimensions in the diagram at the top. Use a small offcut as a template, drawing along each side of the plywood. This will give you the correct slot width without having to measure it every time. The first panel can be the template for marking out where the other panels will be.
Step 4
Then, clamp each panel upright into the vice and carefully cut downwards along the lines that you have marked. Keep to the waste side of each line to make sure the gap isn't cut too big. I would recommend a sharp saw rather than a power saw, as it will be easier to control and more accurate, as you can take a little more time and care when cutting.
Please leave a comment below with feedback on my making a simple wine rack tutorial.
Making Sure Plywood Joints Fit Together
Step 5
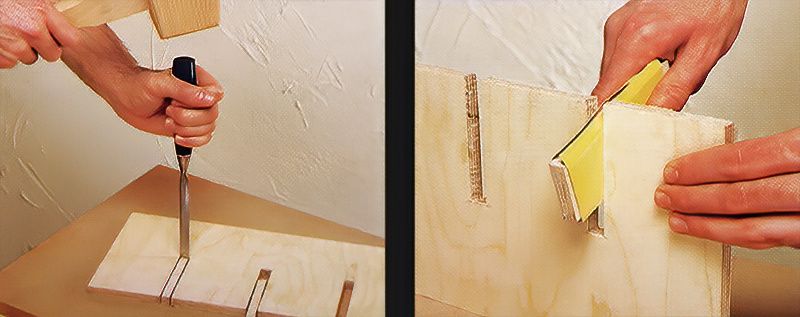
Now, use a mallet and a 12mm chisel to carefully tap down at the ends of each of the slots to remove the waste plywood. Make sure that each of the slots extend to half the width of each panel, to ensure that both halves of the joint slide together perfectly and the edges are all completely flush.
Step 6
Next, wrap some medium grade sandpaper around an offcut of plywood to lightly sand inside the slots that you have just cut. Ensure that each slot has the right sliding fit for the 12mm plywood.
We've Finished Making A Simple Wine Rack
Step 7
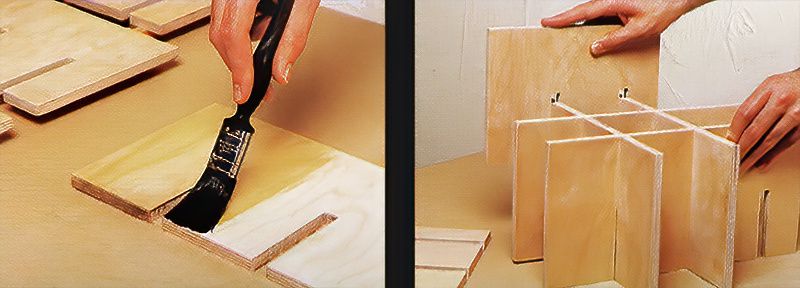
Lay out all of your pieces of plywood and lightly sand with some medium grade sandpaper. Then apply a thin coating of either clear varnish or clear sealer. It is much easier to do this before assembling it. Allow to dry thoroughly.
Step 8
Finally, slot all of the pieces of plywood together to make the wine rack. If you feel you need to, add a small amount of PVA wood glue inside each joint. Now you can enjoy some wine from your new handmade wine rack.
Making A Simple Wine Rack Tutorial Conclusion
I hoped you enjoyed making a simple wine rack. You could actually adapt these principles to make many different things. A shoe rack, book shelves, nic nac boxes. Please leave a comment and let me know what you think.







.jpg)



.jpg)
