How To Make A Wall Hung Bookshelf
You Can't Have Too Many Wall Hung Bookshelves
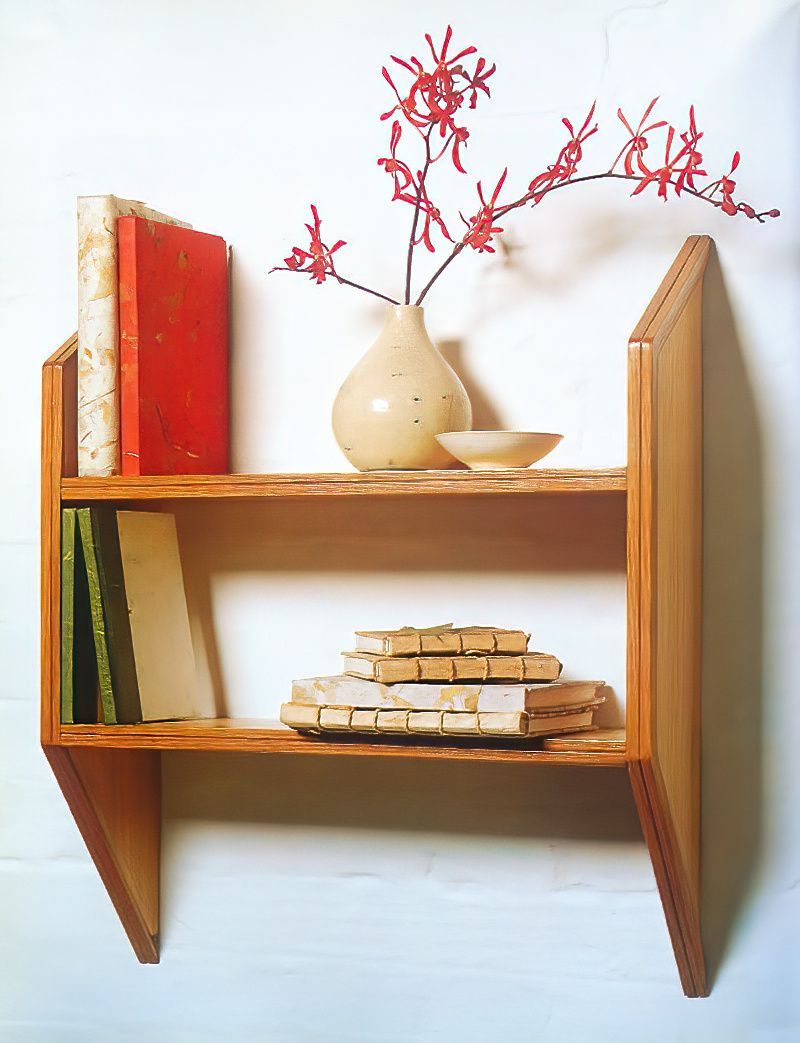
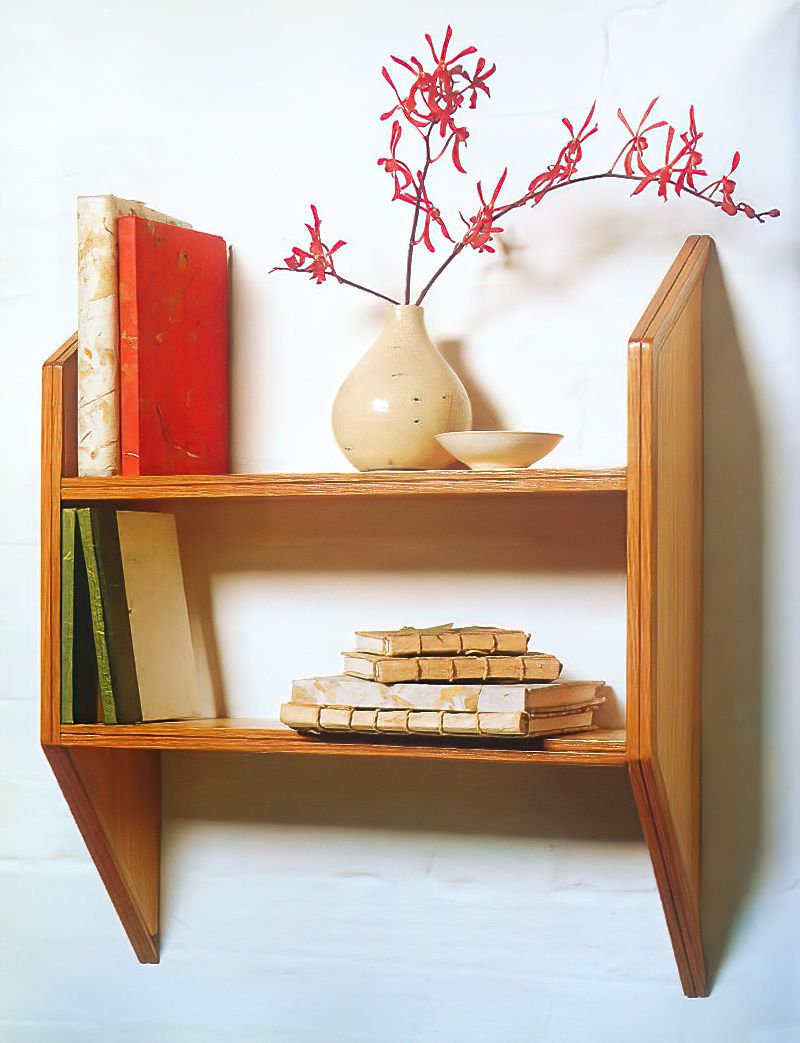
Here is a useful guide on how to make a wall hung bookshelf out of wood. You will need to choose either a veneered plywood or a veneered MDF. It is a simple wooden wall shelf that can be used for books or decorative items. It is quite simple to make and quite easy to put together.
You can make a bigger one if you wish, but I have shared the measurements for one this size. It would be fairly easy to work out the measurements for a bigger one with additional shelves though.
Materials & Equipment
- 760mm X 610mm of 12mm Veneered Plywood or MDF
- 2.7m of 19mm Angled Moulding for Edge Trim
- PVA Wood Glue
- Panel Pins
- Pencil
- Sharp Knife
- Jigsaw or Sharp Panel Saw
- Vice
- Block Plane
- Router
- Soft Cloth
- Sash Clamps
- Tenon Saw or Adjustable Mitre Saw
- Nail Set
- Spatula or Modelling Tool
How To Start With The Wall Hung Bookshelf
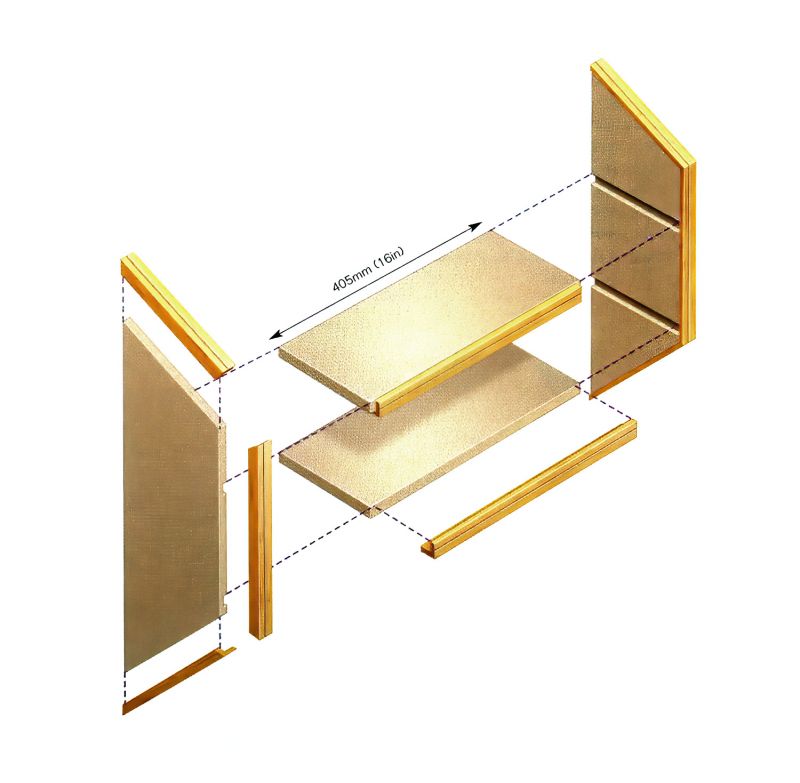
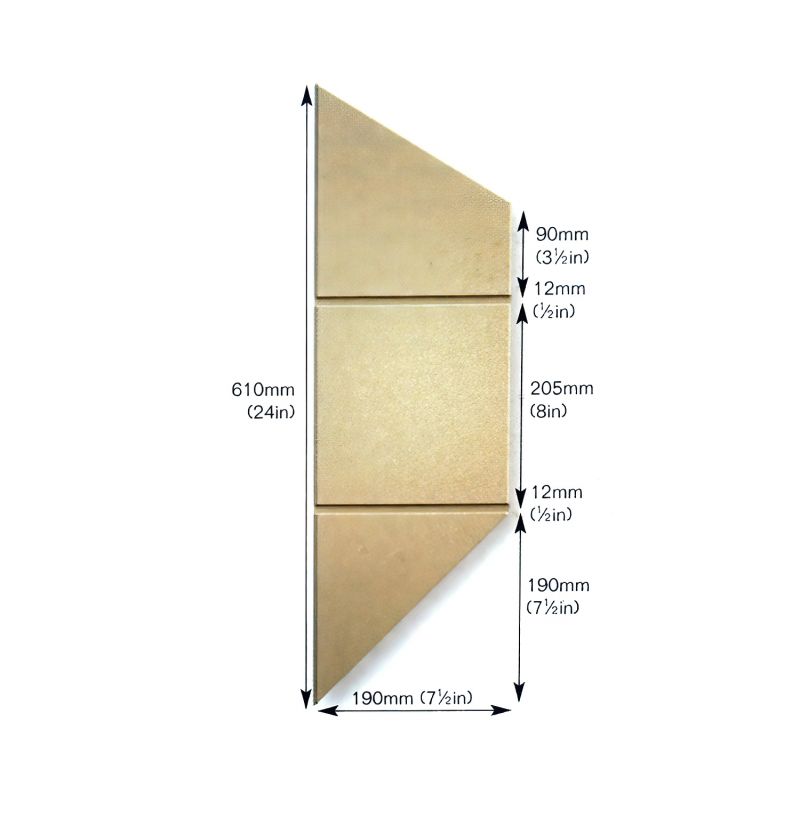
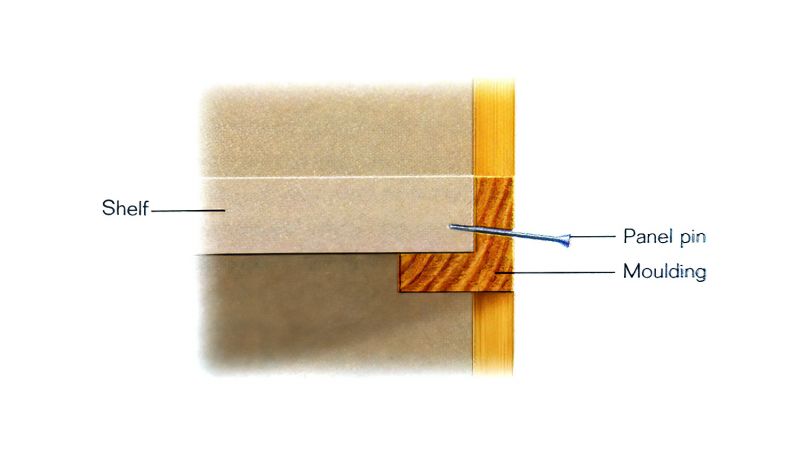
Above are the diagrams with the measurements and shows how the wooden wall hung bookshelf is put together. You will need to refer to these diagrams throughout the process to ensure that your measurements are correct, so that it will fit together correctly as shown.
These dimensions are provided as a guide, so you have the option to alter them if you need more space for books or other decorative objects. The wall hung bookshelf can take a reasonable weight, but try not to overload it too much.
Making The Ends Of The Wooden Wall Hung Bookshelf
Step 1
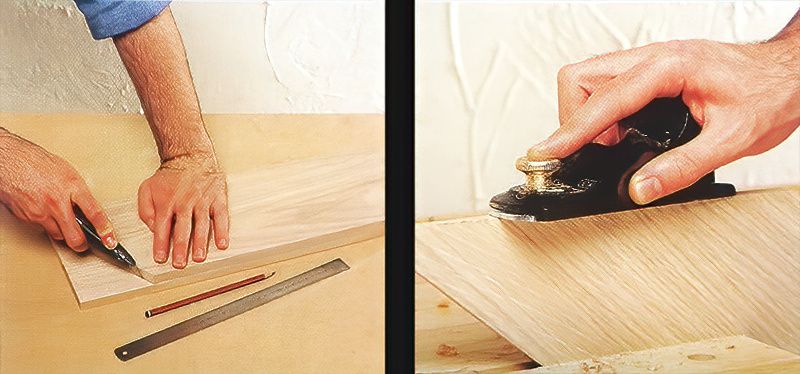
Begin by drawing out the profile of the wall hung bookshelf onto one end of the wood and cut it out. Then use this piece as a template for the other end, to ensure that they match perfectly. Scribe the angle cuts across the grain using a sharp knife to avoid splitting the grains of the veneer. Then cut just outside the line using a jigsaw if you have one, or you can use a sharp panel saw instead.
Step 2
Next, clamp the angled edges into a vice so that they are horizontal, and then plane them down to the scribe lines using a block plane. Make sure that you work with the grain to make sure that you do not damage the veneer. Using the block plane with a finely set sharp blade is the best tool for the job and the material.
Using A Router To Make Grooves In Wood
Step 3
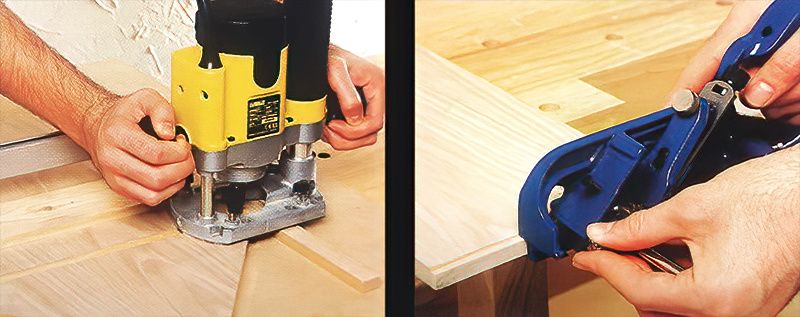
The next step is to create the housings for the wall hung bookshelf using a router, by running it along the straight edge pinned to the inner face. You can ensure accuracy by clamping the two ends together tightly, to cut out the grooves in one go. And pin a strip of scrap wood to the edge of the board to stop breakout at the end of the groove.
Step 4
It is not always possible to perfectly match the size of the board exactly to the diameter of the router cutter because the boards can vary in thickness depending on the type of veneer. If needed, you can plane small rebates on the underside of each of the shelves until it fits inside the grooves perfectly. Additionally, this will also improve the strength of the glued join.
Using Wood Glue And Panel Pins For Holding A Bookshelf Together
Step 5
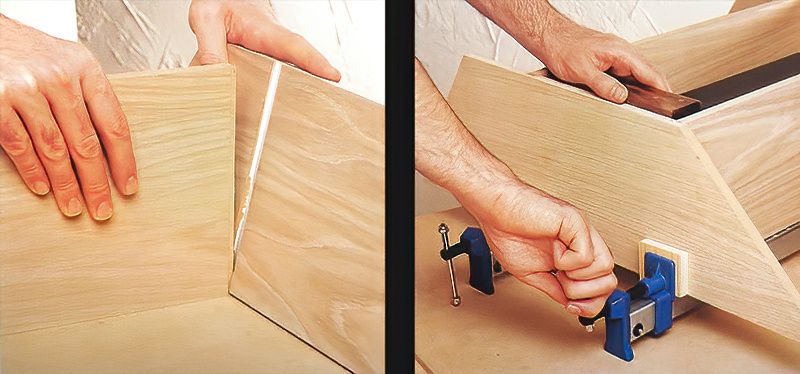
Now, you will need to apply the PVA wood glue to the housings and slot the unit together. Try to use the glue sparingly as any excess glue will need to be removed completely to avoid future discolouration to the veneer. Wipe of any excess using a soft damp cloth white avoiding rubbing glue into the wood grain.
Step 6
Now, hold the wall hung bookshelf assembly together using some sash clamps. These will hold it steady while pinning the wooden shelves into place. Small panel pins are the ideal choice for a small wooden shelf unit. Ensure that all of the corners match up properly and leave it to set overnight. You can use small scraps of wood under the clamps to protect the veneer.
Adding Mouldings To A Wooden Bookshelf
Step 7
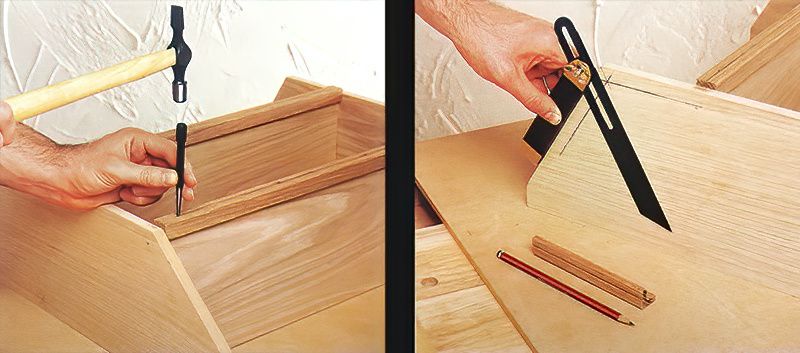
Now it is time to cut the moulding, so cut two lengths of angled moulding to make a trim for the front edges of the wall hung bookshelf. The moulding used and shown here has a small shadow line running along its length that is used to conceal the heads of the panel pins when punched down with a nail set.
Step 8
Then use the same moulding to trim the end panels. Then mitre the ends at the corners using a small tenon saw or an adjustable mitre saw. To make sure that you have the correct angle for the mitred corners, place a small short section of moulding in position and mark it with pencil lines on the end panel and parallel to the front edges. Then draw a pencil line from the corner to the intersection point to form the exact angle. Then you are able to use this as a guide to set an adjustable bevel gauge.
Finishing The Wooden Wall Hung Bookshelf
Step 9
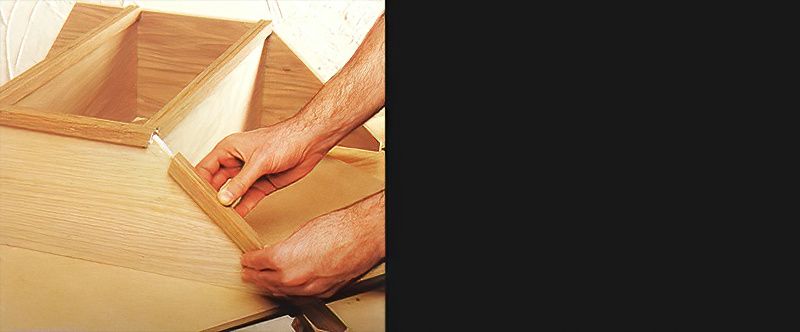
Now, apply some PVA wood glue to the front edges of the end panels and pin the moulding into place. Again ensuring that you use minimal amounts of glue to avoid any excess ruining the veneer when the pins are punched in with a nail set. Once the glue has completely dried, apply a coloured stopping to each pin hole using a small spatula or modelling tool. Then you can sand it down for finishing. Now you have a lovely wooden wall hung bookshelf for your home.

