This Rustic Gift Box Is Very Special
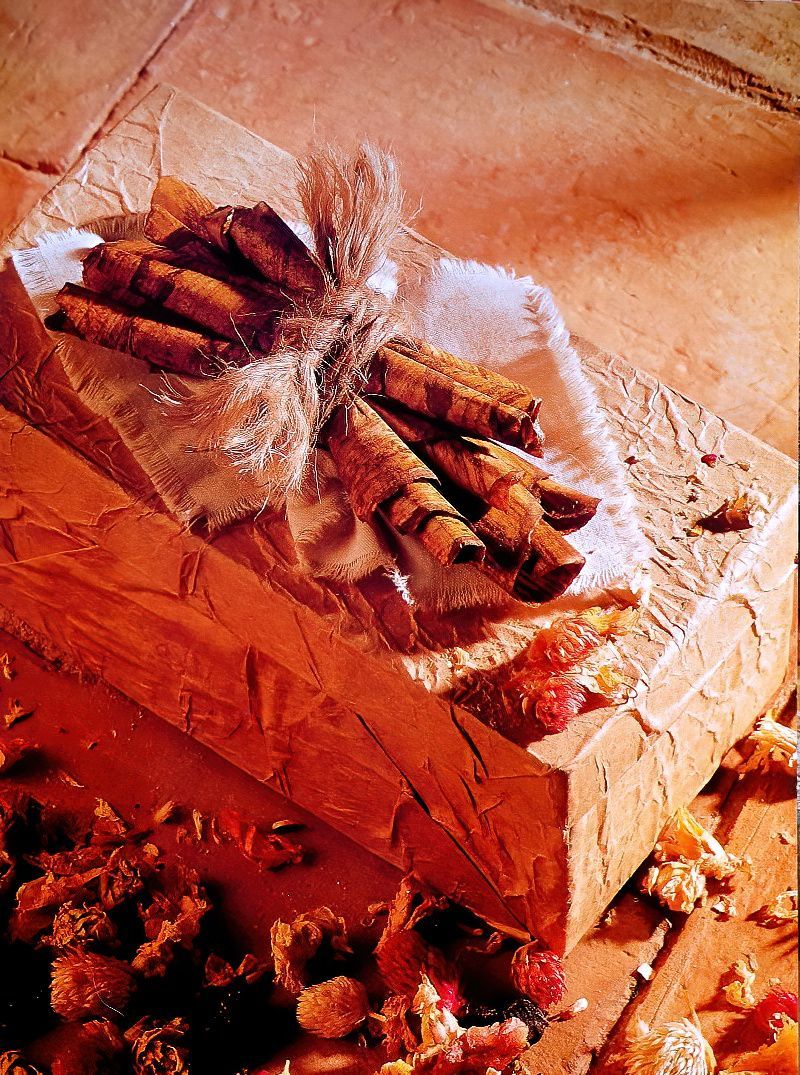
This rustic gift box is a really beautiful way to wrap a gift. This is one of my favourite ways to wrap a gift. All you need is a shoe box and some basic craft materials to create something really lovely to place a gift inside.
I know it is very early to think about it. But I am thinking of wrapping a lot of Christmas presents like this for Christmas 2023. I may add some sprigs of berries or pinecones, etc, to make the rustic gift box a little more festive. You can add any decorations and embellishments that you wish, to personalise your handmade gift boxes.
Stuff You Need
Materials
- Shoe Box
- Cream Emulsion Paint
- Brown Parcel Wrapping Paper
- Wallpaper Paste
- PVA Glue
- Thick White Paper
- Wood Stain
- Thick Coarse String
- 10cm X 10cm Square of Calico Fabric
- Clips or Pegs
Equipment
- Small Decorators Paintbrush
- Large Artists Paintbrushes
- Scissors
- Container for PVA Glue
- Glue Gun
- Glue Sticks
Covering And Wrapping A Shoe Box
Stage 1
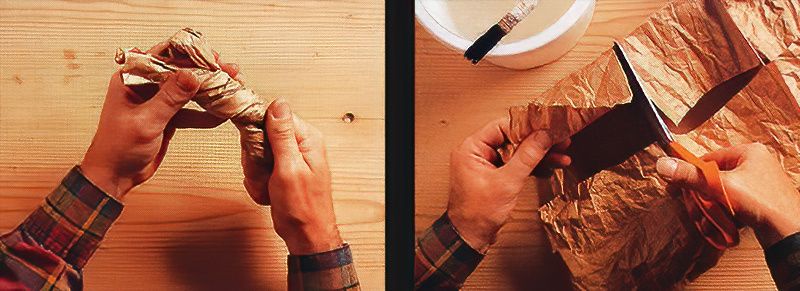
Begin, by painting the shoe box in cream coloured emulsion paint until any lettering or printed designs are completely covered, this might take a few coats of paint. Then leave it to dry thoroughly. Next, roll up and crumple some brown paper, keep folding it, twisting it and screwing it up until it is as small as possible. Then unscrew and open it out. This will create a really rustic effect to the brown paper.
Stage 2
Now, apply a coating of wallpaper paste to the box, and place the box in the middle of the brown paper. Then fold the brown paper around the box, pressing it onto the surface, but not smoothing it out too much, as this will help create the rustic effect for the rustic gift box. Move the paper around the edges and cut around it. Make sure that the edges are stuck well to the wallpaper paste.
Wrapping The Ends Of A Box With Brown Paper
Stage 3
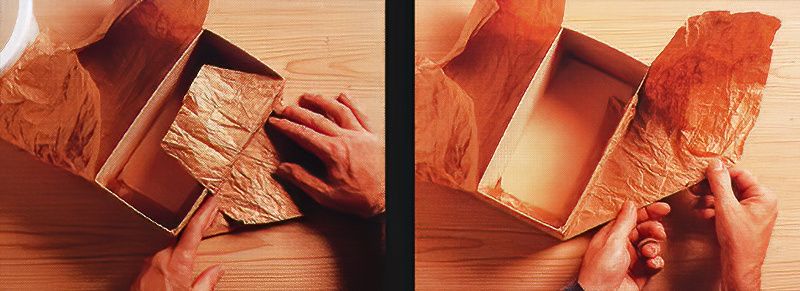
To fold the brown paper around the sides of the rustic gift box, do one end at a time, pasting one on top of the other to make two large triangle shapes at the end.
Stage 4
Then fold the triangle shapes over the sides, and paste them to the inside of the box.
Making A Bark Effect
Stage 5
Then to neaten up the insides of the box, cut a piece of brown paper to perfectly fit the inside base of the box, and paste it over the wrapped paper edges.
Stage 6
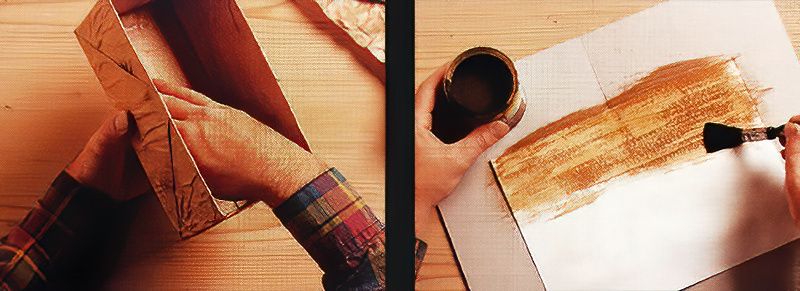
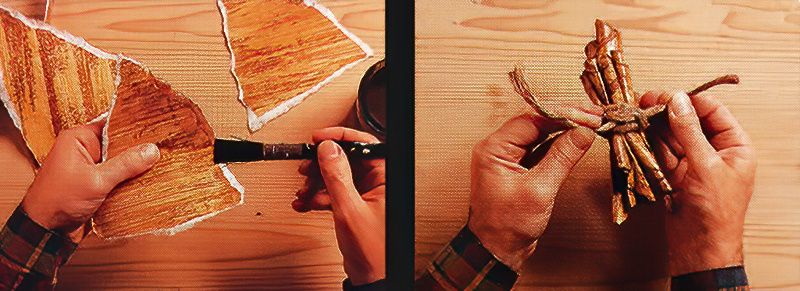
Next, using a dry brush, paint a streaky coating of undiluted PVA glue on to the white paper, leaving some of the areas as just paper. Leave it to dry thoroughly. Once dry, brush some wood stain on top of it to create bark like effect.
Making A Bark Effect Bundle
Stage 7
Again, once dry, tear the bark effect paper into rough triangular shapes. By tearing at the right angle, the paper will rip to reveal white paper edges. It is best to paint these edges with wood stain so that they blend in well.
Stage 8
Now, roll up the paper triangles starting with the widest part and rolling them towards the point. Then bundle these strips together using string and tie it with a reef knot. Then separate the strands of string so that they fray out from the knot.
Decorating A Rustic Gift Box
Stage 9
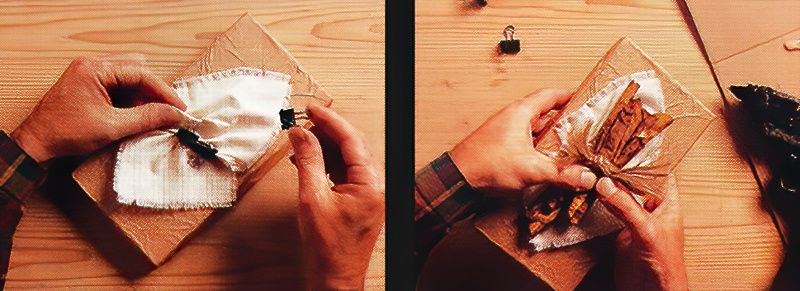
Now to start decorating the rustic gift box. Fray the edges of the calico fabric, then scrunch it up in the middle, use pegs or clips to hold the shape in place. Then use the hot glue gun to apply glue to the folds and scrunches. And press the calico on to the middle of the box lid.
Stage 10
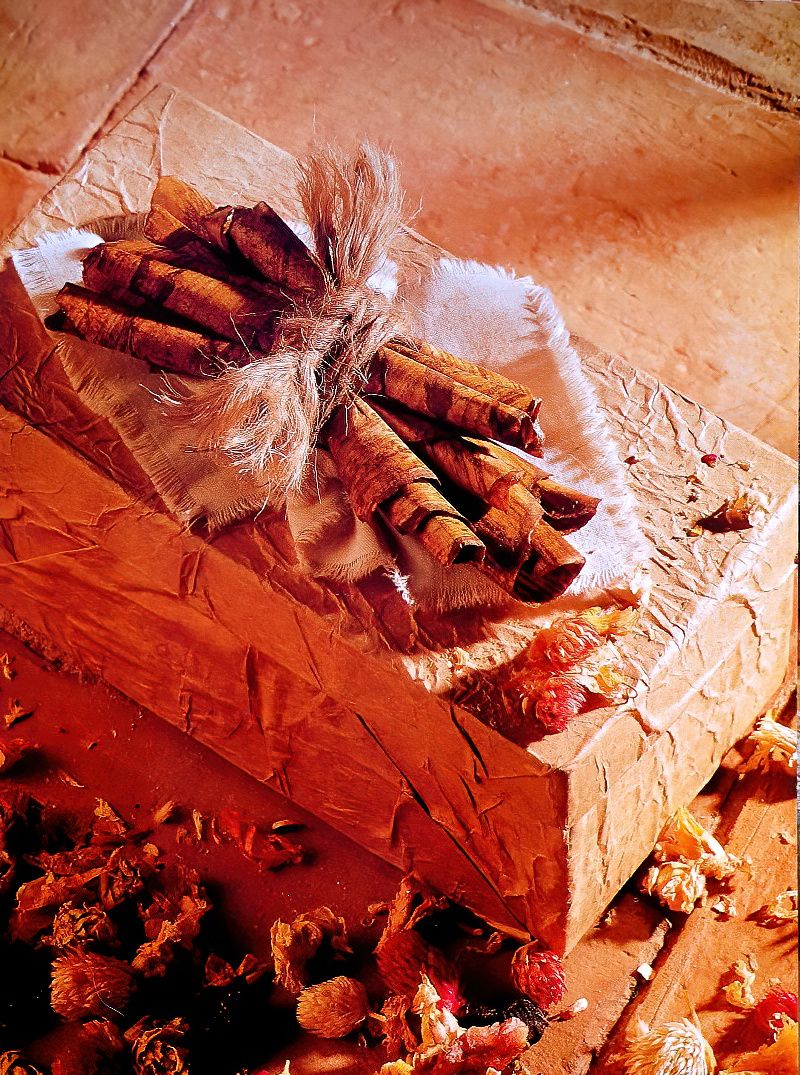
Now you can remove the pegs or clips from the calico and add more hot glue. And finally press the bark effect bundle on top of the calico to create a finished rustic gift box.

