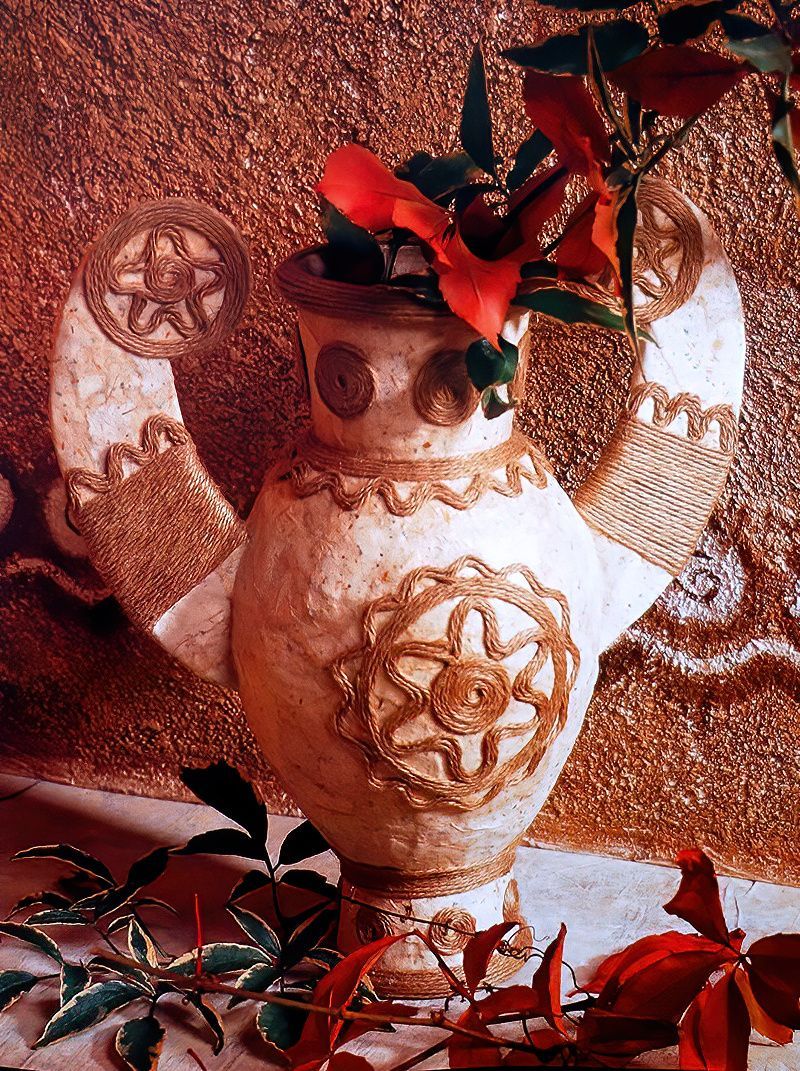
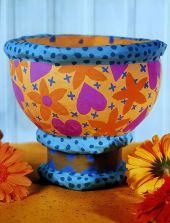
Add A Rustic Charm To Your Interior With This Papier Mache Greek Vase
This papier mache Greek vase is so much fun to make, and makes a really lovely decorative piece for your home. Or they can be made as nice gifts with faux flowers in.
And all you need is a few basic craft materials to make it. However you can decorate it further if you wish to, with different embellishments, you could even add some extra colour if you want to.
To Make This Papier Mache Greek Vase You Will Need
Materials
- Balloon
- Newspaper
- PVA Glue
- Tracing Paper
- Heavy Corrugated Cardboard
- Thick Cotton Cord
- 1 Large Pot (Container)
- 1 Medium Pot (Container)
- Masking Tape
- Strong Clear Glue
- Decorative Recycled Paper
- Natural Twine
Equipment
- Small Bowl
- Container for PVA Glue
- Pencil
- Craft Knife
- Cutting Mat
- Small Decorators Paint Brush
- Scissors
- Fine Grade Sandpaper
Making A Papier Mache Greek Vase
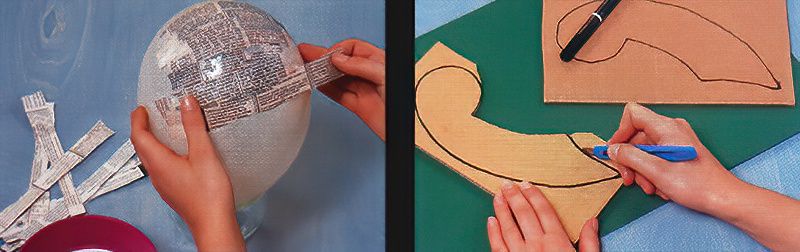
Step 1
To start getting the basic shape for your Greek vase design, blow up a balloon and rest it on a small bowl. Then tear the newspaper into 2.5cm wide strips and coat them in diluted PVA glue. Then cover the balloon with five layers of papier mache, and leave it to dry thoroughly. This could take a little time.
Step 2
Next Find a template for some handles, and trace them. Transfer the shapes twice onto corrugated cardboard. Then cut the handles out using a craft knife and cutting mat. And then brush over the handles with diluted PVA glue to seal them. And again, leave to dry.
Making The Top And Bottom Of The Greek Vase
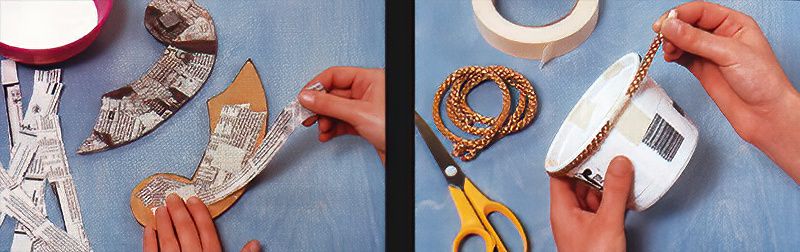
Step 3
Next, cover the handles with four layers of papier mache, making sure that you neatly work the newspaper strips over the edges to keep the handle shapes well defined. And then leave to dry once again.
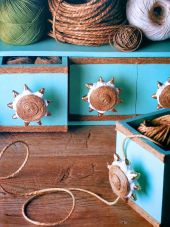
Step 4
Now, cut a length of the cotton cord to fit around the top of each of the yogurt pots. And use the tape to hold the cotton cord in place. This will make the top and bottom more prominent and stand out on the neck and foot of the Greek Vase.
Joining The Papier Mache Greek Vase Pieces
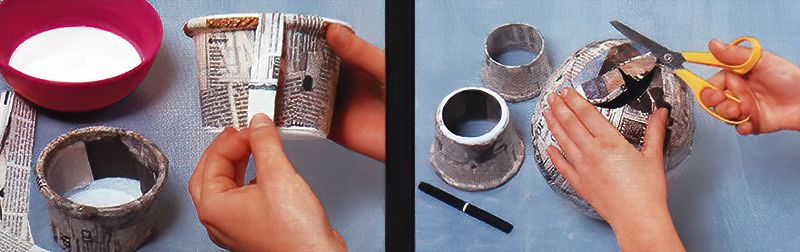
Step 5
Next, using some narrow strips of newspaper, add five layers of papier mache to both of the yogurt pots, and leave them to dry overnight. Once completely dry, cut the bases off of the yogurt pots.
Step 6
Now, burst the balloon, and take it out of the papier mache shape. Then position the larger yogurt pot on top of the wider end of the balloon shape. Then draw around the inside of the yogurt pot container and cut it out.
Covering A Vase With Recycled Paper
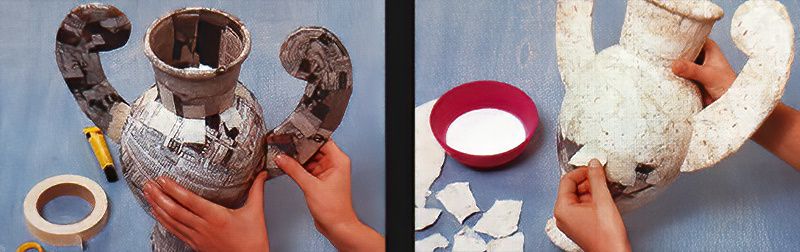
Step 7
Now for the other end of the papier mache Greek vase. Place the narrow end of the balloon shape onto the smaller yogurt pot, and glue and tape it into position. Then attach the larger yogurt pot to the top of the Greek vase in the same way. And then add the two handles.
Step 8
Once your Greek vase is all put together, cover all of the joins and seams with three more layers of papier mache. Then leave it overnight to dry. Next, tear the recycled paper into small strips, and coat them in the diluted PVA glue mixture.
Make sure that you cover the whole vase completely with a layer of the recycled paper papier mache. And again, leave to dry thoroughly.
Decorating A Papier Mache Greek Vase
Step 9
Almost time for the decoration. Use sandpaper to gently smooth over the surface of the vase. Then lightly draw some pencil guidelines ready for the twine decoration. It is best to rest the vase on a small bowl for this.
Paint undiluted PVA glue onto each of the areas where you would like to place your twine. Then apply the twine by coiling it over the guidelines that you just made. Now you have a beautiful Greek inspired vase.


.jpg)


.jpg)