Building Rockets Is Super Fun
Making your own toys is fantastically rewarding. And then you can go on a real adventure across your living room or around your bedroom.
Making up fun stories is really rewarding.
What is better than going to the moon in your own rocket ship, you have made yourself? So get ready to blast off and let's make a rocket ship.
What do we need to build a rocket ship?
- Plastic bottle
- Tin foil or aluminium foil
- Foil sweet wrappers
- Glue stick
- 3 toilet roll cardboard tubes
- Thick paper or thin card
- Sticky tape
- Scissors
Make A Homemade Rocket Ship
Step One
So to start making our super dooper rocket ship, we need to take our plastic bottle. Ask an adult to help you cut off the base of the plastic bottle.
We need a flat bottom to the bottle. The best way to cut it off is to poke the scissors through the bottle at the bottom and cut around. Please ask an adult to help with this step.
Now we can decorate, hooray!
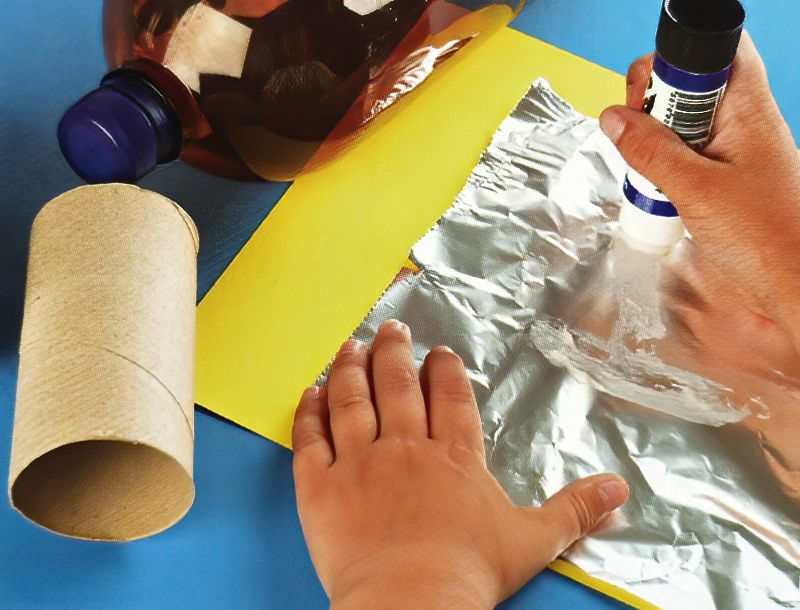
Use the glue stick to stick tin foil or aluminium foil all over the bottle. You can also stick the sweet wrappers on or anything else you like. It is your rocket ship, you decorate it the way you want.
Use Tin Foil To Make The Metal Of Our Homemade Rocket
Step Two
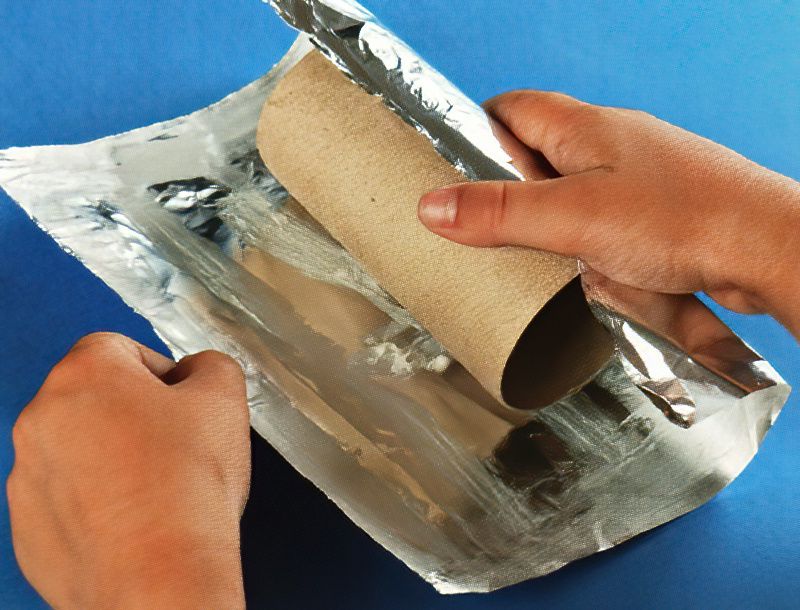
Now we can cover the cardboard tubes with the tin foil too. So cut out a piece of tin foil larger than the cardboard tube. Use the glue stick to cover it in glue. Then carefully wrap the tin foil around the tube. Tuck in the tin foil that overlaps at the ends.
Repeat for the other 2 tubes. We need 3 boosters in total.
Don't worry, there is no wrong way of doing this. If you need more tin foil, just glue some more on. It's important to have fun when you build a rocket ship.
Making The Cardboard Rocket Boosters
Step Three
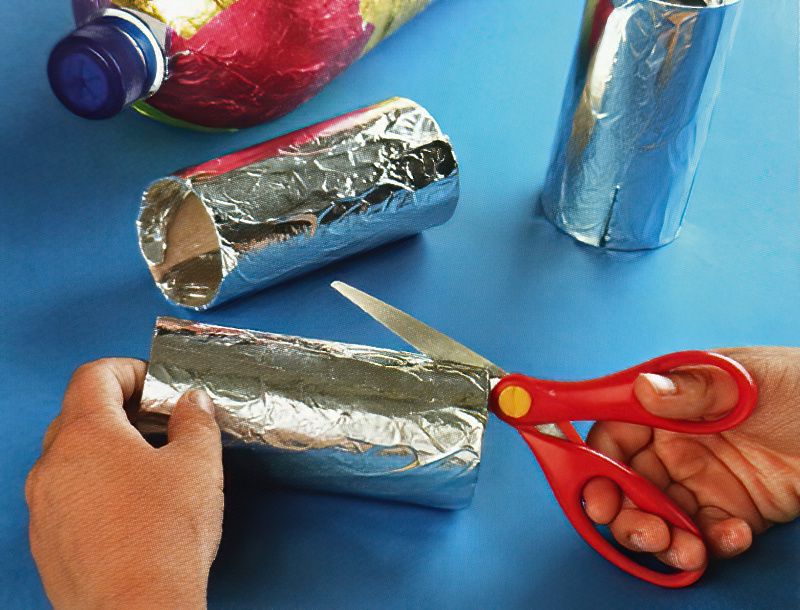
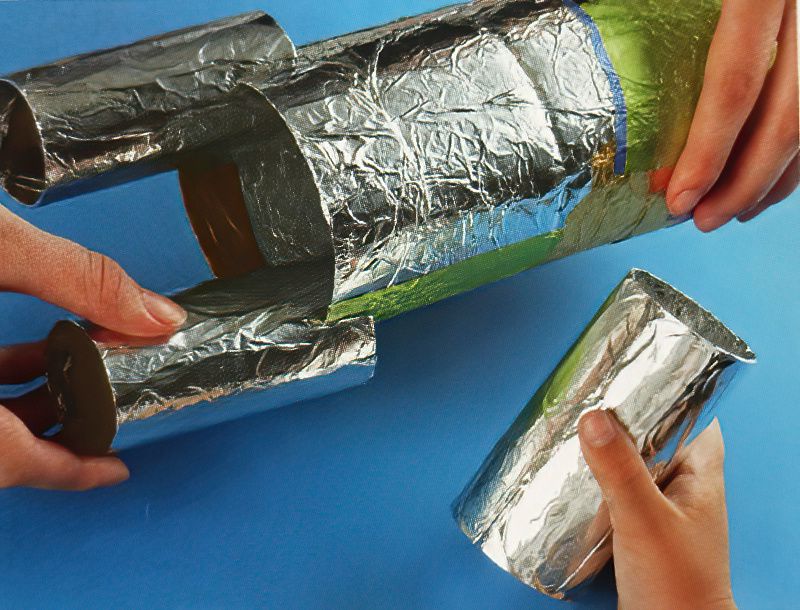
Now we need to snip some slits into our tin foil covered paper tubes. Cut a slot about 3cms long or 1 and one quarter inches long.
Then snip another slot on the other side the same length.
Repeat on the other boosters.
Being Assembling The Cardboard Rocket
Step Four
Now we can slot the boosters on to the rocket bottle bottom. Push the plastic bottle bottom into the slots of each booster.
Make sure the boosters are evenly spread around the base of the rocket. Unless you want a wonky rocket, which could be fun too.
Continue to build a rocket ship. You are becoming a master engineer.
Make The Top Of The Homemade Rocket
Step Five
Now we can finish off our homemade rocket spaceship.
You can now decorate the rocket with paper shapes. Cut out some stars or windows or anything you like and use the glue stick to glue them to the rocket. Use felt tip pens to add more details to the paper you have just stuck on.
If you have any stickers you could add them too.
Finally we need to make the nose cone.
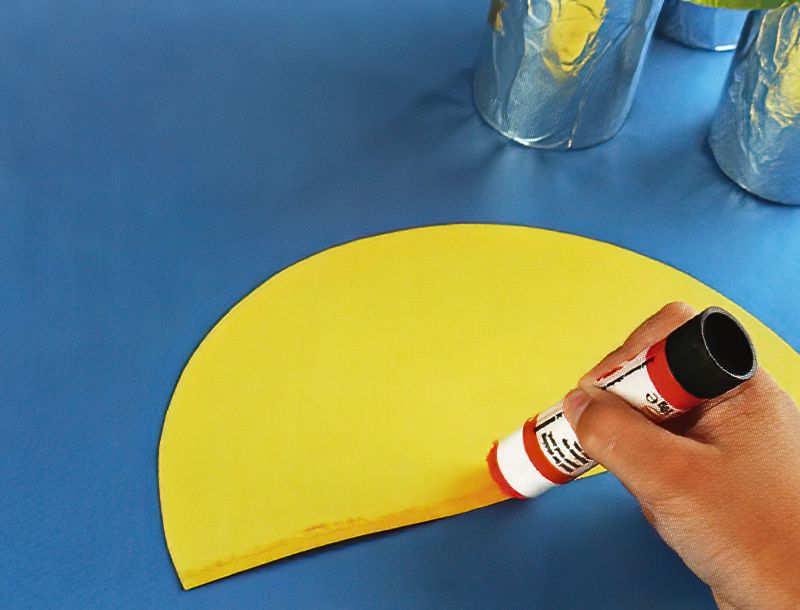
Cut out a circle of thick paper or card. Use a plate to draw around. Then cut the circle in half to make a semi circle. Keep the other half for your next rocket.
Now apply glue on one straight edge of the semi circle and wrap it around to stick it to itself. Now you just need to glue it to the top of the rocket.
And WOOOOOOOSSSSSSHHHH!!!
You are ready for a blast off!
Have fun making rockets. And now you know how, you can build a rocket ship in all sizes and shapes, and for all sort of adventures.









.jpg)
















.jpg)
