Papier Mache Doors
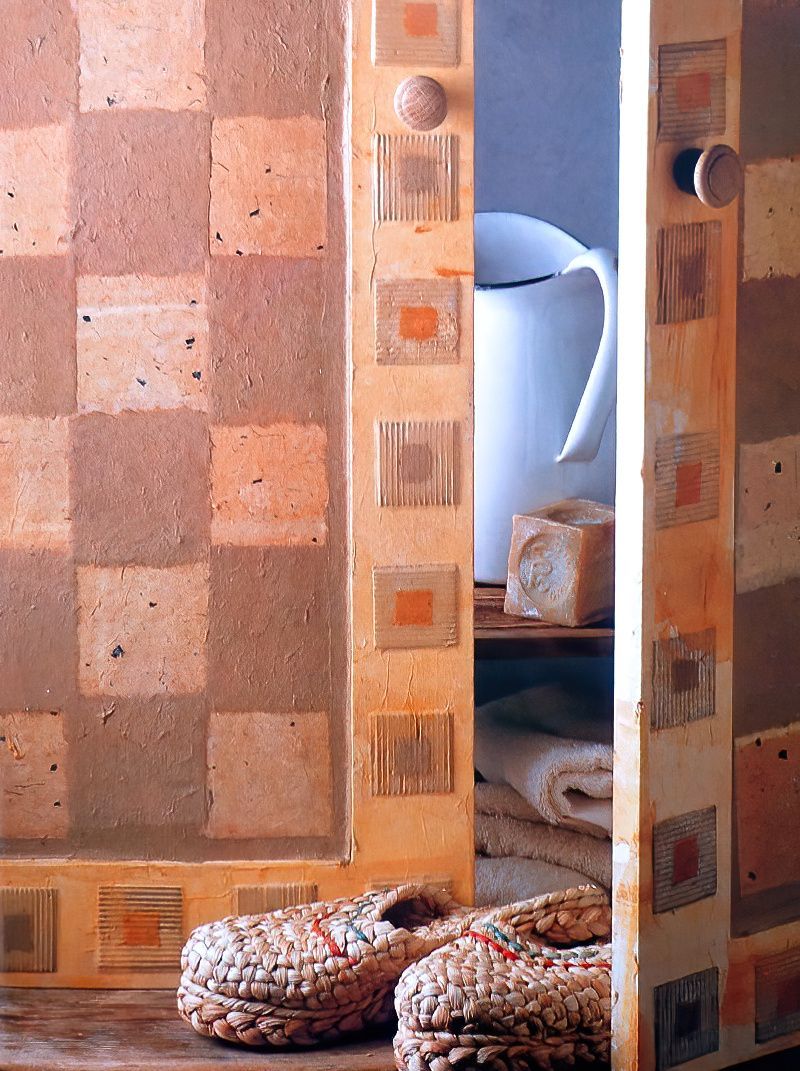
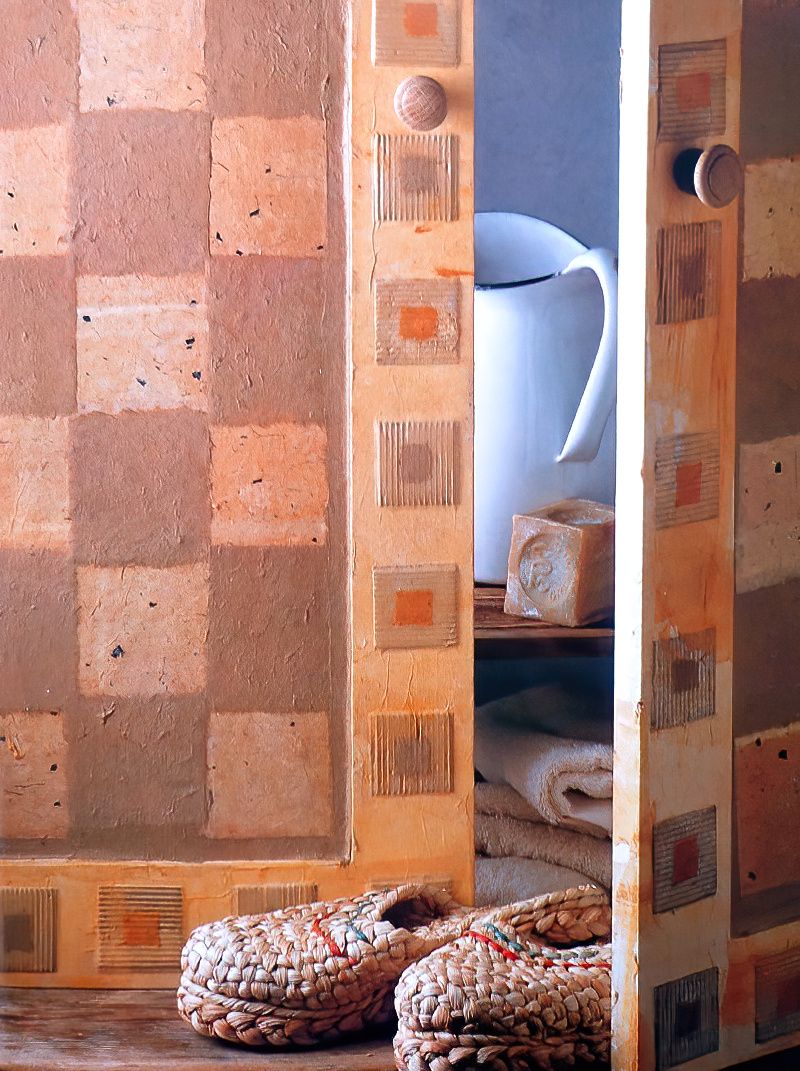
It is fun to make a dull bathroom cabinet more interesting by making some decorative checked doors. Obviously you can choose any design that you wish, but here are just some tips on how to make checked effect papier mache doors using naturally coloured papers.
Again, if you prefer to, you can use brighter colours for yours. Once you have used a selection of different papers, you will need to varnish the whole thing to give it a protective coating. Just follow these 8 simple steps if you would like to make your own decorative checked doors.
To Make Papier Mache Doors You Will Need
Materials
- Water Based Acrylic Wood Primer
- White Tissue Paper
- PVA Glue
- Handmade Papers in 2 Colours
- Sheet of Japanese Tissue Paper
- Thin Corrugated Cardboard
- Coloured Tissue Paper
- Matt Oil Varnish
- White Spirit
Equipment
- Fine Grade Sandpaper
- Small and Medium Decorators Paint Brushes
- Container for PVA Glue
- Scissors
- Thin Rubber Gloves
- Metal Ruler
Preparing And Priming The Wooden Doors
Step 1
Start by lightly sanding the front and the sides of the cupboard doors that you would like to decorate. Then apply a coating of acrylic wood primer to the doors, and leave it to dry thoroughly.
Step 2
Then tear off pieces of plain white tissue paper and apply one tissue paper layer to the front of the doors using diluted PVA glue. And again, leave this to dry thoroughly. This will form the base for your checked papier mache doors.
Making The Decorative Checked Design
Step 3
Now you will need to measure the inner recess of the door. Then use a metal ruler to tear large squares of the two coloured handmade papers. Make sure that you tear them the correct size to fit the area in a checked pattern. Put the darker coloured squares to one side for now.
Step 4
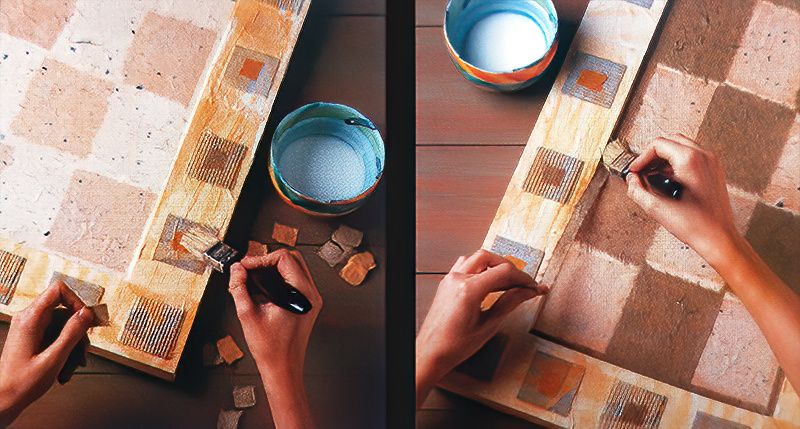
Then use the diluted PVA glue mixture to attach the first coloured squares to the front of the door in a checked pattern. Then tear a piece of Japanese paper the same size as the inner section of the checked doors, and glue it over the top of the first coloured squares to lighten the colour slightly.
Decorating The Cupboard Door Border
Step 5
Now, cut some squares out from the cardboard and glue them around the door frame with undiluted PVA glue. This will create a low relief border. Feel free to use any design as you wish.
Step 6
Next, tear off irregular shaped strips of coloured tissue paper and glue them over the cardboard squares around the border. Use diluted PVA glue to do this. This is the start of our papier mache doors.
Finishing The Decorative Checked Papier Mache Doors
Step 7
Now, tear of some squares of the two colours of handmade paper. Then use diluted PVA glue to stick them to the centres of each cardboard square around the border, alternating the two colours as you go around.
Step 8
Next get the large darker coloured homemade squares of paper. Then glue them in between the first coloured squares on the inner panel of the door recess. Then tear long thin pieces of the same paper and glue them around the inside edge of the recess which will cover the edges of the squares. Then leave this to dry thoroughly.
Once dry, put on some thin rubber gloves. Dilute two parts of the matt oil varnish with one part of the white spirit. Do this in a very well ventilated area. Seal the whole thing with two coatings of the mixture. Now you have some lovely decorative checked doors for your cabinet.
Decorative Papier Mache Doors Conclusion
I find this project really quite amazing. The ability to turn some doors, that are frankly boring, into something quite interesting. Once you know the principles, you can really let your imagination run wild and create a very unique and exciting interior to your home.



.jpg)
