Make A Fun Little Display Case For Your Toys
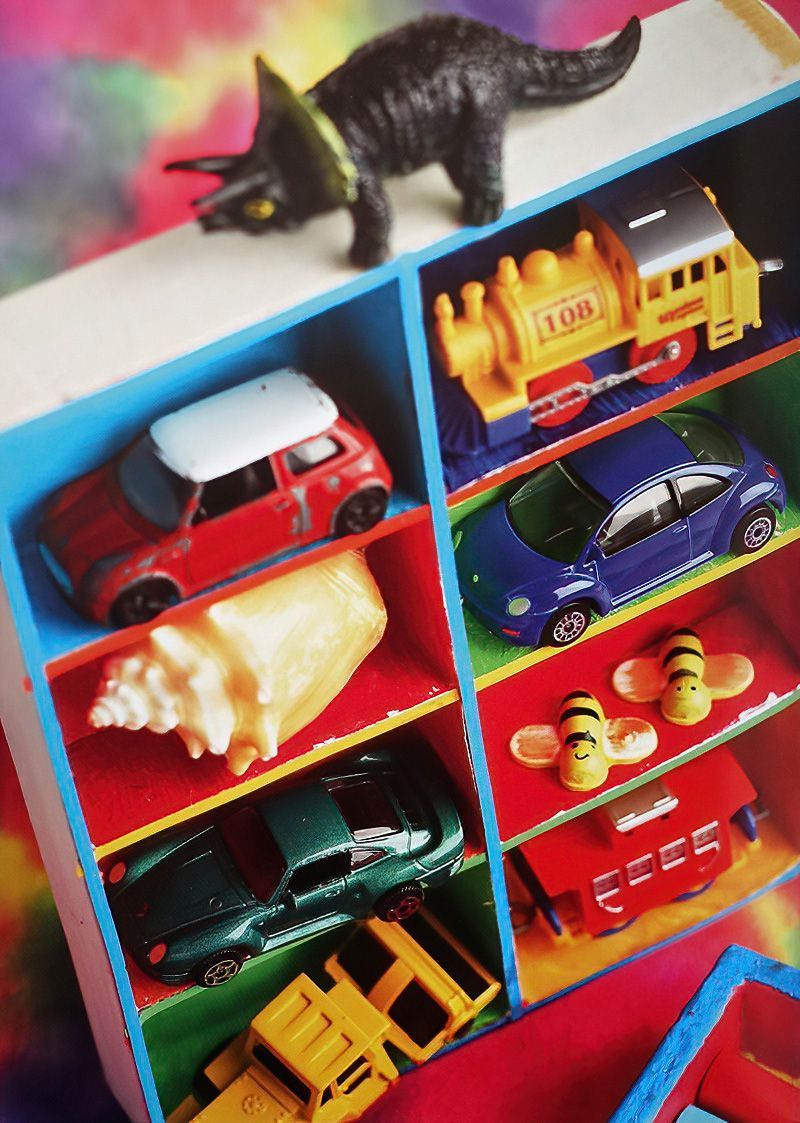
These little display cases are a lot easier to make than you might think. Most of the work is already done for us, so all we need to do is the decorating. Which is always a super fun part when you make a cheap display case.
Use them to show off your toys. Or keep your collections together. Or make them as a gift for friend who likes to collect things.
What do we need to make a cheap display case?
- A box lid
- Cardboard
- PVA glue
- Paints
- Coloured paper
- Ruler
- Pencil
- Scissors
Start Making The Cheap Display Case With Cardboard
Step One
So to make a cheap display case we start with a box lid. So find a nice box lid, like a shoe box or other similar box lid.
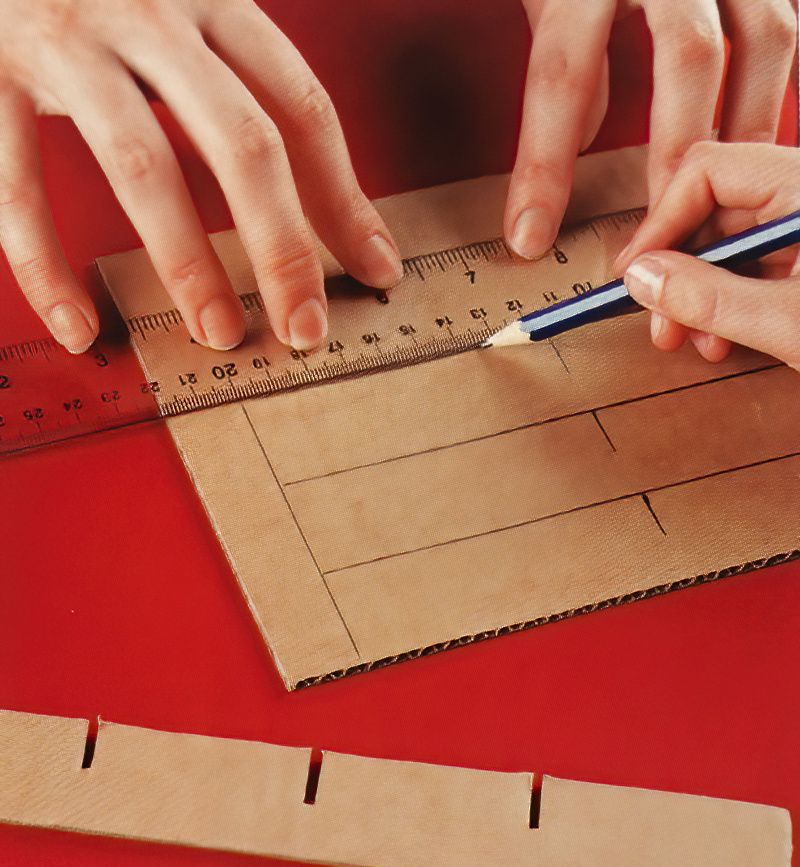
Now we are going to make dividers inside the box lid. Lay down your box lid and use your ruler to measure:
- the inside width of the box, this will be our strip length
- the depth of the box lid, this will be our strip width
Mark out three strips on some other cardboard with the above dimensions.
Then we need one more strip going the other way. So measure:
- the inside length of the box, this will be our last strip length
- the depth of the box lid again, this will be our strip width again
Mark out the last longer strip on a piece of cardboard.
Make The Dividers For The Display Case
Step Two
Cut out all your strips of cardboard. You should have:
- three shorter strips
- one long strip
Now we need to cut notches in the strips so we can slot them all together.
FOR THE SHORTER STRIPS
Cut notched in the centre of each of the shorter strips. Only cut the notch halfway through the strip. Make the notch the same width as the thickness of the cardboard.
FOR THE LONGER STRIP
Cut the same notch in the centre of the longest strip. Then cut another notch on either side of the central slot, again in the centre.
So we will have three slots on the longest strip.
Glue The Display Case Dividers
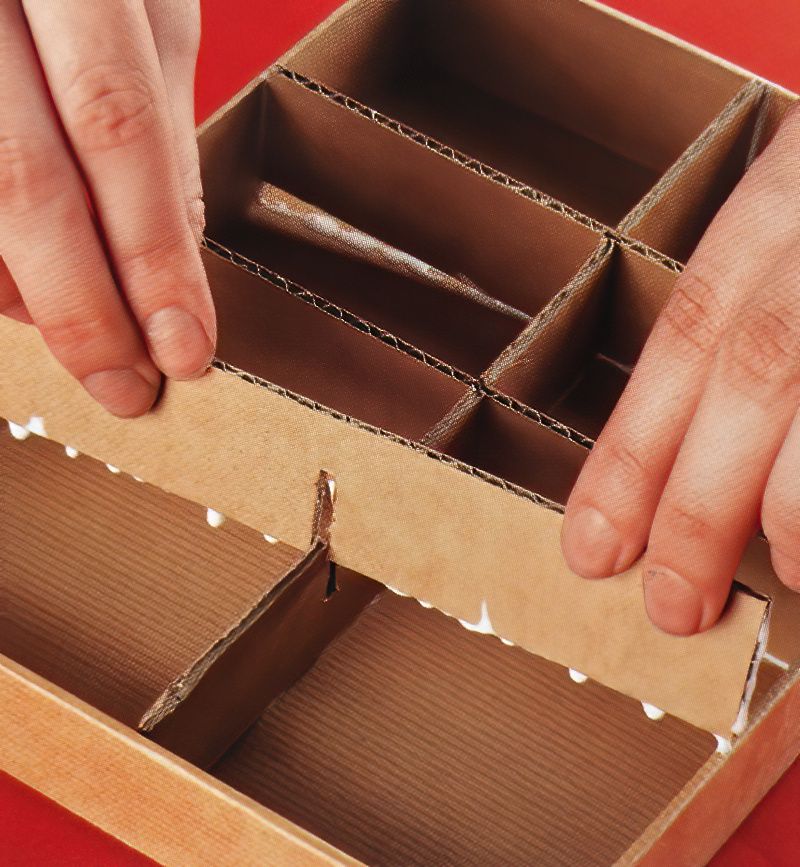
It is best to test fit all the pieces together before you glue. So slot all the pieces together and put them inside the box lid.
If you need to make any adjustments, you can do it now. Pull the pieces apart and trim any pieces to make them fit nicely.
Once you are happy that it will fit ok. Take your PVA glue and glue in the first longest strip with the notches facing up. Then glue in the other dividers, making sure the slots fit together.
Start Painting Your Cheap Display Case
Step Three
Once the glue has dried we can start painting.
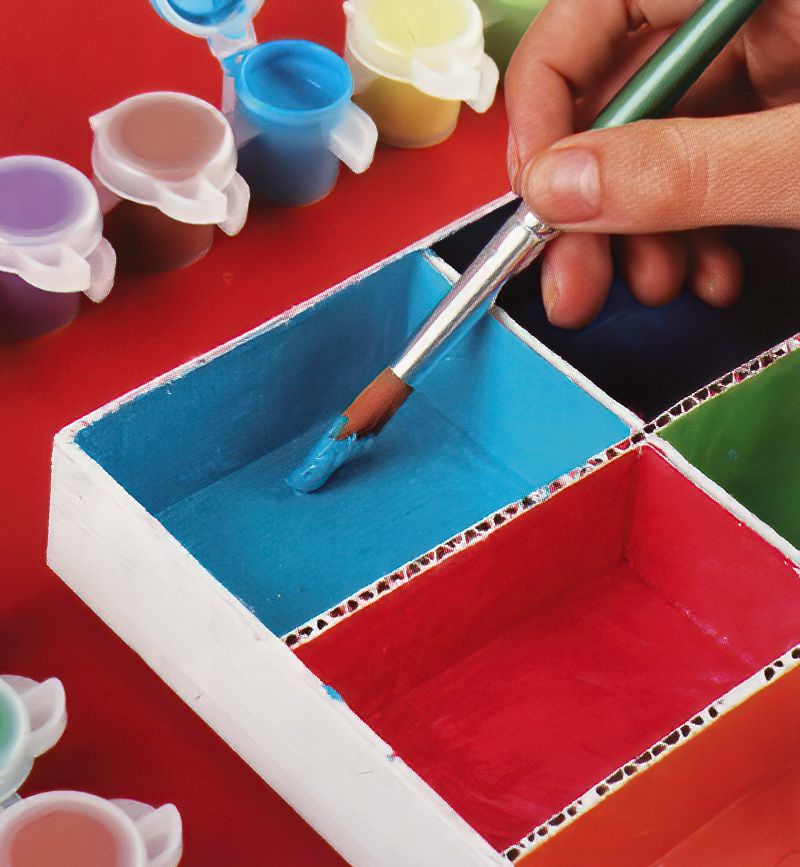
When you make a cheap display case, it is best to paint the box white all over first. The reason we do this is because when we paint colours, they will be brighter, because they are painted on white. But it is ok, it is your box, you paint it how you like.
Once the white layer is dried, we can paint the colours in the different sections of the display case.
Finish Making Our Cheap Display Case For Kids
Step Four
The last stage to make a cheap display case, is to cover the ugly cardboard edges.
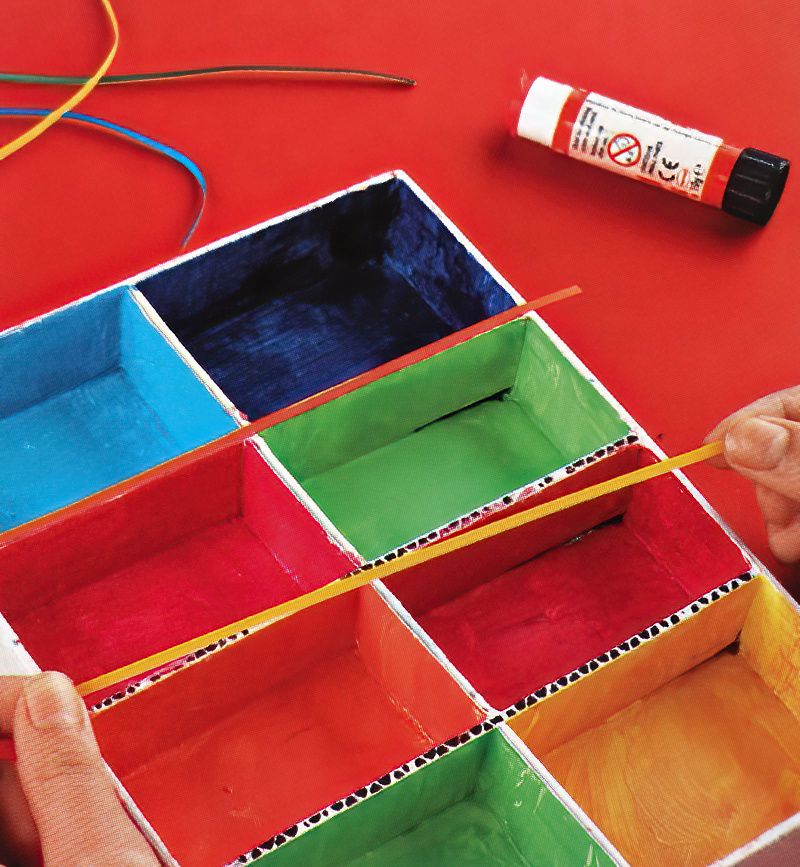
So first, wait for the paint to completely dry. Then cut strips of coloured paper that are the same width as the width of the cardboard dividers.
Then use more glue to stick the coloured paper strips over the top of the cardboard divider edges. This will make a nice neat look when you make a cheap display case.
And there you go, fantastic!
Now we can start a little collection of whatever you like. And we have a fun and cheap way to show them off to our friends or family.




.jpg)


