How To Make A Papier Mache Memories Keepsake Box
Making Papier Mache Memories Keepsake Box is Fun
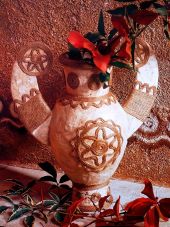
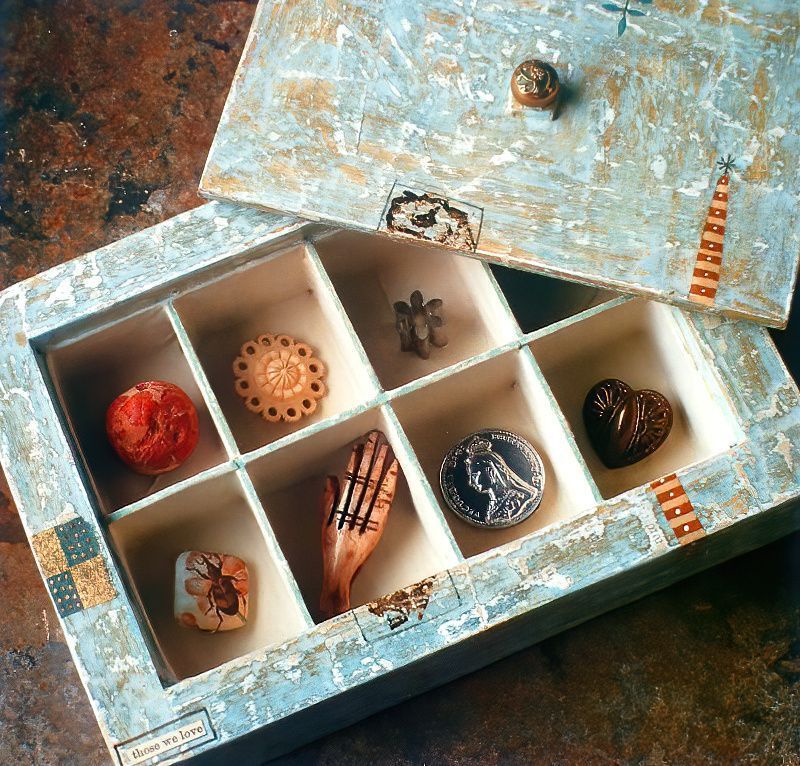
I loved making this papier mache memories keepsake box to keep all of my special things in. It is a beautiful memory box that is really quite simple to make. As long as you remember to take accurate measurements and cut precisely, it will all fit together properly.
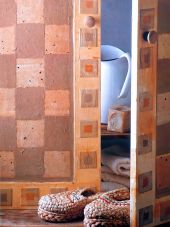
I love using papier mache to create beautiful things. You can decorate it in any way that you want using whatever embellishments you want. I made my memory keepsake box with an aged vintage look, by laying coats of paint. Overlaying them and rubbing them back to create an almost antiqued look. Then added a few collaged papers to add some additional detail.
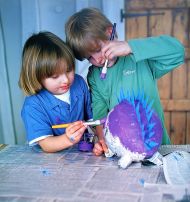
This papier mache menories keepsake box is perfect for your memories and to give as gifts. My two girls are making these for their grandparents. And would like to put some of their special things inside to give to them. I love getting the children involved in making memories that will last for a long time. Hopefully one day they will teach their children.
To Make This Papier Mache Memories Keepsake Box You Will Need
Materials
- A2 Mount Board
- PVA Glue
- Masking Table
- Newspaper
- Wallpaper Paste
- White Emulsion Paint
- Gouache Paints or Acrylic Paints
- Scraps of Decorative Paper
- Matt Acrylic Varnish
- Decorative Button
Equipment
- Metal Ruler
- Set Square
- Pencil
- Craft Knife
- Cutting Mat
- Containers for Glue and Paste
- Brush for Glue
- Artists Paint Brushes Medium and Small
- Fine Grade Sandpaper
- Container for Mixing Paint
Always Remember To Measure Twice And Cut Once
Step 1
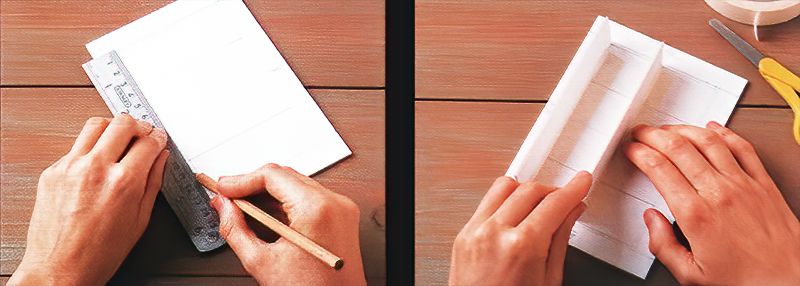
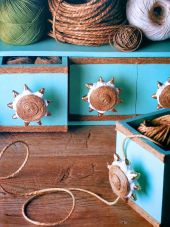
To create the base of the box, first cut two pieces of mount board 11.5cm X 16.5cm, and glue the together to make a strong base for your papier mache memories keepsake box. Next, use a pencil and metal ruler to measure out and mark the positions for the walls of the box and compartments. As seen in the pictures above.
Draw a rectangle 1.5cm in all around the edges of the base. Draw another rectangle 2mm in from the last rectangle all the way around. Then divide this rectangle into eight equal sections to create the inner compartments of the papier mache memory box.
Step 2
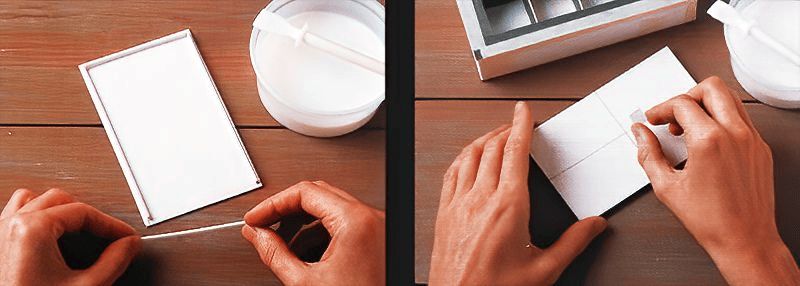
Next, to make the diving walls for the inner section, cut three strips of mount board measuring 13.5cm X 2.5cm. Then glue and tape one strip along the centre of the box base. And then glue and tape the other two strips along the edges of the inner rectangle. Cut two more smaller strips for the two ends of the inner rectangle measuring 10.5cm X 2.5cm.

Making The Dividing Sections For The Papier Mache Memories Keepsake Box
Step 3
Now cut four strips of mount board to 3cm wide to fit around the outside walls of the outer rectangle. Then glue and tape tree of the strips into position, like before. Now to create the inner compartments by measuring and cutting eight smaller strips 2.5cm wide. Then glue and tape those into position in the inner rectangle.
This should give you eight equally sized compartments. Then glue the remaining end pieces in place at the side of the box to close the inner rectangle.
Step 4
Next, cut four 3cm wide strips of mount board to create the outer walls of the base for the keepsake memory box. Again, glue and tape these into position as before. Cut four more strips of mount board to cover the space between the compartments and the outer box wall. Then glue and tape those into place also.
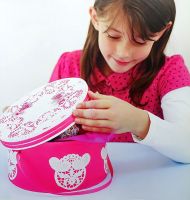
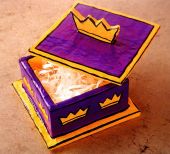
The Decorative Box Needs A Lid To Keep Memories Safe
Step 5
It is now time to make the memory box lid. Cut out two more rectangles of mount board measuring 3mm smaller than the opening for the top of the box. Then glue these rectangles together to strengthen the mount board.
Next draw a line around the lid 2mm in from the edges. Now cut four 3mm pieces of mount board to fit inside the pencil line that you drew and glue them in position to create a lip for the memory keepsake box lid.
Step 6
With a pencil and a ruler, divide the top of the papier mache memories keepsake box lid into four equal sections to find the centre point. Now cut a small rectangle of mount board to create a ledge for the decorative button to sit on to make the boxes handle.
If the button has a shank on the back of it, cut a small notch into the small rectangle to hold the button flatter.
Now For The Messy Part Of Making Our Box
Step 7
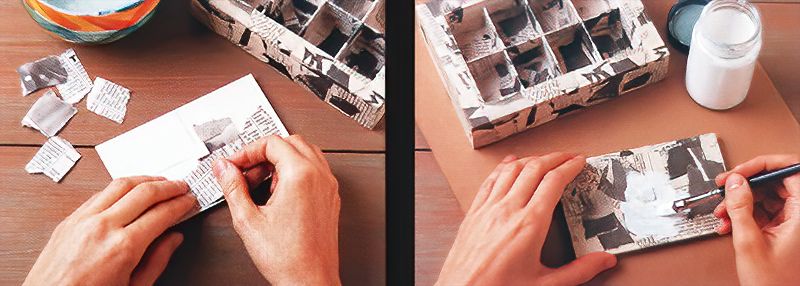
For the next part, you will be needing the newspaper and paste to make papier mache. Tear the newspaper into small pieces around 2.5cm square. Then dip the pieces into the paste and stick them onto your keepsake box.
Make sure that you cover the entire box including the lid with papier mache. I would recommend pasting two layers of newspaper onto the box, ensuring that it is put on as smoothly as possible. Then leave the whole box to dry thoroughly.
Step 8
We are almost ready for decoration. You need to now prime the papier mache box and the lid with white emulsion paint. Once it is dry, apply a coat of paint in choice of colour. I have chosen a turquoise paint, mixed from gouache paints with white emulsion added. Then follow this same method with a coating of a lighter colour shade of whichever colour you have chosen. I went with a lighter blue/green paint colour.
Then you can select another colour, I chose a warm ochre colour. To get the vintage aged effect, I did this method using a dry brush technique and leaving each coat to dry thoroughly. And then lightly sanding the surface between coats. Obviously, if you prefer, you can paint your box a solid colour, metallic colour, or anything that you can think of.

Decorating Your Papier Mache Memories Keepsake Box
Step 9
Finally you need to stick the scraps of decorative paper onto the surfaces of the box and lid of the keepsake box. Also, you can sketch decorative patterns and designs on faintly if you wish. Then paint them using the gouache paints.
Next, when both the box and lid are completely dry, seal the whole thing using a coat of acrylic varnish. Then leave to dry again. To complete the project, glue the decorative button into position on the top of the lid to create a handle.
Now you have a beautiful papier mache memories keepsake box for your special memories or to give as a handmade gift.


.jpg)