A Simple And Fun Handmade Cupid Valentines Card
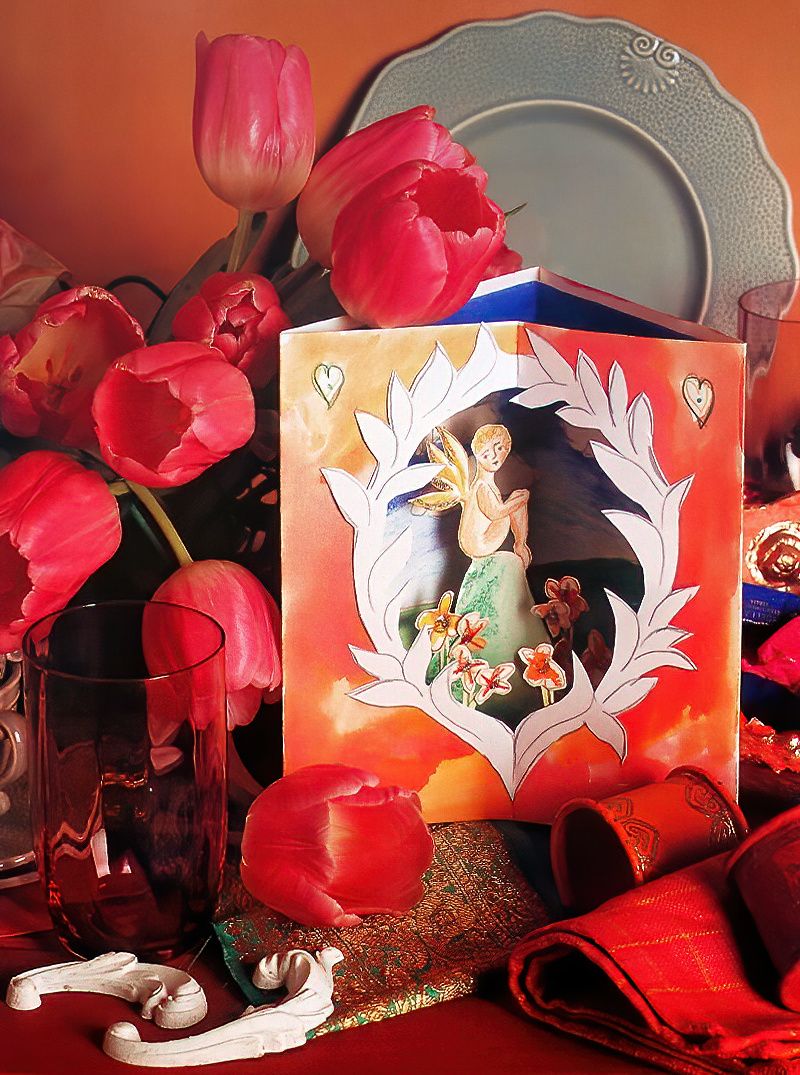
I really love making cards for Valentines day, as it is just an extra touch of something special that you have made to give to a loved one. I have been experimenting with watercolour effects recently, so I thought it would be a good idea to try making some cards using water soluble coloured pencils and watercolours or drawing ink. I would love to see both your card making and watercolour creations. So please add them in the comments if you would like to show them off.
To Make A Watercolour Effect Valentines Card You Will Need
Materials
- Masking Tape
- Heavy Watercolour Paper
- Thin Cardboard
- Water Soluble Coloured Pencils
- Watercolours or Drawing Inks
- All Purpose Glue
- Glitter Glue
Equipment
- Tracing Paper
- Pencil
- Craft Knife
- Cutting Mat
- Scissors
- Fine Artists Paint Brush
- Glue Brush
Making The Shapes For A Cupid Valentines Card
Step 1
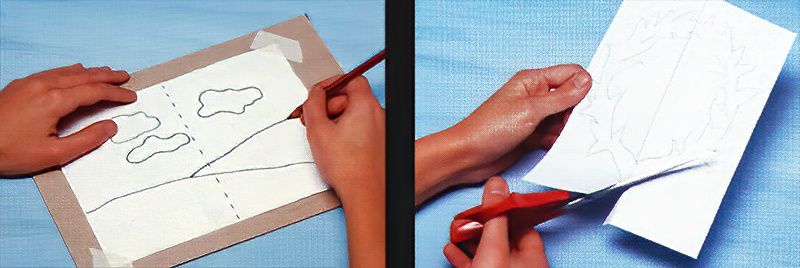
First, find and trace a template for the the background and the cupid. You can either get a print out, a photocopy, or you can even draw it freehand if you like. Then tape these to the heavy watercolour paper, and carefully draw over the outlines with a pencil. This will leave indentations on watercolour paper. Now fold along the fold lines.
Step 2
Then transfer the design for the frame onto some thin cardboard in the same way. Again, you can either get a print out, a photocopy, or you can even draw it freehand. Then cut out the card, the frame, and fold them.
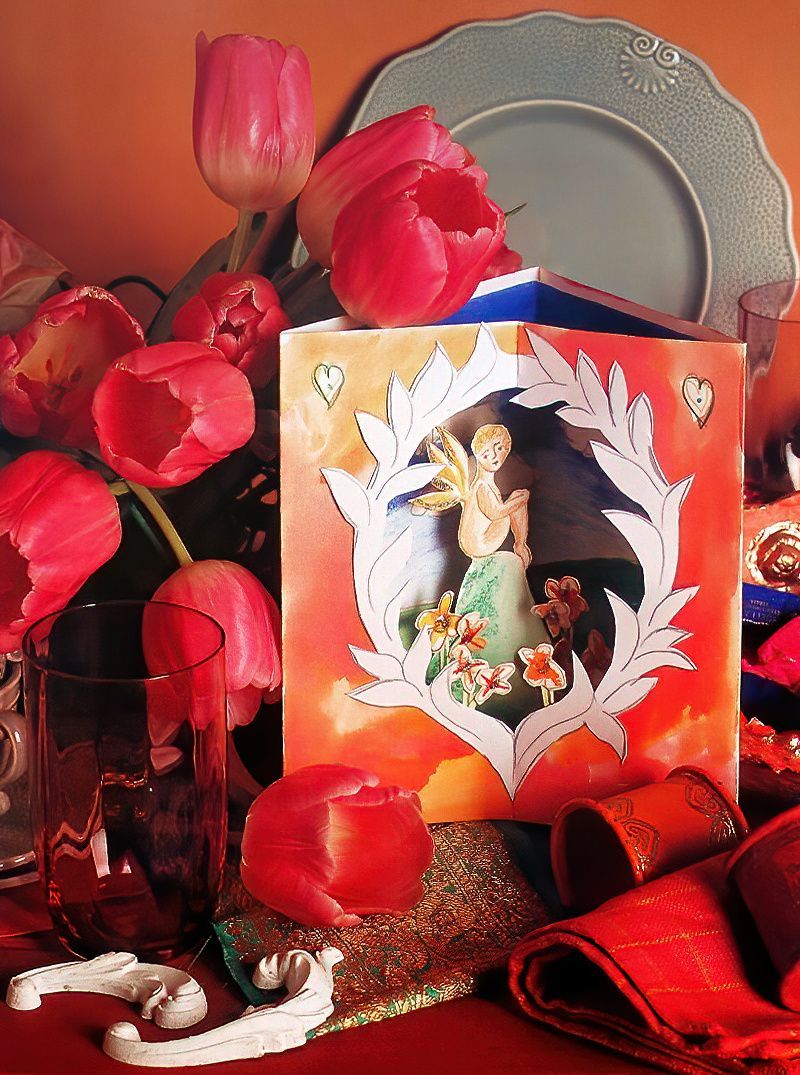
Watercolour Effect Cupid Valentines Card
Step 3
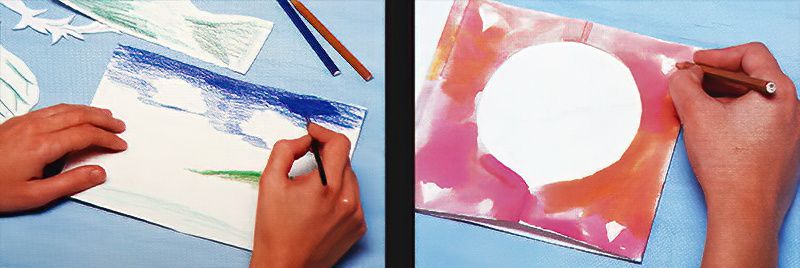
Next, colour in the background and the cupid design using the water soluble pencils. Then carefully cut out your cupid shape. On spare pieces of watercolour paper, draw and colour in some simple floral shapes. Then go over all of the coloured pencil work with a wet paint brush to blend all of the colours together.
Step 4
Now, decorate the outside of the frame with watercolours or drawing inks. Mix the colours together to make a patchy effect.
Decorating The Cupid Valentines Card
Step 5
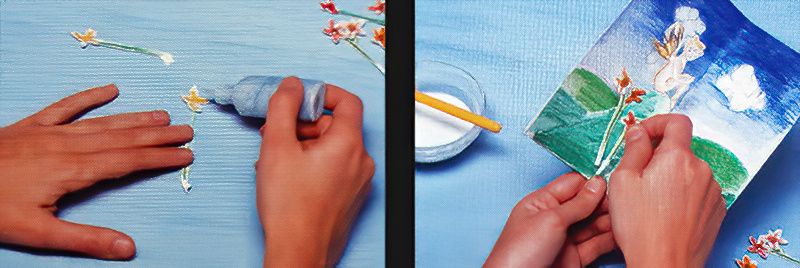
Then cut out the floral designs that you made, glue them together, and add a little bit of glitter glue to the middles of the flowers. Also, now add some glitter glue to the edges of cupids wings.
Step 6
Next, line up all of the edges of cupid with the edges on the background of the card. Then glue some flowers along the bottom.
Assembling The Cupid Valentines Card
Step 7
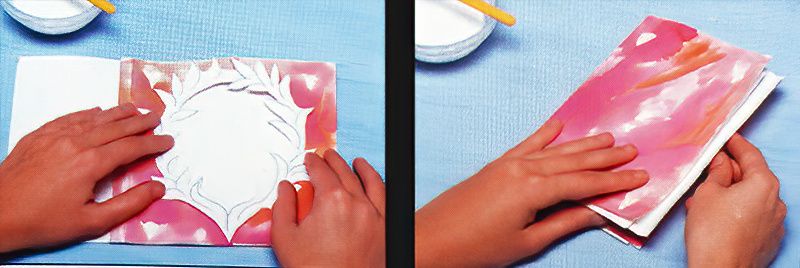
Now, glue the frame to the front of the card. And attach some more flowers to the inside of the frame.
Step 8
Lastly, glue the background and the cupid into the card, making sure that you line everything up well. Add a flap to a piece of card and join them together to make a card that opens. It is good to press the card under a heavy book to make it nice and flat before sending it.






.jpg)






.jpg)
