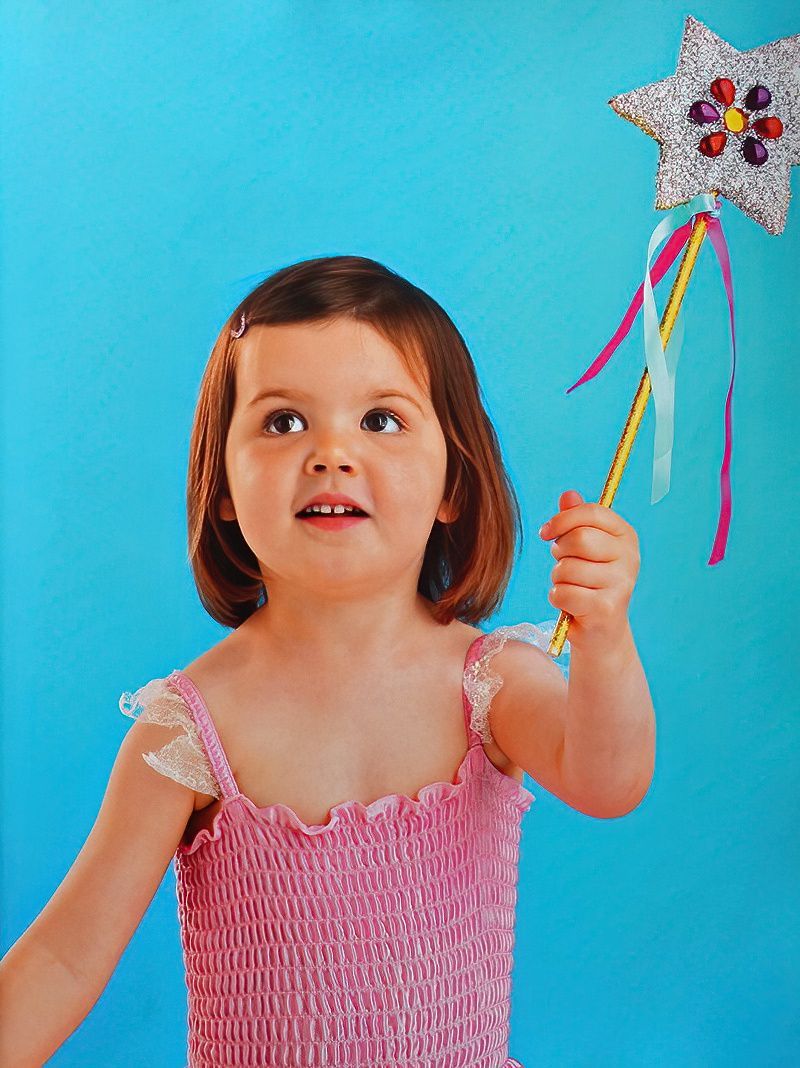
You Are Not a Wizard or a Witch Without a Wand
Dressing up is so much fun for children. And when you start adding in characters and adventures and stories, the magic is endless. Stimulate your child's imagination and creativity. Make a magic wand.
A fantastic accessory to a fancy dress outfit and so easy to make. Once you make a magic wand for one person, everyone will want one.
So what do we need to make a magic wand?
- Shiny sticky tape
- Wooden stick
- Cardboard
- Masking tape
- Gem stones or decorations
- PVA glue
- Scissors
- Glitter
- Ribbons
How To Make A Magic Wand
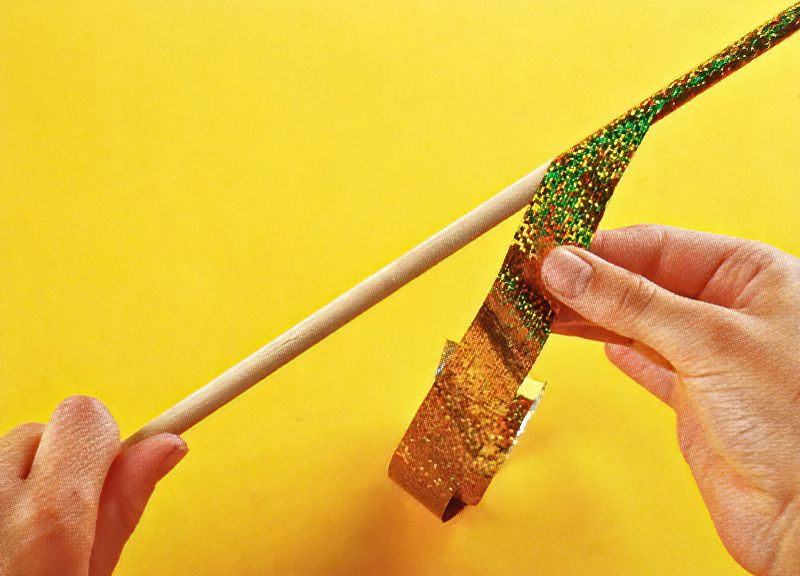
Step One
First, when we make a magic wand, we start with the wooden stick. Wrap the stick in shiny sticky tape. Wrap it at an angle so the tape moves down the stick and secure it at the end.
Make The Star Shapes For Our Wand
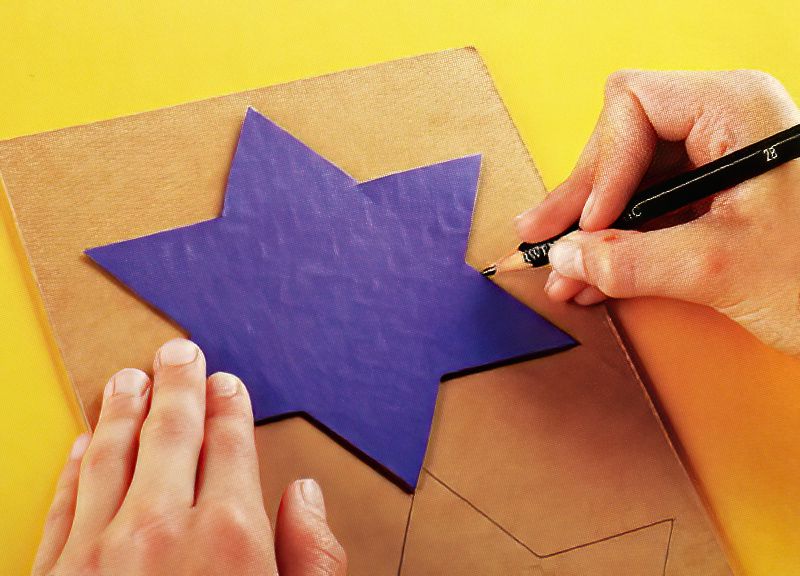
Step Two
Now we can make the star shape. Cut out a star shape from the cardboard. You can make a star shape by drawing two triangles. Draw one triangle on the cardboard, then draw another triangle upside down.
Or you can just search the internet for star shape template. Print it out, cut around your paper template and draw around it.
Remember, we need two stars, so use one star as a template for the other.
Assemble The Star Shape Of Our Wand
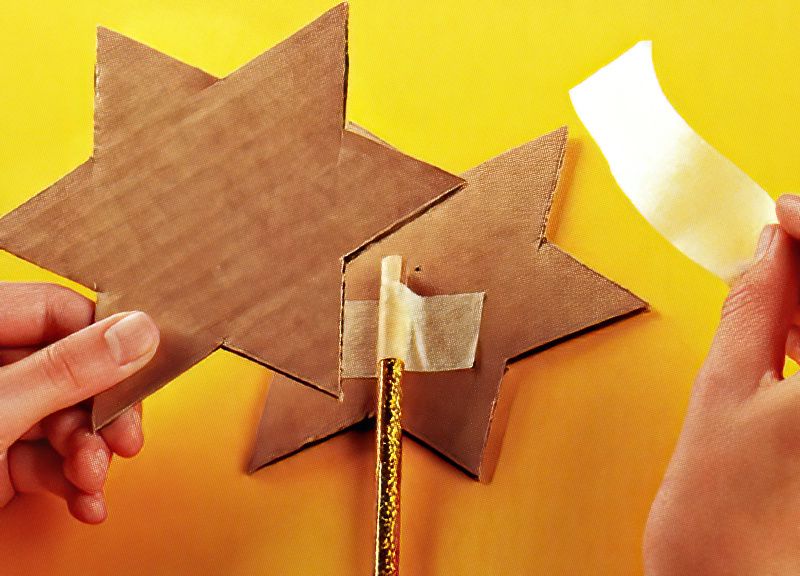
Step Three
Now let's continue to make a magic wand by sticking one end of the stick to one of the cardboard stars. Then stick the other cardboard star on top of the other cardboard star. This will sandwich the stick between the two cardboard stars.
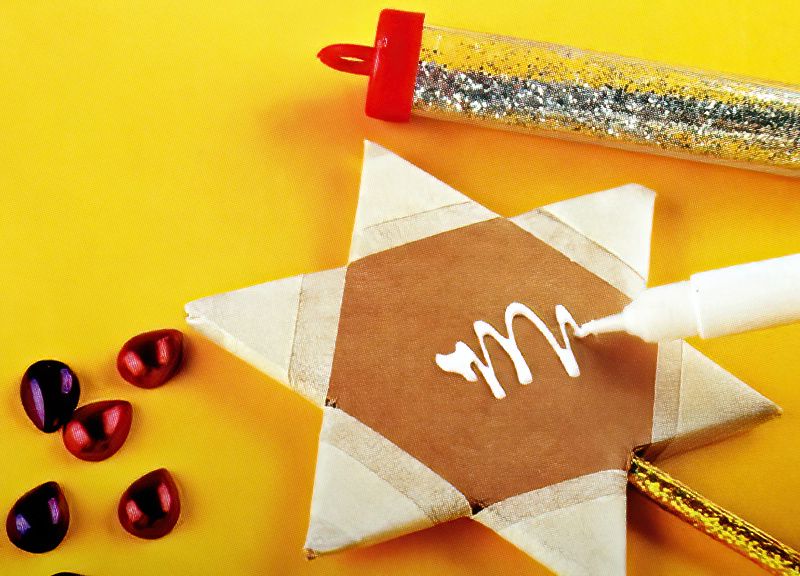
Apply Glitter To Our Homemade Magic Wand
Step Four
Now, where the two points match we can tape them together. Wrap the ends of each point with masking tape to join them together.
Now we can cover one cardboard star in white pva glue. Make sure you spread the glue around as the glitter will only stick where the glue is.
First apply any gemstones that you want on your star. Now make sure you have a sheet of paper underneath your star to collect any glitter that falls on to your worktop.
Next sprinkle glitter all over the glued areas of your magic wand. Be careful to sprinkle glitter all over. Now we need to be patient and let the glue thoroughly dry.
Once the glue is dried, carefully turn the wand over and let any glitter that didn't stick, fall on to the sheet of paper underneath.
Any glitter that falls on to the paper, we can save. So make a crease at one end of the paper sheet and slowly and carefully shake the glitter back into the bottle it came from.
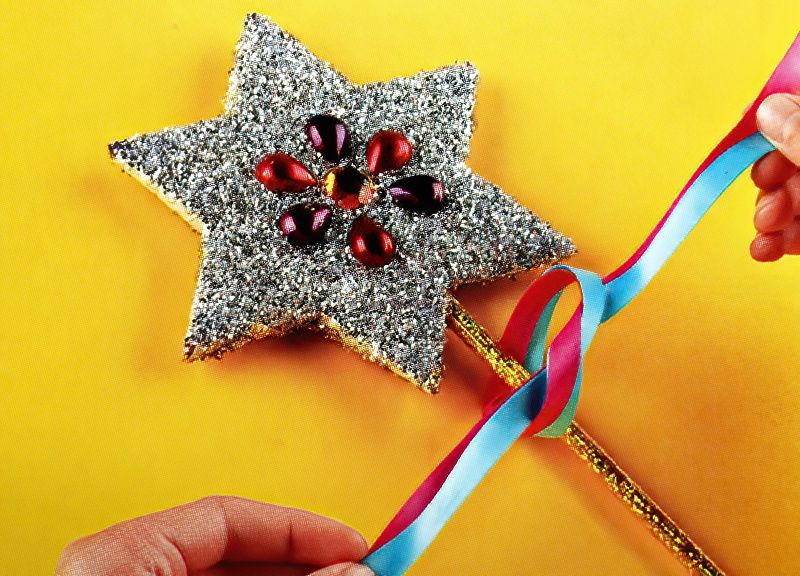
Finish Making Your Homemade Magic Wand
Step Five
Finally, the last stage of the make a magic wand project is to tie some ribbons around the top of the stick. Tie the ribbons near the base of the star. This will look amazing when you wave your wand. Like flowing wand magic.
And there we have it. Make a magic wand for that friend in your life that likes playing. And start making up fun spells and magic potions.