Kirigami Is Like Origami, Except You Get To Cut the Paper as Well
Pronounced Kiri gami, when you made a paper snow flake as a child you were basically doing Kirigami. So most of us have already tried Kirigami and didn't even know it. What else do we know that we don't know, lol!
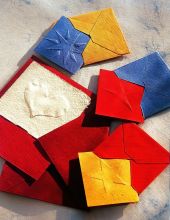
Kirigami comes from Japan and describes a single sheet of paper folded and cut and then laid out to reveal a design with clever symmetry. So we will use this Japanese paper cutting technique to make a beautiful greetings card. But obviously once you know the technique you can adapt for nametags, placeholder, pressie tags and anything else you fancy.
What do we need to make a Kirigami card?
- Basic papercraft tools
- Blue paper, 13xxm square or 5 and one quarter inches square
- Cream card blank, 12.5cm square or 5 inches square
Basic Kirigami Tutorial
Step One
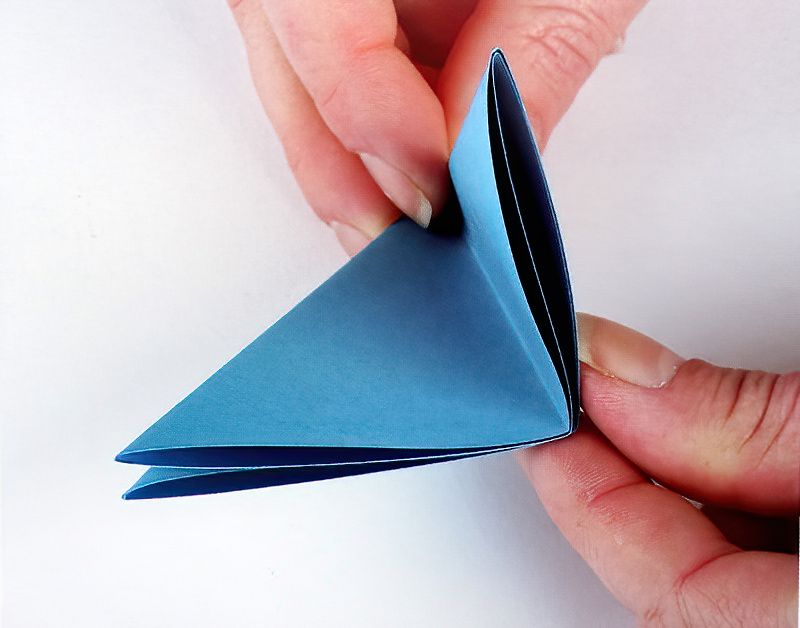
First we need a fold the paper corner to corner. Make sure you use a square piece of paper. Cut your paper into a square if you it is not the right size.
After you have folded corner to corner once, use something to make the crease sharp. There are specific tools for this, but they are really not needed. A ruler or something similar can be run along the crease to make it sharp. The folds can be part of the design, so if they look neat that's a bonus.
Second fold. Fold again from corner to corner. This is like we are making a paper snow flake, if you remember from when you were a child. Flatten and make sure the crease is sharp again.
Third fold. Here we go again, fold for the third time and press flat on a level surface and sharpen the creases once more.
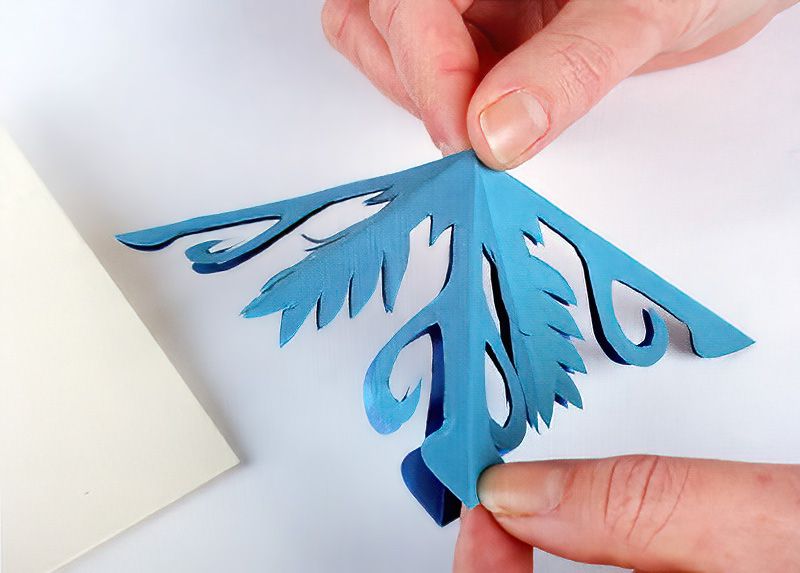
See image above. Look for the open sides. These are the side where we are going to cut pieces from. The other pointy end will be the centre of our design.
You Have Probably Already Done A Kirigami Project
Step Two
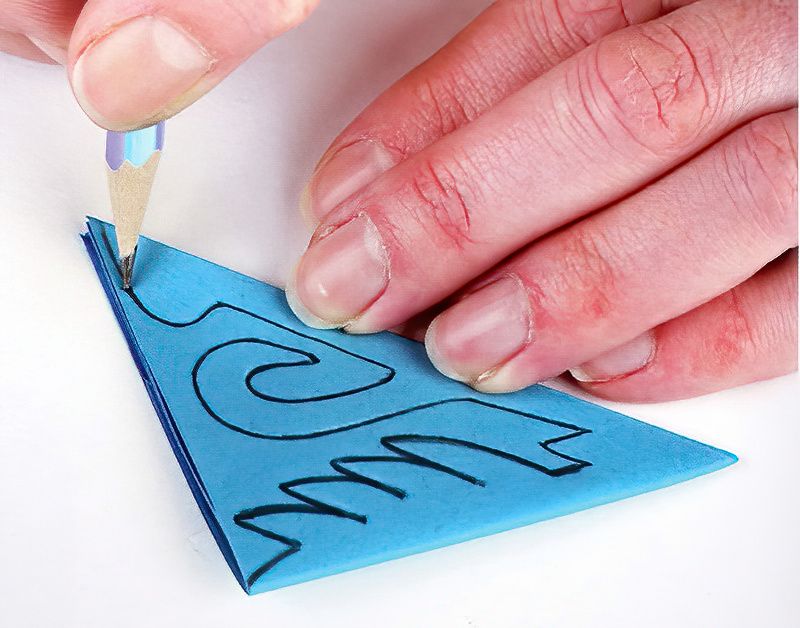
Try and copy the above design onto your folded piece of paper. Use a pencil so you can erase any pencil left at the end.
The design obviously does not have to be exactly the same. This is your project, so feel free to do your own design. Crafting is about experimenting. If you have to throw some experiments away, it don't matter. It's better to throw nine terrible experiments away, to find that one experiment that's beautiful :)
When you draw your design, pay attention to the open ends again. This will be the outside of our Kirigami design.
The other corner with all the folds and no open edges, this will be the centre of our Kirigami design.
The Magical Part Of Kirigami
Step Three
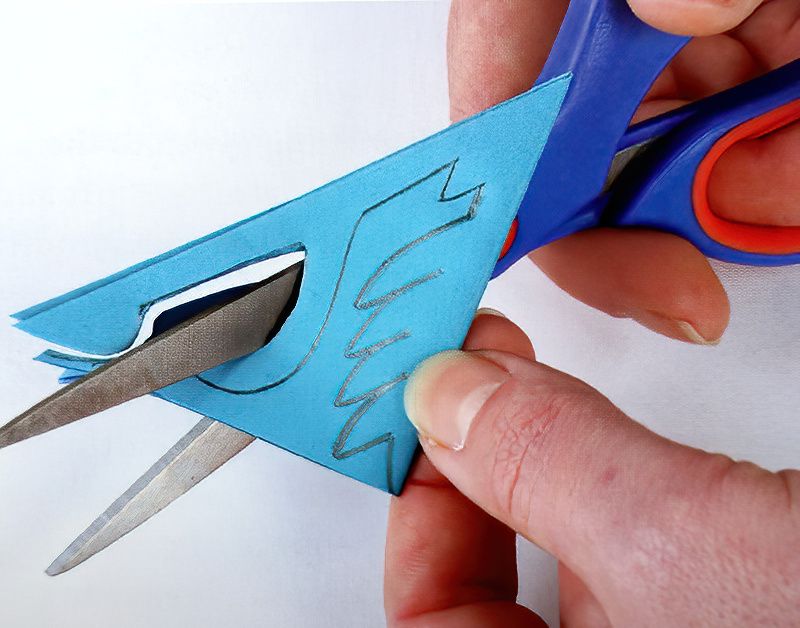
Take some scissors and cut along the pencil lines. Take your time here, this can be tricky. As there are many layers of paper cutting can be difficult. Make sure you have sharp scissors, hold the papers together tightly and take your time. The papers can slip slightly sometimes, but then this often gives unexpected, interesting results.
Smaller scissors may be easier for this process if your design is intricate. But then a large pair of scissors may give your more leverage.
The Final Reveal Of The Kirigami Project
Step Four
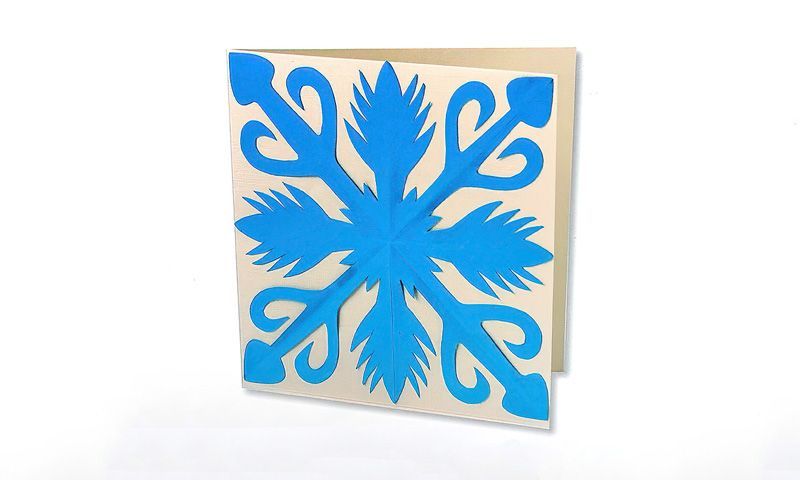
Finally, once all the cutting is done, we are ready for the big reveal. Gently unfold the paper. If your Kirigami design is delicate, take some time gently teasing your paper open or you may rip the paper.
If there are some places where the cutting was not as accurate as you hoped, just take some smaller scissors and neaten up any errors.
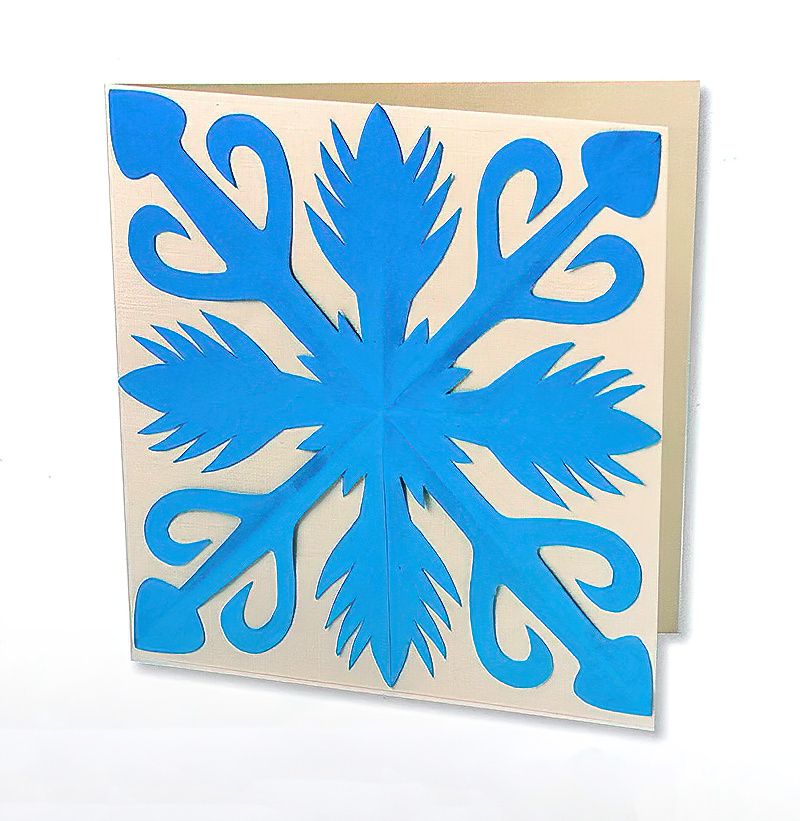
Use a cocktail stick to apply some white glue to the back of your Kirigami design and glue it to a blank greetings card.
And there we have our amazing design. Quite a simple process, but every card will be slightly unique. Think about using patterned papers of pages from an old book.
Experiment with more complex designs or multiple designs on one card. Kirigami cutting in principle is simple, but as you may imagine, it truly is endless where you can take it. Especially if you are good at cutting fiddly little things :)

