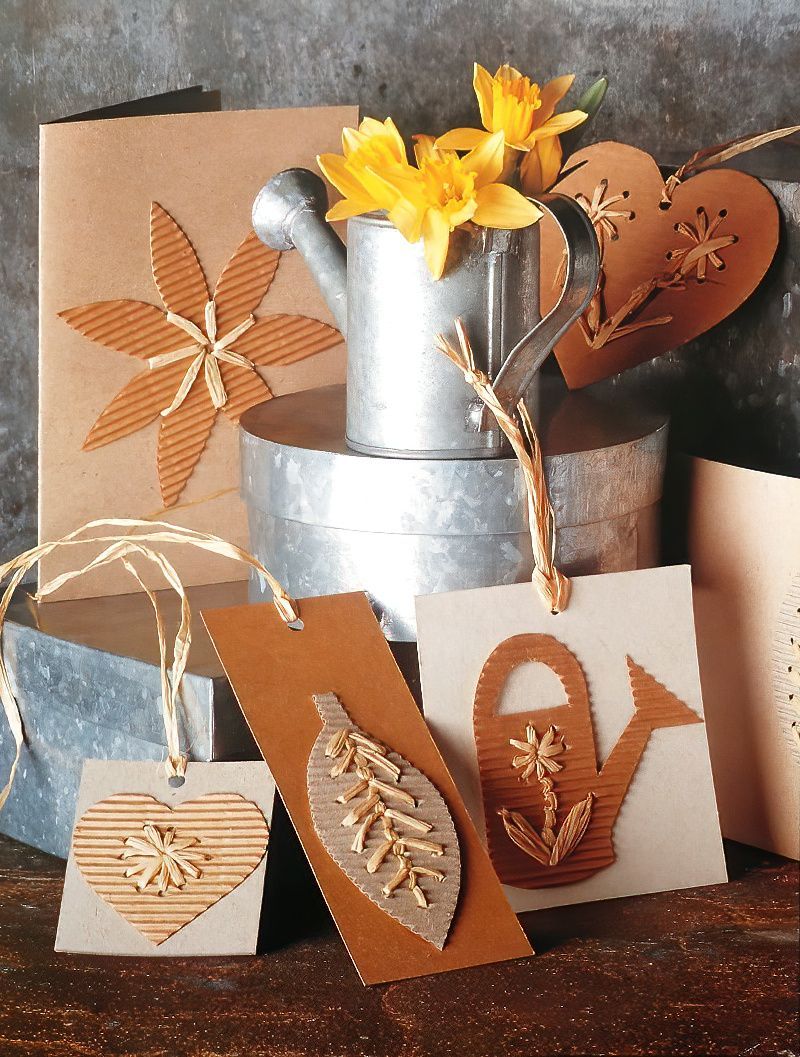
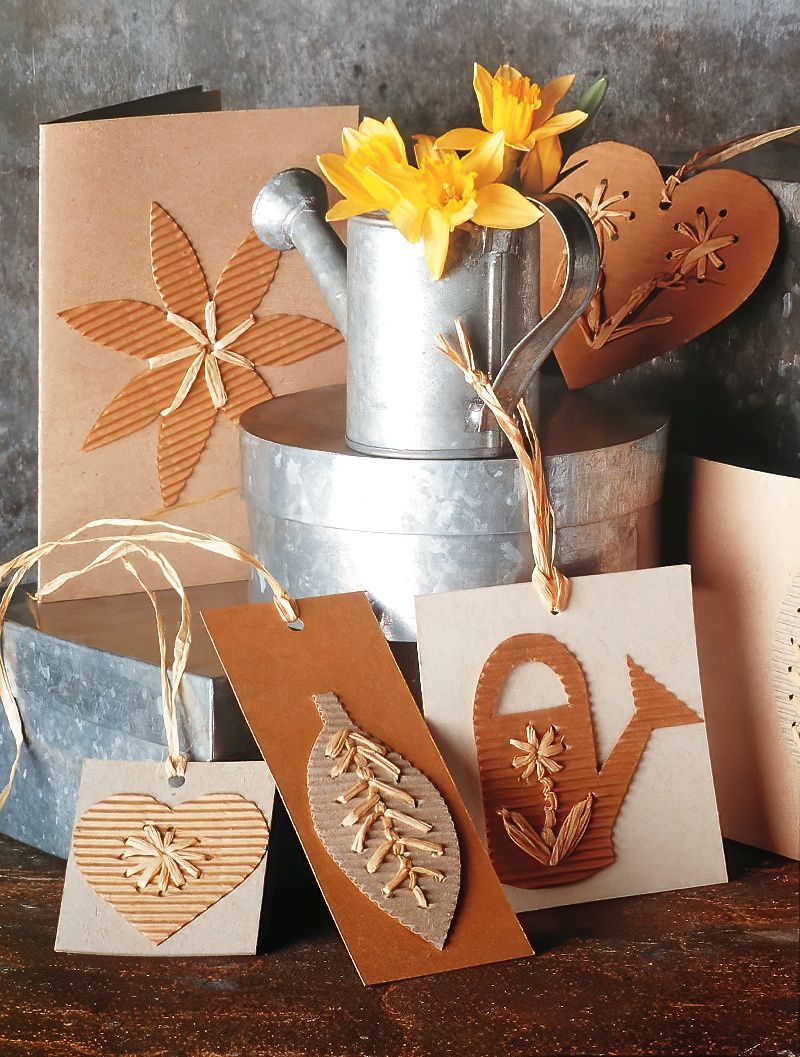
How To Make Pretty Cards And Gift Tags Using Cardboard
It is so much fun to make your own cardboard greetings cards and gift tags. It adds a lovely personal touch to cards and gifts that you may give to family and friends. Also, it is a very affordable craft as it can be made using leftover craft materials and some basic craft equipment. I love to make these cardboard greetings cards and gift tags with my children.
Stuff You Need
Materials
- Plain Paper
- Very Fine Single Faced Corrugated Cardboard
- Natural Raffia
- Manila and Natural Coloured Cardboard
- High Tack Glue
Equipment
- Tracing Paper
- Pencil
- Scissors
- Revolving Hole Punch
- Large Darning Needle
How To Make Templates For Carboard Greetings Cards And Gift Tags
Stage 1
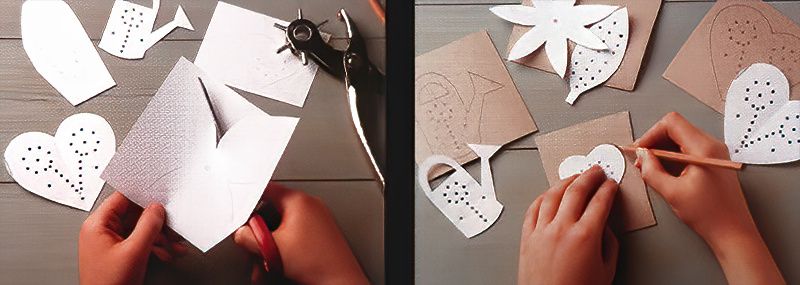
Begin by tracing a template of the designs of your choice for your cardboard greetings cards and tags. You can use either a print out or a photocopy for your designs. Transfer your designs onto some plain paper. Then cut out the shapes and punch some holes where shown using a revolving hole punch. And use the smallest hole size setting.
Stage 2
Next, place the paper cut out shapes onto the smooth side of the single sided corrugated cardboard, and carefully draw around the shapes with a pencil. Then mark the position of all of the holes, ensuring that the template does not move while doing so.
Stitching Onto Carboard Greetings Cards And Gift Tags
Stage 3
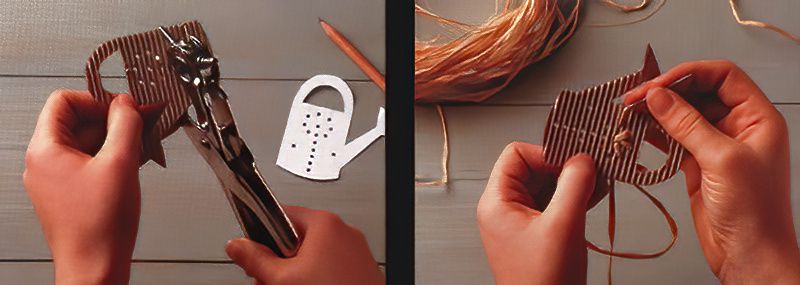
Now, cut out the shapes from the corrugated cardboard using scissors. Again, punch the holes in the same places as you did with the paper templates. And make sure that you still use the smallest setting on the hole punch.
Stage 4
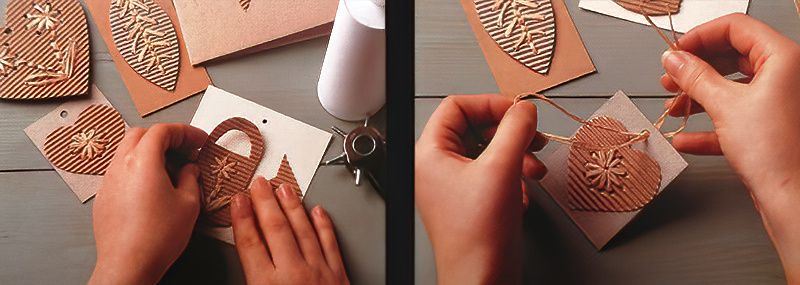
Next, cut a length of natural raffia, and thread it onto the darning needle. Then stitch the shapes with the raffia, through the wholes. Follow the techniques within the pictures. And finish off your stitching with a small knot at the back of each of the shapes.
Decorating Cardboard Greetings Cards And Gift Tags
Stage 5
To mount your designs to create your cardboard greetings cards and gift tags, cut out some large rectangles of manila and natural coloured cardboard. Then fold them in half and stick the embroidered designs into the centre of the card. Then cut out some smaller card squares and rectangles. And punch a small hole in the top to create gift tags, and again stich the embroidered designs onto them.
Stage 6
Now, for each of the gift tags, cut another length of the natural raffia and fold it in half to make a loop. Then thread the loop through the holes of the gift tags, pass the ends through the loop and pull. Now you have some lovely handmade cardboard greetings cards and gift tags.