Paper Snowflakes Are Super Fun To Make
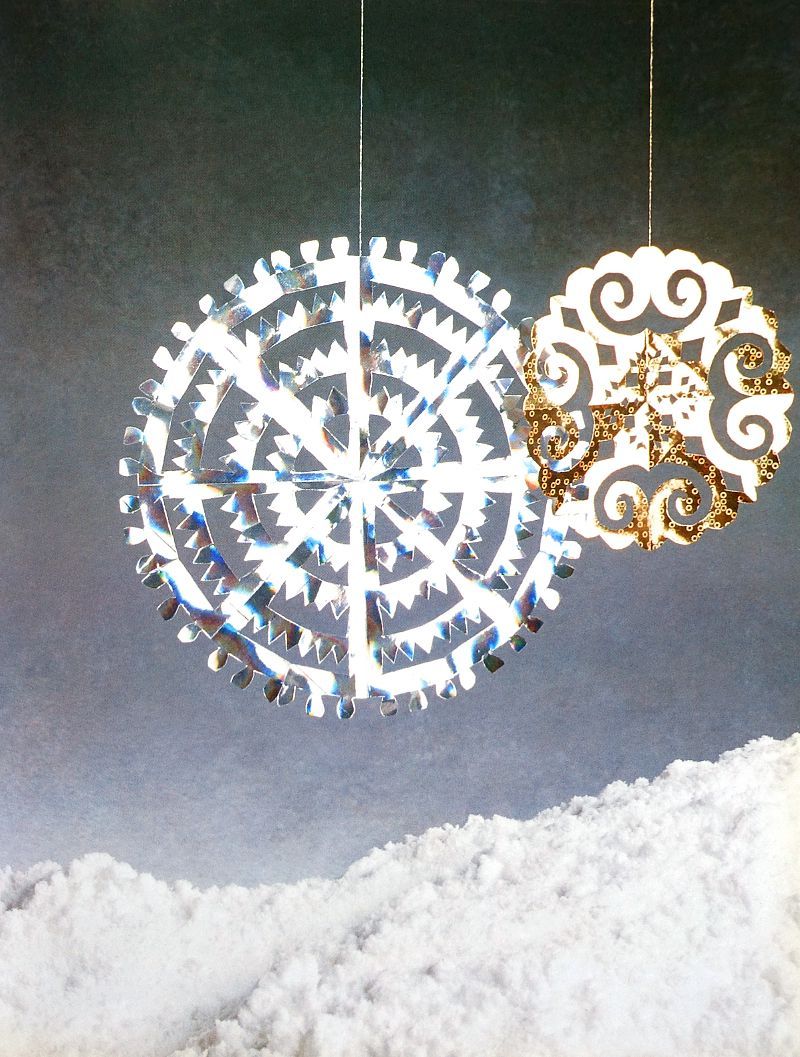
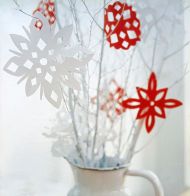
Making paper snowflake Christmas decorations is something that I have always loved doing. I remember as a child getting pieces of paper, folding them and cutting them to make different snowflake designs. As an adult, I have tried to take them to the next level.
These are so much fun to make, and is something that both adults and children will love doing. These are a little more intricate than the ones I made as a child, and will require adult assistance and supervision with the craft knife and scissors. And you can create any snowflake design that you like.
Things That You Will Need
Materials
- A Selection of Decorative, Metallic, Reflective or Sparkly Papers
- Gold or Silver Thread (or any that you have)
Equipment
- Set of Compasses
- Pencil
- Small Sharp Scissors
- Regular Scissors
- Tracing Paper
- Craft Knife
- Cutting Mat
Beautiful Paper Snowflake Decorations
Step 1
Start by using the set of compasses and pencil to draw a circle on the back of the reflective paper. Then cut out the circle with a pair of scissors.
Step 2
Next, fold the paper circle in half three times. Ensure that you take care to match the edges as closely as possible when folding the circle.
Designing Your Own Paper Snowflake Designs
Step 3
Print out some pictures of snowflake patterns to the sizes that you want to make them. Have some larger ones and some smaller ones. Then use the tracing paper to trace over one of the segments of the snowflake.
Step 4
Now, you need to transfer the tracing onto the folded reflective paper circle. Take care to do this as accurately as possible.
Carefully Cut Out The Paper Snowflake Decorations
Step 5
Next, use the small sharp scissors to cut out the traced pattern shapes on the folded paper. Then unfold the circle and flatten the whole thing. It might help to put it under a heavy book for a while to get the paper snowflake decoration really flat.
Step 6
Then, follow the same process for the rest of the folded reflective papers and patterns. You can use the craft knife and the cutting mat to make the smaller, detailed internal cuts.
How To Make Curved Paper Snowflakes
Step 7
Even if you choose to make a curved design, fold the paper circle in the same way as you did before. Then cut the first parts of the pattern with the sharp scissors.
Step 8
Next, unfold once, then fold it in half the opposite way. Then carefully cut out triangular notches along the fold line.
Now You Can Hang Your Snowflakes
Step 9
Finally, attach the pieces of thread to the paper snowflakes and hang them up where you like.

