Doesn't This Corrugated Cardboard Tray Look Fancy?
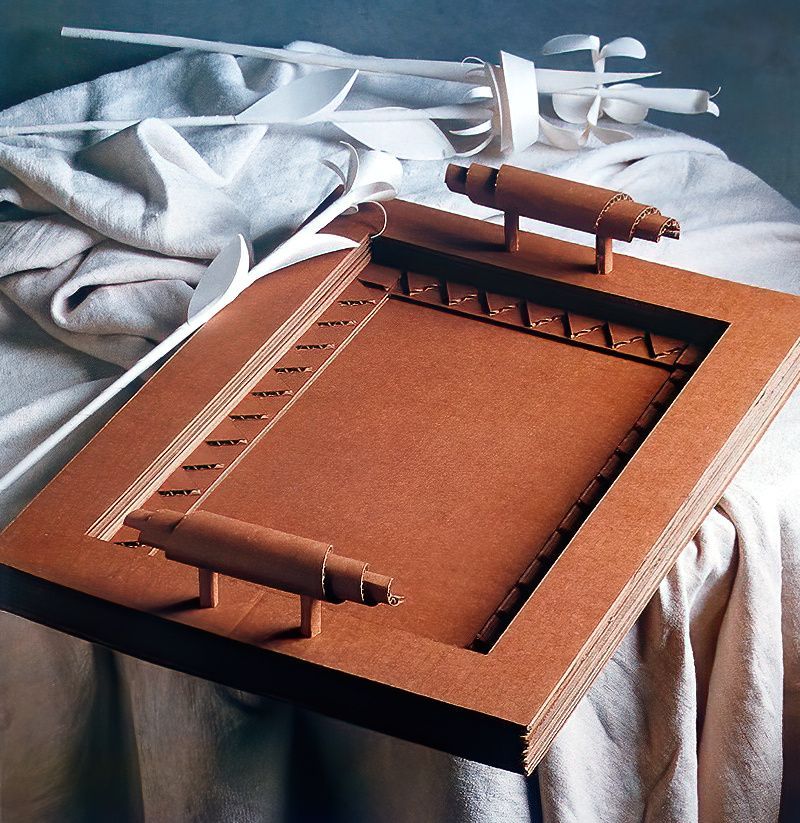
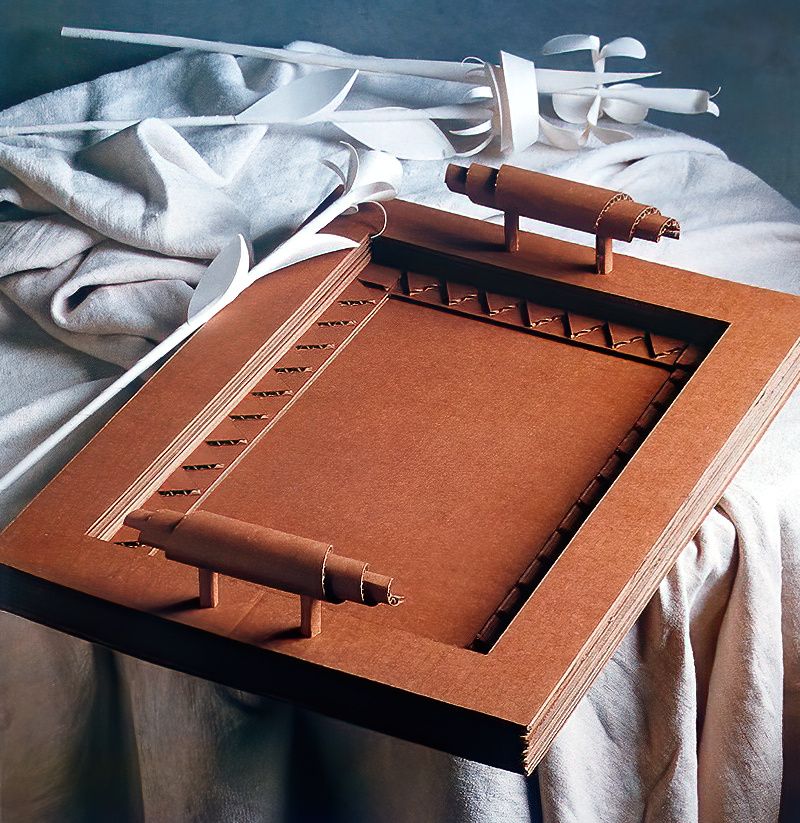
I really love a tray for putting small bowls of snacks on in the evening. It only takes some simple craft materials and layering up corrugated cardboard to make a cute and sturdy cardboard tray. It costs next to nothing to make and is actually quite durable.
Varnishing will also make it more robust by giving it a protective layer. Additionally, if you choose to, you can decoupage the tray with pretty papers before varnishing it. I left mine plain, but the choice is yours.
List Of Items Needed To Make A Corrugated Cardboard Tray
- Single Wall Corrugated Cardboard
- Two Large Metal Paper Fasteners
- High Tack PVA Glue
- Pencil
- Metal Ruler
- Craft Knife
- Cutting Mat
Cutting Out A Corrugated Cardboard Tray
1st Step
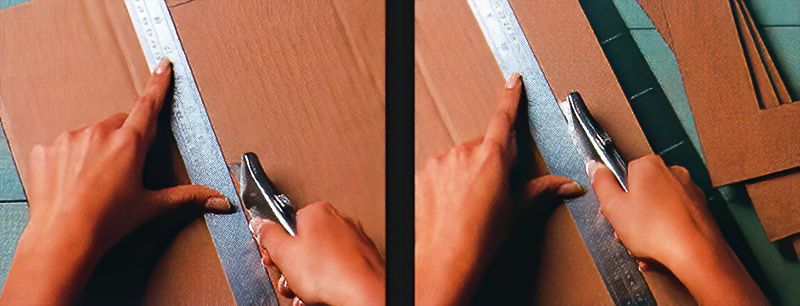
Start by drawing out ten rectangles on the corrugated cardboard, each measuring 38cm X 50cm. Carefully cut them out using a metal ruler, craft knife and a cutting mat. If you draw the pencil marks on the opposite side of the cardboard, so that it won't show through on the correct side.
2nd Step
Then draw a line 5cm in from each of the edges on six of the pieces of cardboard. And cut the central rectangle out of all six pieces. You can put the spare pieces to one side to use for the handles to avoid waste.
Making The Cardboard Triangle Details
3rd Step
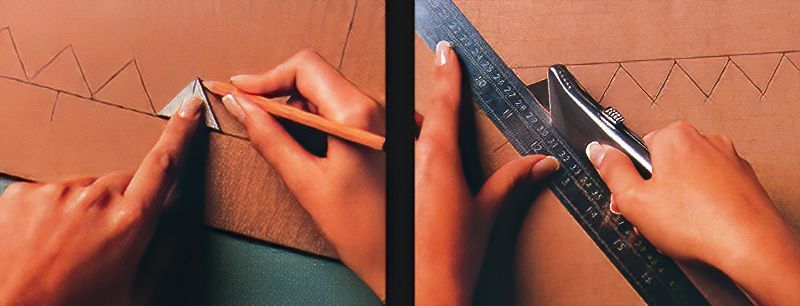
Next, take another one of the large pieces of cardboard, again measuring in 5cm from each of the edges, all of the way around. Then draw an equilateral triangle measuring 3cm on another sheet of spare cardboard, and cut it out.
Then starting at the centre and working outwards to the corners, position the cardboard triangle template along the inner side of one of the pencil lines and draw around it. Again make sure that you do this on the wrong side of the cardboard so that the pencil lines do not show.
4th Step
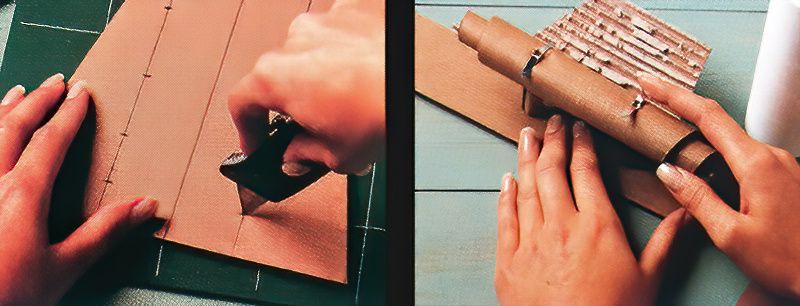
Continue this process along all four sides of the cardboard and finish with a square at each of the four corners. Then cut around all of the triangles, cut from the pencil lines to the points of the triangles.
Let's keep going with our corrugated cardboard tray build.
Making The Uprights For The Handles
5th Step
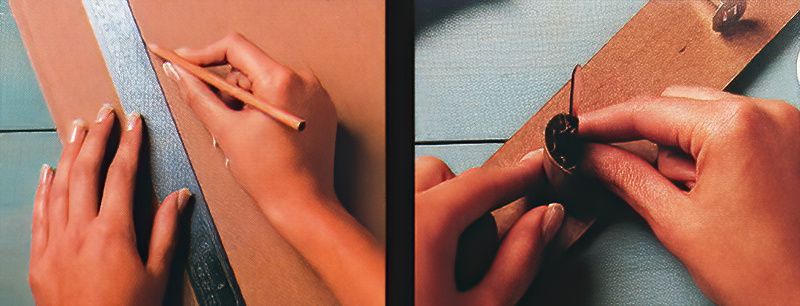
Next, on two of the remaining corrugated cardboard pieces, draw some lines 7.5cm from the edges all of the way around. Then carefully cut out the inner rectangles and discard them.
6th Step
Now, on the back of one of the first pieces of cardboard, measure two points 10cm apart on either side of the centre of each of the shorter sides. Then make some slits using a craft knife and insert a paper fastener into each of the slits from the back side.
Then cut some cardboard pieces measuring 3cm X 5cm, peel the back part off and wrap them around the paper fasteners to cover them. And glue them securely in position.
Making The Cardboard Handles For The Corrugated Cardboard Tray
7th Step
Next, make a template for the handles by drawing a long triangle shape onto a piece of cardboard. Cut out the cardboard triangle and peel off one side of the cardboard.
8th Step
Now, roll up the cardboard triangle quite tightly and firmly hold it in position. Then push the roll onto the paper fasteners, you may need to make small pilot holes for it to go in, as it needs to push through the cardboard.
We are nearly finished with our corrugated cardboard tray project.
Assembling The Corrugated Cardboard Tray
9th Step
Now, push the roll down onto the cardboard stems that you made for the handles to go onto. Put some glue onto the underside of the loose flap part of the cardboard and press it into place. Make sure that you hold it firmly for the glue to dry.
10th Step
Finally, lay the remaining complete piece of cardboard face up, and glue down the back of each piece. Start with the two pieces with the rectangle cut out, followed by the piece with the triangular edge, followed by the six pieces with the rectangles cut out on top of each other, finishing with the handles.
Congratulations, you have completed the corrugated cardboard tray project. Now make a cup of tea and get some biscuits and have a little rest.
















.jpg)


