Making Grapevine Printed Handmade Stationery
Grapevine Printed Handmade Stationery Really Takes Me There
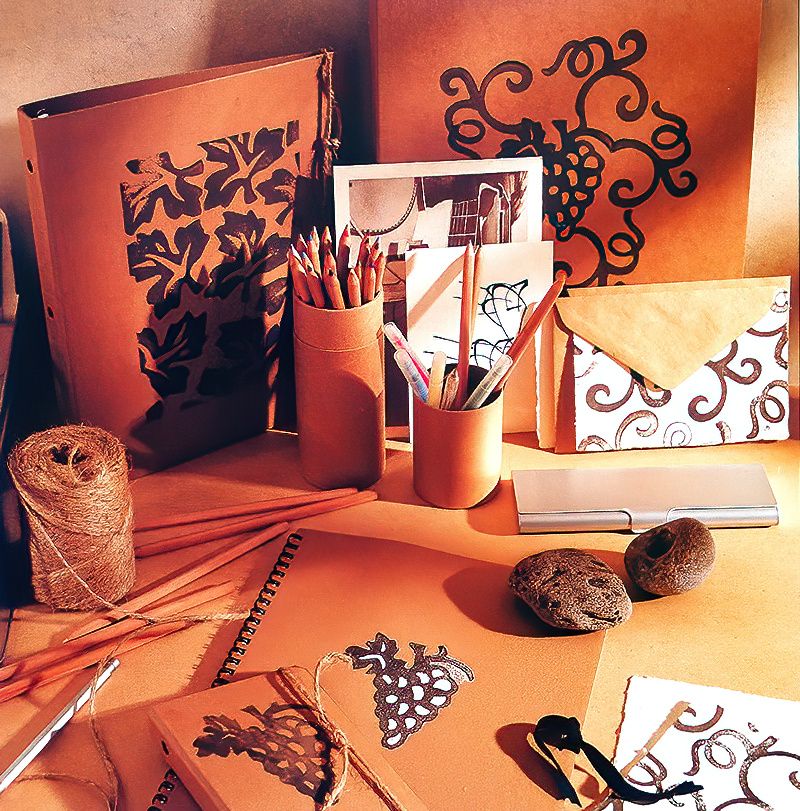
I really like the idea of creating a range of stationery items that all compliment each other. Books, notepads and letters and folders that all look like they are from a range of stationery from a fancy shop.
I have elected to make a grapevine printed handmade stationery set, but really you could make anything. Just find a few bold stamps that really compliment each other and go for it. I really want to invoke the memories of a beautiful holiday my family had in Italy. So wonderful grapevine stamps, leaves and grape designs, really bring back all the wonderful memories.
What we need for a grapevine printed handmade stationery
- Sepia acrylic paint
- Off white acrylic paint
- Pva glue
- Scrap paper
- Notebooks
- Brown parcel paper
- Folder, handmade cards, envelopes or things to decorate
- Plates
- Paint roller
- Grapevine themes stamps
- Knife and cutting mat
- Paintbrushes
Let's Start Our Grapevine Printed Handmade Stationery
Step One
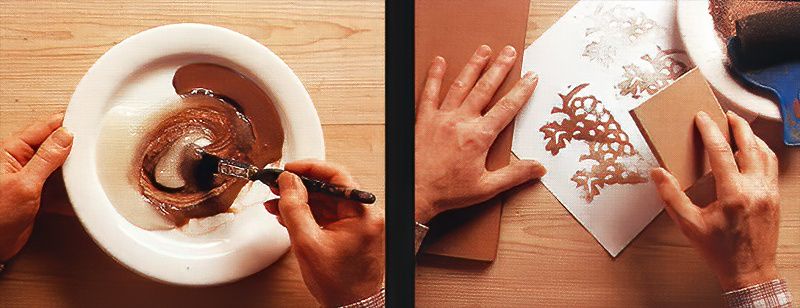
First we need to pop some sepia paint into a plate and then add to it some PVA glue. Mix them both together as well as you can.
Step Two
Now we need to do a little practise to see how our grapevine prints look. And to get used to the idea of how much paint we need to add to get an effect we like. I really like a rustic look, so am not too worried if some of my printing comes out a little faded or broken.
Run the roller through the paint and then apply it to the stamp. You can use a sponge here if you don't have a roller. Test your prints out on a scrap piece of paper.
Let's Make Some Grapevine Printed Handmade Stationery
Step Three
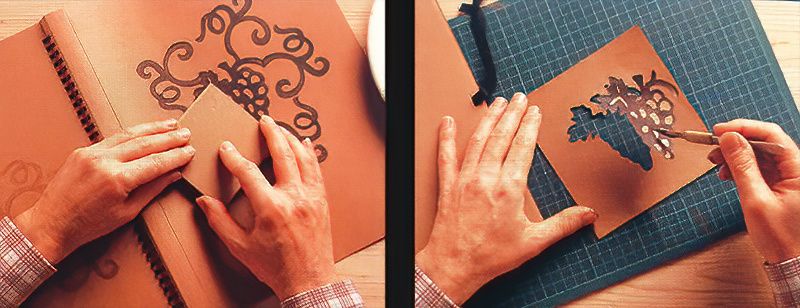
Now we know what we want. Use the stamp to apply the paint to the front of your first item. Here I am printing a notebook. Use more of your stamps to apply similar designs around your first design.
Here I am making the grapevine plant around a bunch of grapes. Continue to the back of the notepad if you like.
Step Four
We can now do another trick with the stamp. Stamp a bunch of grapes onto a spare piece of brown paper. We are going to make an exact stencil, so we don't actually need the piece we just stamped. We want the paper around it, with the hole cut out.
So be careful when cutting out the grape shape, as remember, we want the outside to make our stencil shape.
Stencil Some More Grapevine Details On Our Stationery
Step Five
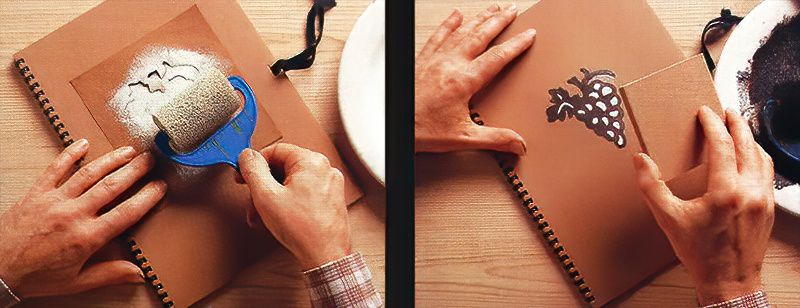
Now we have outside of the cutout shape. The piece with the hole in it. We can pop some white paint on another plate and spread it out with a clean roller or sponge.
Lay down the cutout shape onto our next stationery item. Carefully apply paint through the stencil hole onto the notebook.
I find it is better to have less paint than more and maybe do a few layers. But be careful not to move the stencil in between.
Now leave the paint to dry. We should have a white shape that is the outline of our stamp.
Step Six
Now clean the grape stamp and apply more sepia colour to the stamp. Once the white paint is dry we stamp over the top of it with the same stamp and a different colour.
This then looks like my grapes are coloured in.
More Grapevine Stationery Ideas
Step Seven
Now you can take another notebook or paper or greetings card and try another effect. We are really getting a nice collection of grapevine printed handmade stationery items.
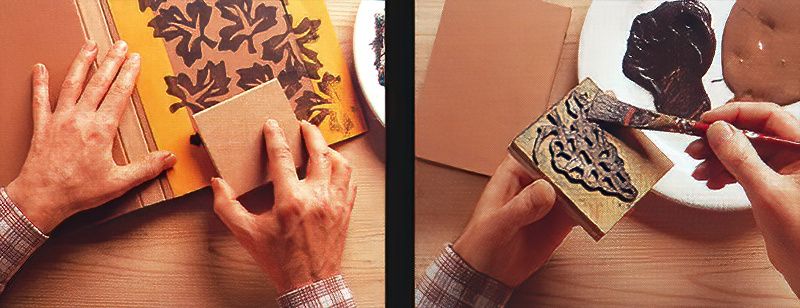
Now we are going to make a smart border before printing. Cut a piece of paper the same size as the front or your notebook or greetings card. Then cut the centre of that piece of paper out to make a frame shape.
Lay that frame shape across the front of your notebook or greetings card or whatever. Then carefully start using your grapevine stamps to make a design all over the front. Stamp over your book or card and overlap the frame.
Let the paint dry, then remove the frame. This will reveal a smart border around your decorated item.
Step Eight
Next we can add some white paint to some of our sepia paint. Mix up some new paint so we have two brown colours. One darker than the other.
Apply the lighter coloured paint to the grape stamp using a sponge or roller. Then with a paintbrush, paint the darker colour brown down one side of the stamp.
We want to create a shadow effect.
Finally For Our Grapevine Printed Handmade Stationery
Step Nine
Now we can stamp onto our stationery item. Because we painted a darker colour down one side, when we look at the stamped result, it may look three-dimensional. The darker line of paint, hopefully looks like a shadowed side of the grapes.
Step Ten
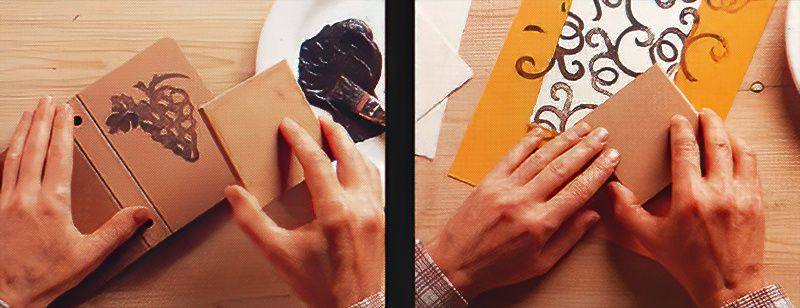
The final grapevine stationery idea is really two in one. Find some nice writing paper for your stationery set and place it down on the table. Fold some card into a blank greetings card. Now lay the folded greetings card in the centre of the writing paper.
Stamp a grapevine stamp across the front of the greetings card, make sure to go over the edges. But be careful of your tabletop.
Let the paint dry and lift the card.
Once finished you will see you have a pretty grapevine printed handmade stationery card, that looks like it was made from a bigger piece of printed card. But you also have a piece of writing paper with a pretty grapevine border effect.
Grapevine Printed Handmade Stationery Conclusion
I hope you enjoy making these things as much as I have enjoyed making this grapevine printed handmade stationery set. Pick a these and collect some stamps that match your theme. Then go to town. You really could extend this to almost anything, not just stationery.
Have fun and explore and please comment below if you have any pictures on your studio page.













.jpg)

