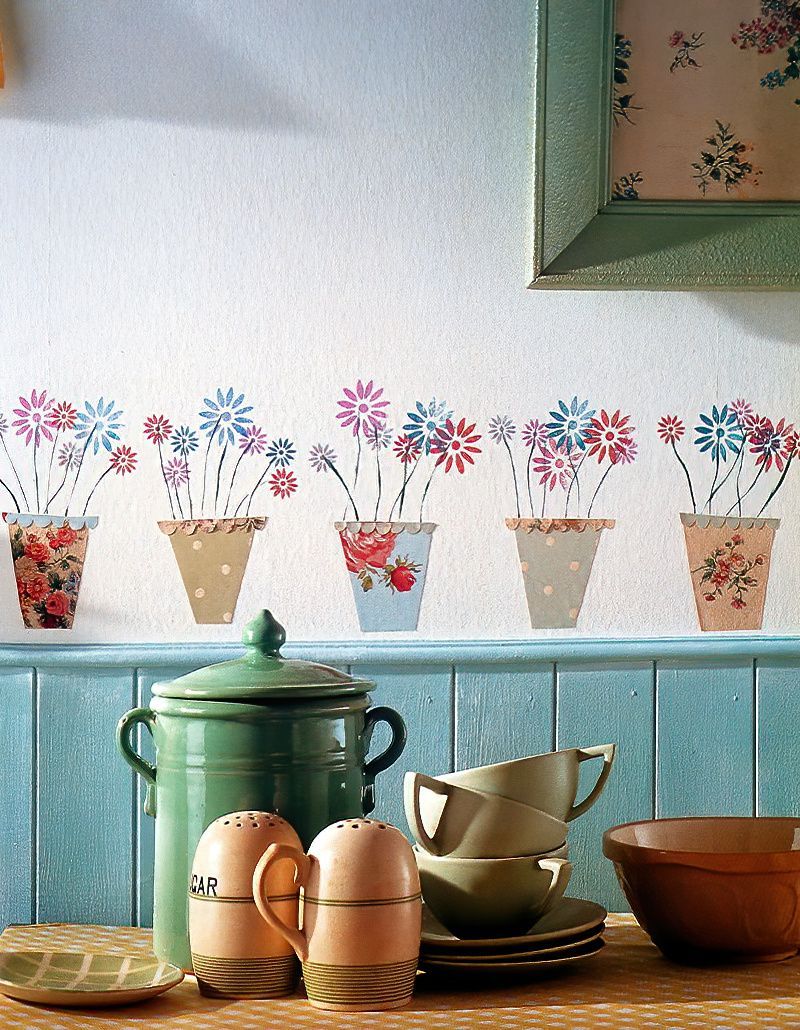
Flower Pot Wall Art In Your Kitchen, Lovely!
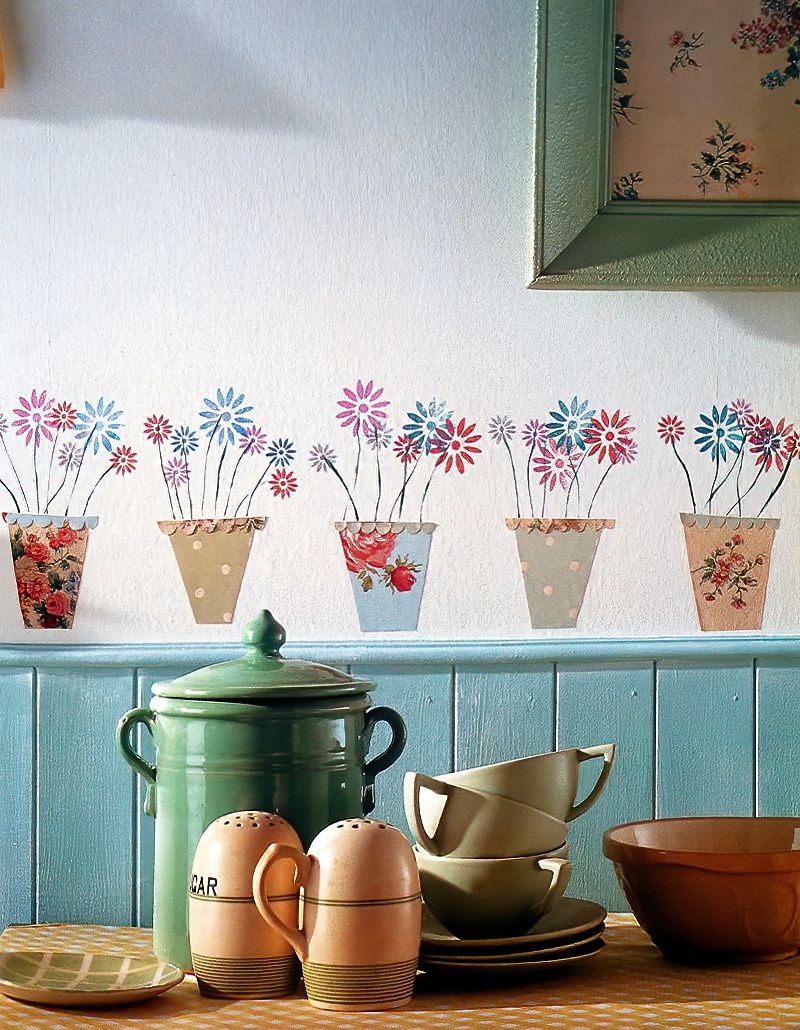
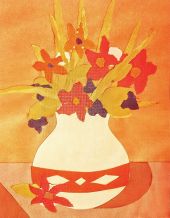
This pretty flower pot wall art really adds some 1950's inspired decoration to your walls or you can create the same look on objects such as notebooks, furniture or anything else that you may think of. This project only needs some basic craft materials and equipment.
You can use any colours of your choice for paint, and any patterns of your choice on wallpaper or gift wrap. Also, this is really fun to do, and children love to help.
List Of Items Needed To Make Flower Pot Wall Art
- Matt Emulsion Paints (Colours of your Choice)
- Wallpaper or Gift Wrap (Different Designs)
- PVA Glue
- Green Acrylic Paint
- Stamping Ink Pads (Variety of Colours)
- Scrap Paper
- Small and Medium Decorators Paintbrushes
- Cloth
- Pencil
- Scissors
- Container for PVA Glue
- Fine Artists Paintbrush
- Small and Large Flower Rubber Stamps
- Cotton Buds
Preparing A Wall With Emulsion Paint
1st Step
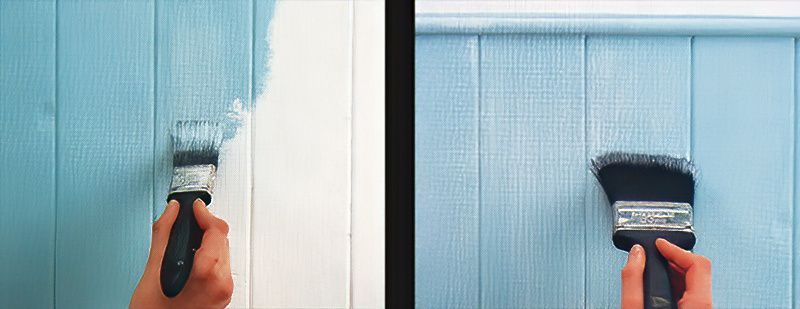
Begin by painting some tongue and groove boarding or the lower half of your wall with emulsion paint, you can choose any colour that you wish. This might need a couple of coats of paint. And leave to dry thoroughly.
2nd Step
Next, use a dry paintbrush to lightly brush some white emulsion paint over the top, and rub down with a soft cloth. This will help to achieve a vintage look.
Making The Decorative Flower Pots
3rd Step
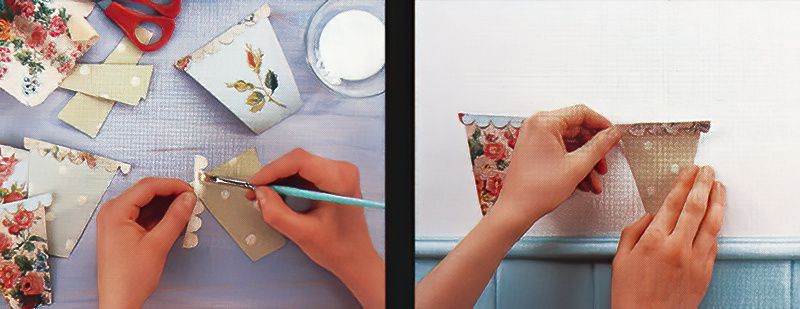
To make the flower pots for the flower pot wall art, draw some flower pot shapes onto scraps of different wallpaper or gift wrap. You can use any that catch your eye, and then cut them out. Then cut out some scalloped strips of coloured paper and glue along the top edge of each pot with PVA glue.
4th Step
Now it is time to glue your flower pots onto your wall, making sure that you space them evenly as you go. You can use as many as desired to fill your space.
Preparing The Flower Rubber Stamp
5th Step
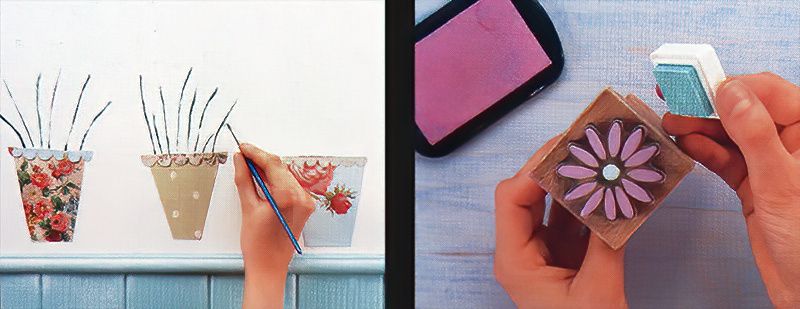
Now, use the green acrylic paint and a fine artists paintbrush to carefully paint some flower stems for your flower pot wall art. Paint them coming out of each of the decorative flower pots. Then leave the paint to dry thoroughly before printing your flower designs.
6th Step
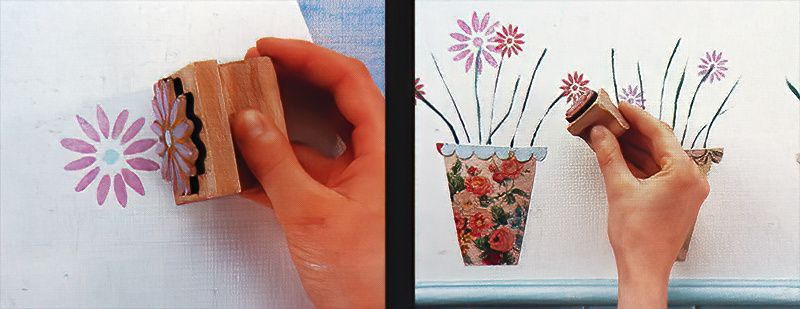
Next, use the coloured ink pads in your choices of colours to apply ink to the flower rubber stamp. Use the lighter coloured inks first. If you would like to add a centre colour to the flower in another colour, remove the first colour in the centre using a cotton bud. Then use a smaller ink pad to dab on the centre colour.
Building Up Layers Using Rubber Stamps
7th Step
I would now recommend doing a test stamp onto a scrap piece of paper to ensure that you are happy with the print before applying it to a wall.
8th Step
Now for the fun part of creating your own pretty flower pot wall art. Start by printing the lighter coloured flowers on the ends of some of the stems using both small and large flower stamps. Then allow the ink to dry.
Pretty Printed Flower Pot Wall Art
9th Step
Finally, print some darker coloured flowers onto the remaining stems. Make sure that the flowers overlap to create fuller looking pots and to add a bit of extra dimension to your design. Now you have your very own flower pot wall art.

