Let's Make A Wooden Rabbit Ornament, You Know You Want To
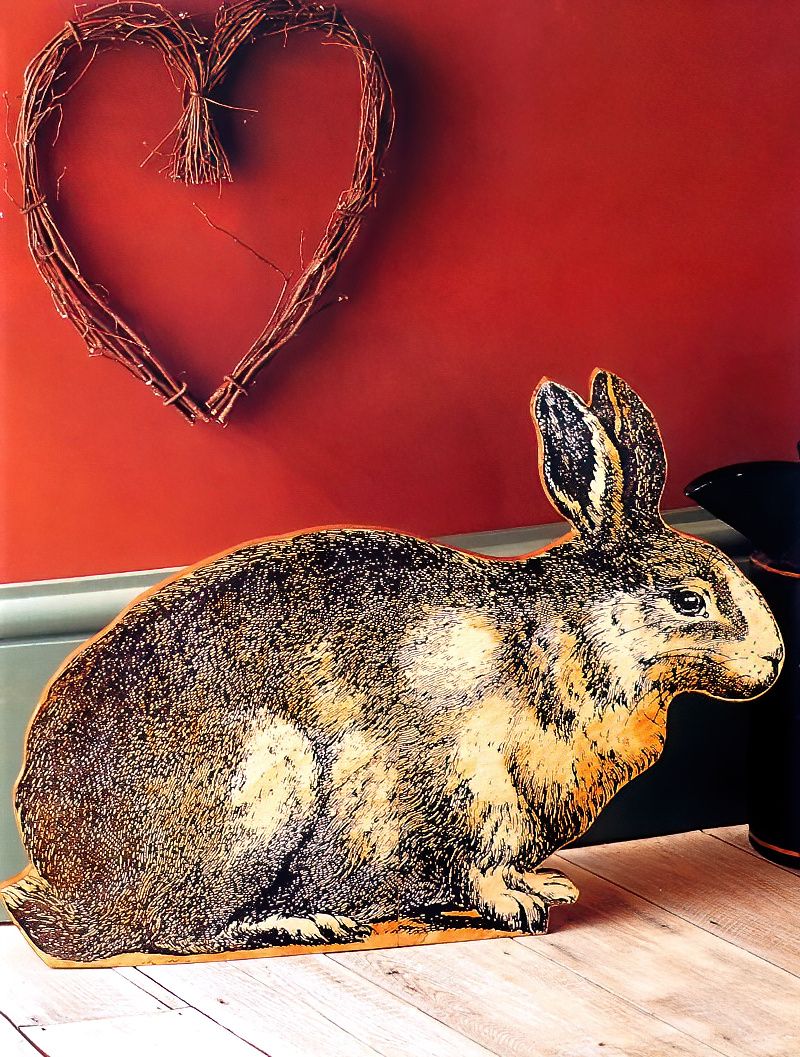
Rabbits are one of my favourite animals, I always had lovely pet rabbits when I was growing up. I decided to make a wooden rabbit ornament for my home. My Auntie loves it, so I will be making her one as well.
Obviously you can choose any animal you like to base your ornament off of. And you can make it any size that you want also. People used to make really oversized ones like this called dummy boards, which they used to have outside shops.
Things You Will Need To Make A Wooden Rabbit Ornament
Materials
- Paper
- Wallpaper Paste
- A2 Sheet of Marine Plywood or Similar
- Shellac
- Antique Pine Varnish
- Clear Varnish
- Scrap Wood for the Stand
- PVA Glue
Equipment
- Container for the Wallpaper Paste
- Small Decorators Paint Brush
- Soft Cloth
- Jigsaw
- Fine Grade Sandpaper
Designing An Ornamental Animal For Your Home
Step 1
Begin by getting a printout of an animal of your choice, in my case a rabbit, and sizing it to however big you want to make your ornament. Mine is about the size of an A4 sheet of paper. Then cut the picture in half to make two A5 sized pieces.
Step 2
Then, use these sheets and enlarge them each to A4 to make a full picture that will be A3 sized when put back together. Depending on the scanner, this might need doing in stages.
Sticking Paper Designs Onto Wood
Step 3
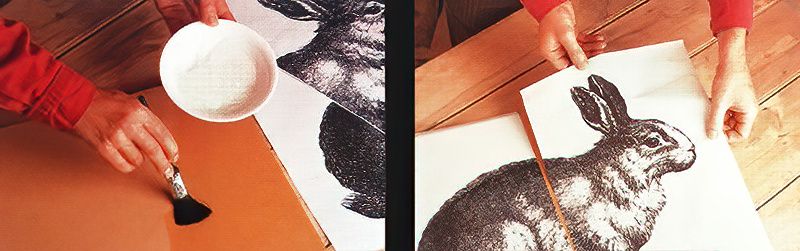
Next, apply a coating of wallpaper paste to the surface of the plywood. This will seal the plywood and prepares the surface for the paper.
Step 4
Now to trim the joining edges of the two pieces of paper to form a whole picture, so they should butt up against each other with no overlap. Then apply a very thin layer of wallpaper paste right up to the edges. And finally stick the two paper halves together onto the sheet of plywood.
Our little wooden rabbit ornament is slowly coming to life.
Practise Using A Jigsaw
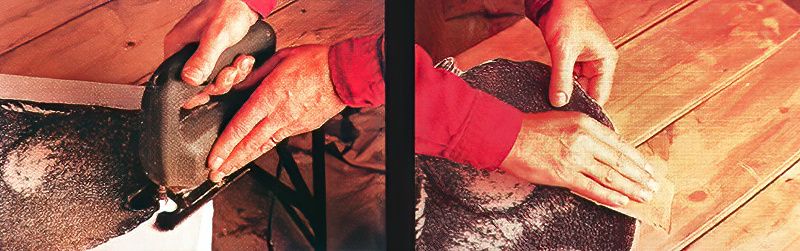
Step 5
Now, use the jigsaw to very carefully cut around the shape, but leaving the base flat. If you haven't used a jigsaw before, I would recommend a couple of practises on some scrap wood. Take your time to get the shape as accurate as possible.
Step 6
Then, using the fine grade sandpaper, sand the edges of the shape to make them smooth.
Finishing Touches To Our Wooden Rabbit Ornament And Making A Stand
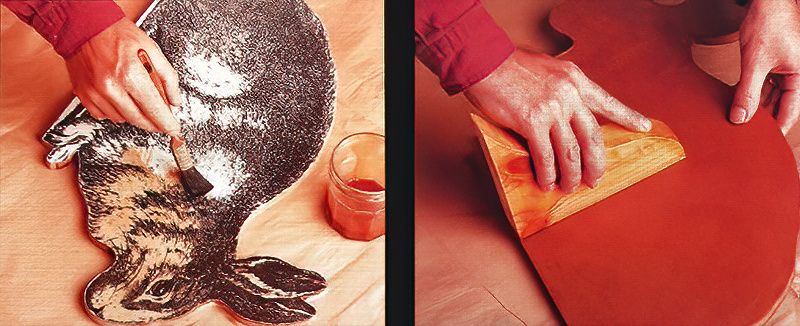
Step 7
Next, seal the surface of your ornament with a coating of shellac which will give it a vintage golden glow. Then apply a coating of antique pine varnish, followed by several coatings of the clear varnish to seal the whole thing. Ensure that you allow each coat to dry thoroughly before applying the next.
Step 8
Finally, trace the pattern for the wooden rabbit ornament stand, and then cut it out of wood. Then rub down the edges with the sandpaper and glue the stand in place to support your design.


.jpg)
.jpg)