Decorate Your Bedroom With A Simple Wood And Paper Screen
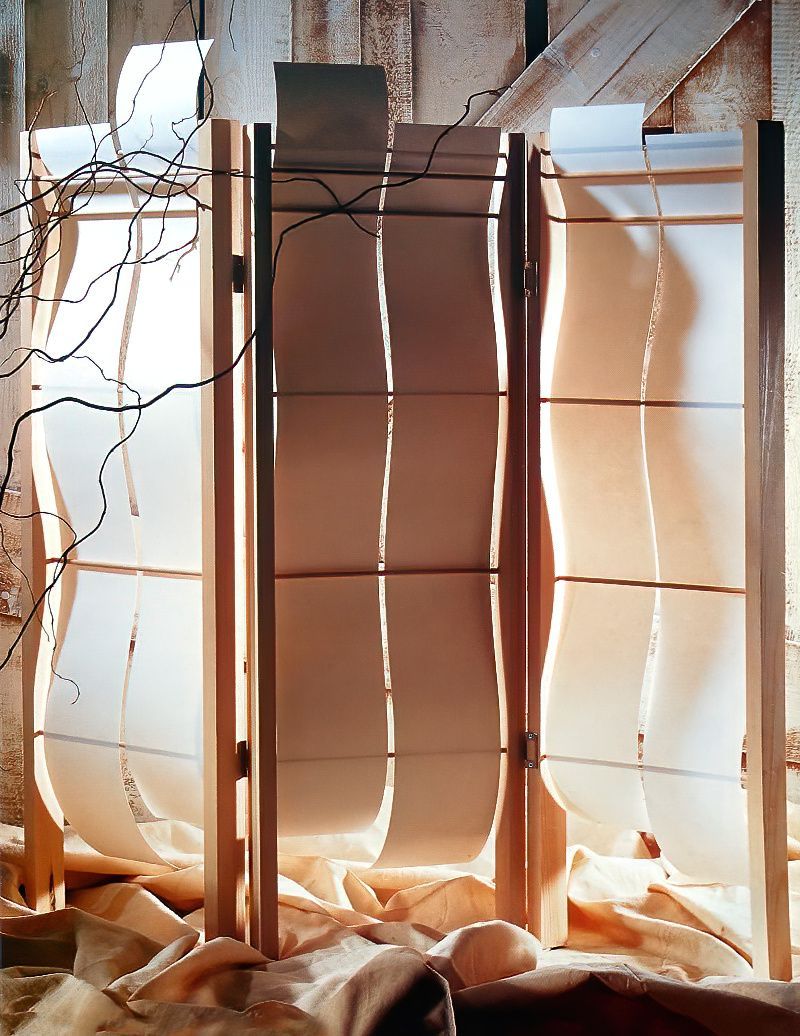
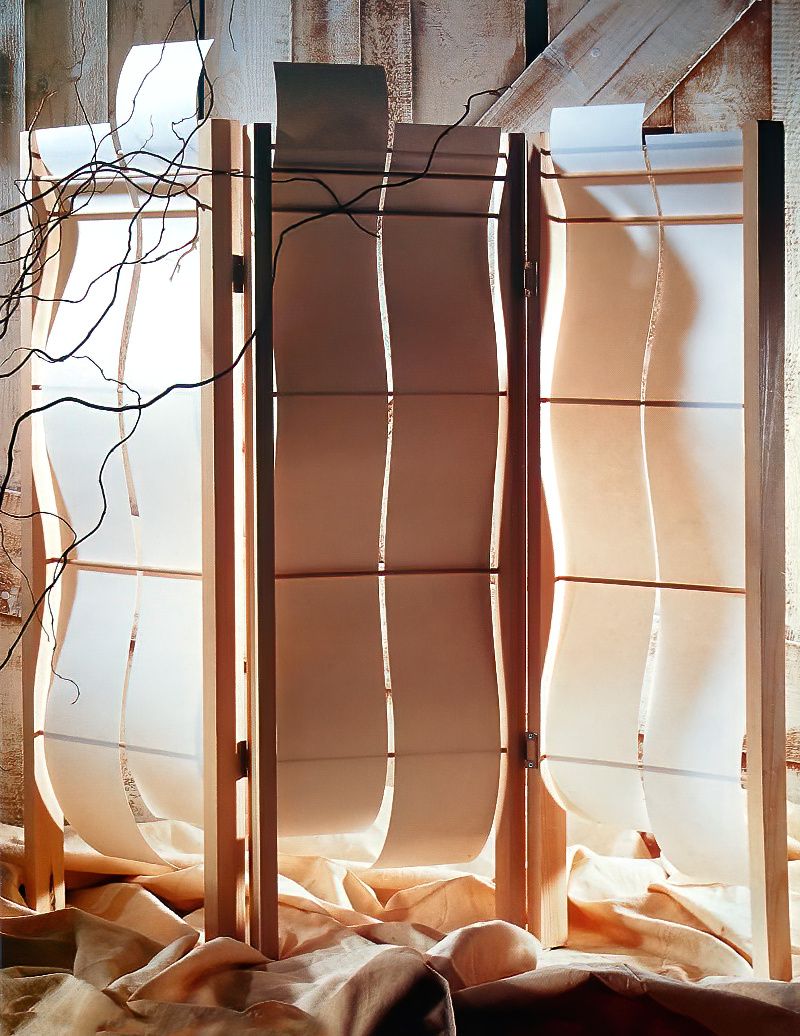
Here is how to make a simple wood and paper screen. Minimalistic and elegant and perfect for use as a privacy screen for dressing or as a room divider. Its minimal aesthetic makes it perfect for use almost anywhere. It is a really simple, yet effective design, and looks very stylish.
List Of Items Needed To Make A Simple Wood And Paper Screen
- Six 90cm Lengths of 5cm X 2.5cm Softwood (Pine)
- Eighteen 30cm Lengths of 6mm Wooden Dowel
- White Emulsion
- Clear Acrylic Varnish
- Wood Glue
- 2 Pairs of Butterfly Hinges and Screws
- White Heavy Textured Watercolour Paper
- Fine Grade Sandpaper or Fine Wire Steel Wool
- Small Decorators Paintbrushes
- Pencil
- Clamps
- Drill
- Wooden Mallet
- Screwdriver
- Metal Ruler
- Craft Knife
- Cutting Mat
Preparing The Wood For Our Simple Wood And Paper Screen
1st Step
Start by lightly rubbing down all of the pieces of wood using either the fine grade sandpaper or the fine steel wire wool. Then apply a thin and patchy coating of diluted white emulsion paint to all of the wooden pieces. And leave it all to dry. Then seal the painted wood with a coat of the clear acrylic varnish.
2nd Step
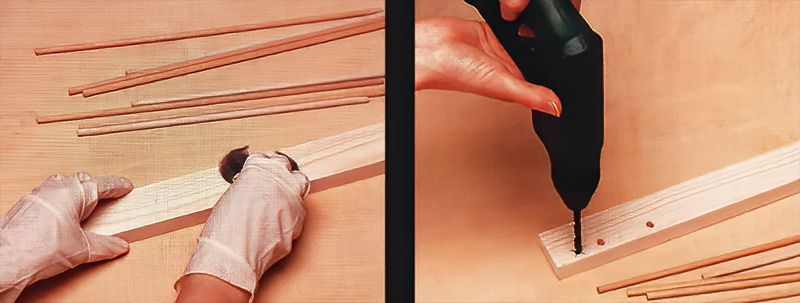
Next, use a pencil to mark the position of each of the dowels for the upright pieces of the screen. Then firmly clamp the wood and carefully drill a hole roughly halfway through the wood at each of the marked points.
Making The Screen Frame
3rd Step
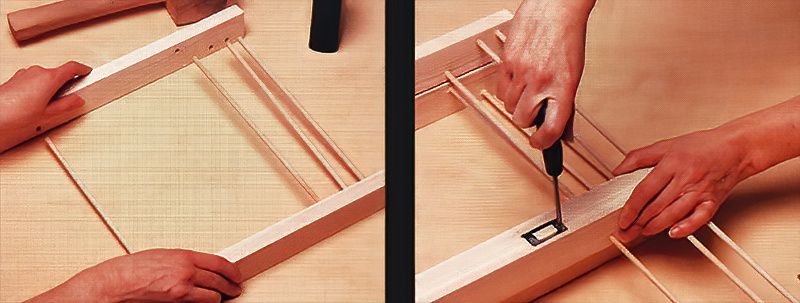
Now, glue the dowels into one half of the pair of upright pieces. Then put a little glue into all of the holes in the second upright piece, and attach the two together, carefully putting the dowels into each of the holes on the other side.
Make sure that you correctly match the corresponding holes on both pieces, so that it lines up properly. Gently use a wooden mallet to tap the two sides together.
4th Step
Next, place the frames side by side and use the pencil to mark on the position of the hinges. I would recommend making small pilot holes for the screws so that you will not split the wood. Then screw in the hinges.
Putting The Paper Into The Screen
5th Step
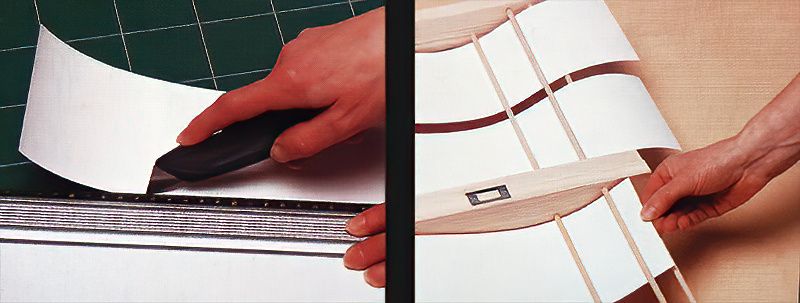
Now for the paper part. Cut out six 12cm X 90cm lengths of heavy textured watercolour paper using a metal ruler, craft knife and cutting mat, to ensure that everything is cut straight. Then roll it so that it has a gently curve to it.
6th Step
Finally, weave the paper strips in and out of the dowels of the screen. You can experiment with the curves as you put the paper in to create your desired effect.
Making A Simple Wood And Paper Screen Conclusion
I think it looks really interesting and vey smart. Often we have a room that have a little section that we would simply rather just cover over and hide a little. This simple wood and paper screen is perfect for that situation.

