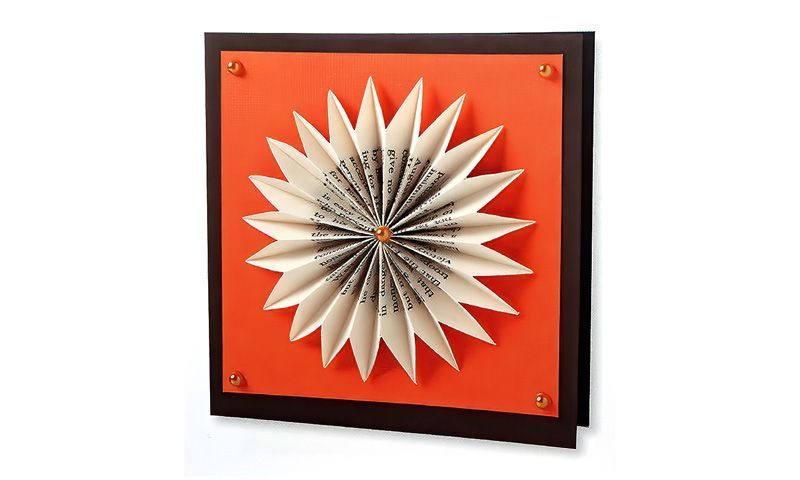
Concertina Cards Are A Simple Way To Make An Impressive Card
If you have an old book that you don't mind discarding then save the pages, as they make the perfect material for many crafty projects.
Concertina cards have a little bit of a wow factor. Once you understand the basic principle you can adapt and change and add more and more concertina circles to make all sort of amazing designs.
Make sure you use a book with pages of good thickness, so you can make sharp creases. Some older books tend to have very thin pages. These are not idea. Maybe try the same effect with picture books or comics or anything you can think of that makes an appropriate effect.
Things you will need to make the concertina card
- Three pages from an old book, each 16 x 5cms or 6 x 2inches
- Orange card for background, 11.5cms square or 4.5inches square
- Orange gemstones
- Brown card blank 13cms square or 5inches
How To Make A Concertina Card
Step One
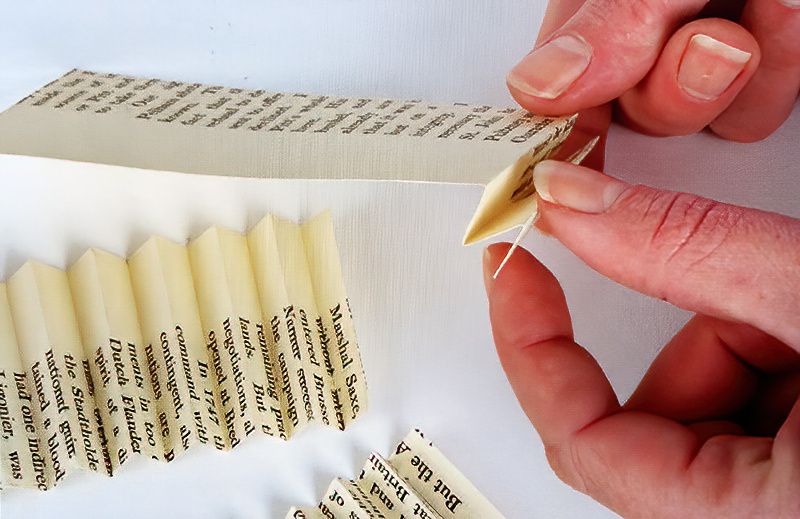
To start making your concertina card you will need to get your book pages and cut three strips of paper 5cms or 2inches wide and 16cms or 6inches long. If you add part of the blank margin this will create a natural border around the final design. Or simply let loose and go with your creative flow.
Start creating the concertina card by folding back and forth at 1cms or half and inch intervals as pictured above.
Fold back and forth creating a zig-zag effect all the way to the end of each strip.
Making A Zig Zag Effect With Your Papers
Step Two
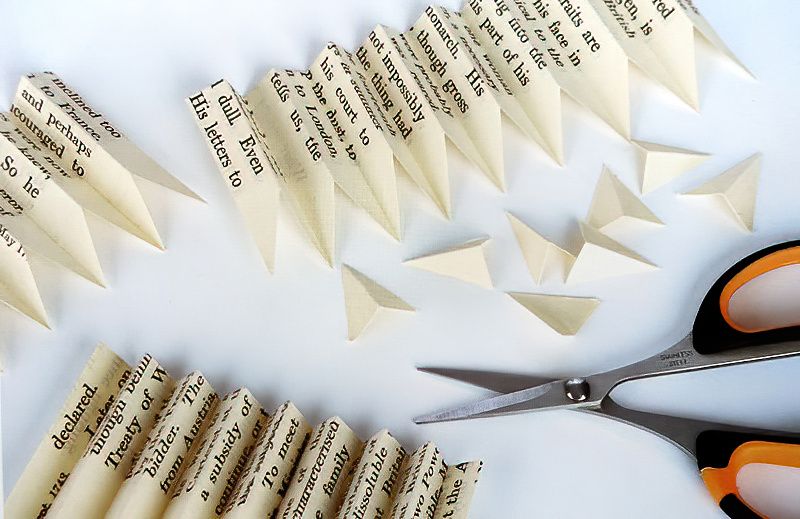
Find some small scissors and snip off the points on one side of the strip. This side will be the outside effect of the concertina card. The snipped off angles will create a flower effect. Make sure to snip the corners off the side you want to be on the outside of the final design.
First Assembly Of The Basic Concertina Part
Step Three
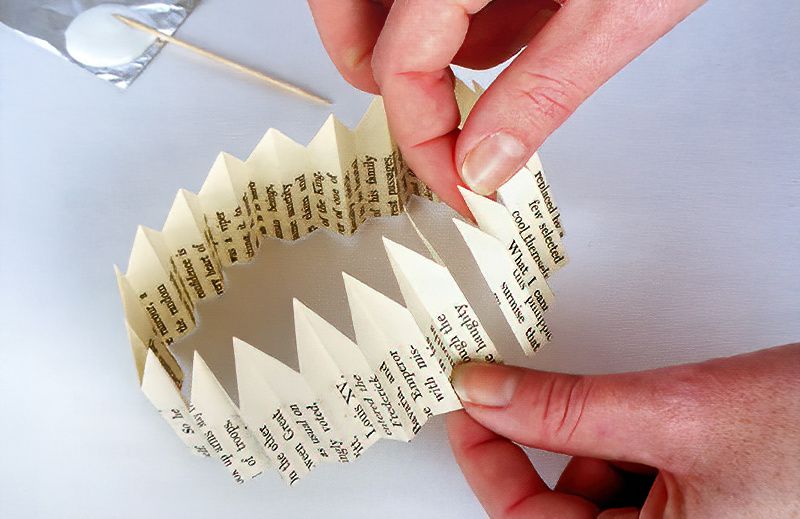
Put some white glue on a small piece of tin foil or similar. Then use a cocktail stick to apply glue to the ends of each strip. Then glue the strips to create one long strip. Then finally loop the strips and glue the ends together to create a ring.
We use a cocktail stick to apply the glue, because this enables us to apply the glue more accurately. Even though the common white glue sets clear, an excess application can still be seen and is not desirable. But remember to have fun. So if you don't have a cocktail stick, don't worry, just use a stiff piece of card, maybe from some discarded packaging to apply the glue more delicately.
Start Assembling The Concertina Ring
Step Four
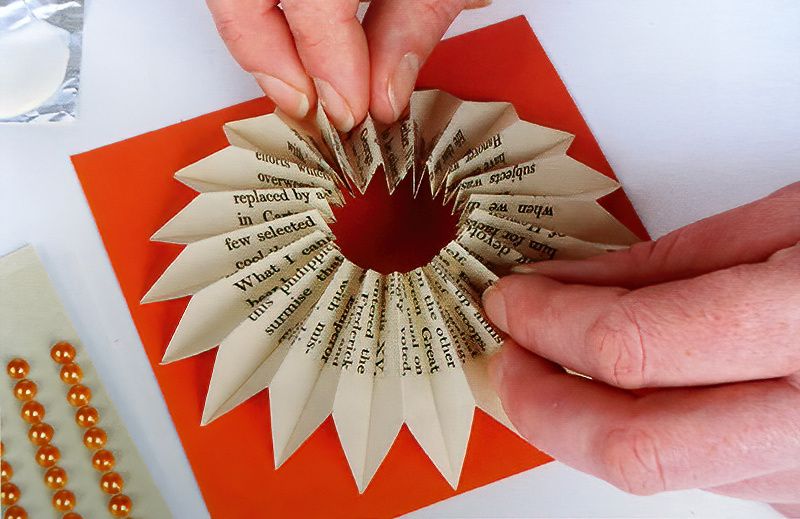
Once the glue is dried, we want to gently tease the ring into the shape we can stick to the card. Gently push the one side of the ring into the centre of the card. The pointy edges pointed to the outside. Take some time to neatly and gently persuade the ring into a flatter form. It will keep trying to spring back, so we need to glue it.
Apply a generous amount of glue to the orange card and even to the back of the concertina if you are confident. Again gently tease it into the correct flat position, pressing down gently on top of the orange card. Hold the concertina in place for a while, until the glue sets.
If you release it too early, the concertina will try and spring back into the ring shape.
Final Assembling Of The Concertina Card
Step Five
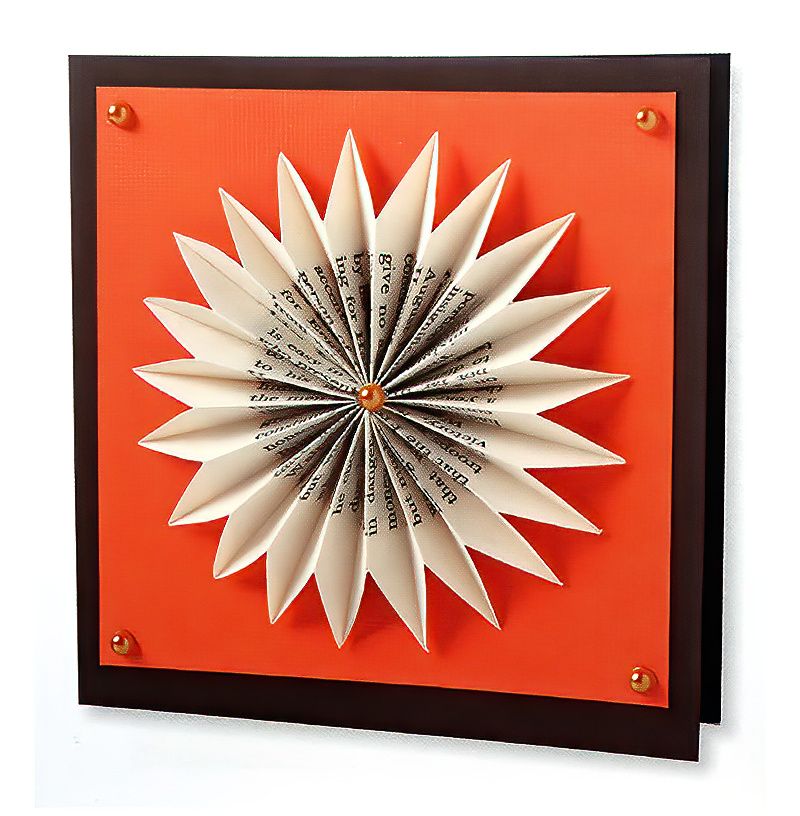
Now we need to attach the orange card to the brown greeting card blank. To attach the orange card you can either use double-sided sticky tape or simply glue again. Once the orange card is mounted in place you can decorate further by adding gemstones to the centre and corners.
Or complete to your own design. Have fun with this simply technique and make sure to share your results. I can't wait to see them.
To conclude, if you want to place your concertina card in an envelope, this obviously won't work. Just search out a small flat box and pop it in there.
Hand-made cards, including concertina cards, are such a wonderful gift. Fun to make, fun to give and fun to receive.



.jpg)
