Log in Sign up
PROFILE MENU

Society of Makers

Don't have an account? Sign up.

Society of Makers

Already have an account? Log in.

Select Guild Forgot Logo Society of Makers

An Easy Gingham Applique Cushion Tutorial

21 views  •  11 Aug 2023
Kids Craft Club
11 subscribers

How To Make A Gingham Applique Cushion

Applique means sewing other pieces of fabric on top of a base piece of fabric. Usually for decorative purposes. It's a lovely technique and really makes a project something special and personal.

I find hand sewing very relaxing. Set yourself up in a nice comfy position in front of the tv or some other cosy place and just take your time sewing.

Here we are going to make a simple and fun house motif. This would make a great present for someone moving home. Or would be a great addition to your own interior design. 


What we need to make a gingham applique cushion

  • Paper, pencil and scissors
  • Fusible web
  • Gingham fabric, 40 x 80cms / 16 x 32 inches
  • Extra gingham scraps
  • Needle and thread
  • Buttons
  • 30 x 40cms / 12 x 16 inches cushion pad
  • Ribbon
  • Embroidery thread in a contrasting colour
  • 40cms / 16 inches of ribbon
An Easy Gingham Applique Cushion Tutorial

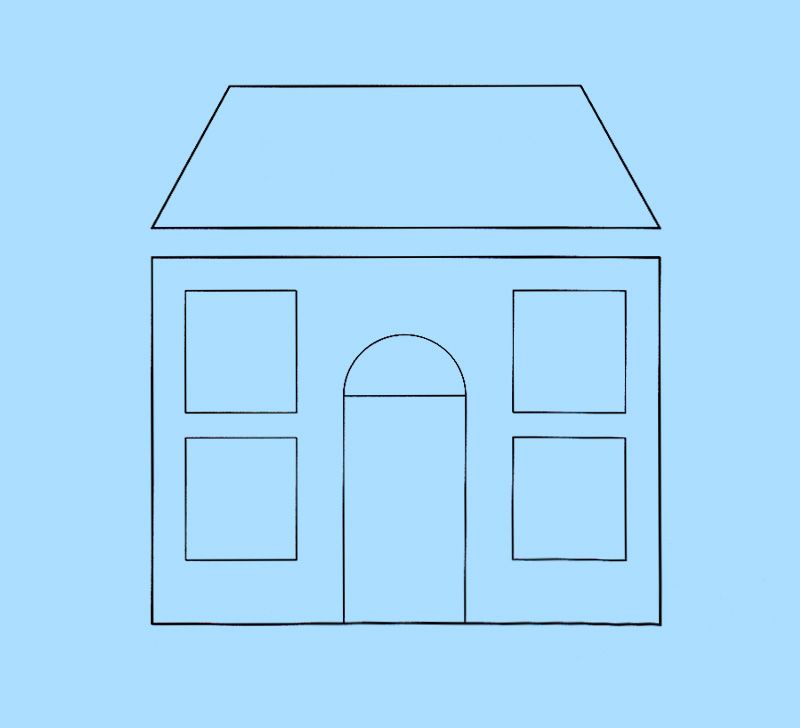
Make A House Template For Our Gingham Applique Cushion

Step One

First we need to cut out some house shapes. You can use the template above, copy, resize and print it. Or just search the internet for house template shapes.

Cut out the paper shapes and templates. Now we want to take our scraps of gingham fabric we are going to use to make up the house shapes. We are going to use the fusible web now to make everything much easier.

Fusible web, is like a fabric glue sheet, that comes with a paper backing. The paper we can peel off when ready.

So take your gingham fabric pieces, each big enough for each part of the template. Then ask an adult to use a hot iron to press down some fusible web paper onto the gingham fabric. Leave the paper attached for the moment.
An Easy Gingham Applique Cushion Tutorial

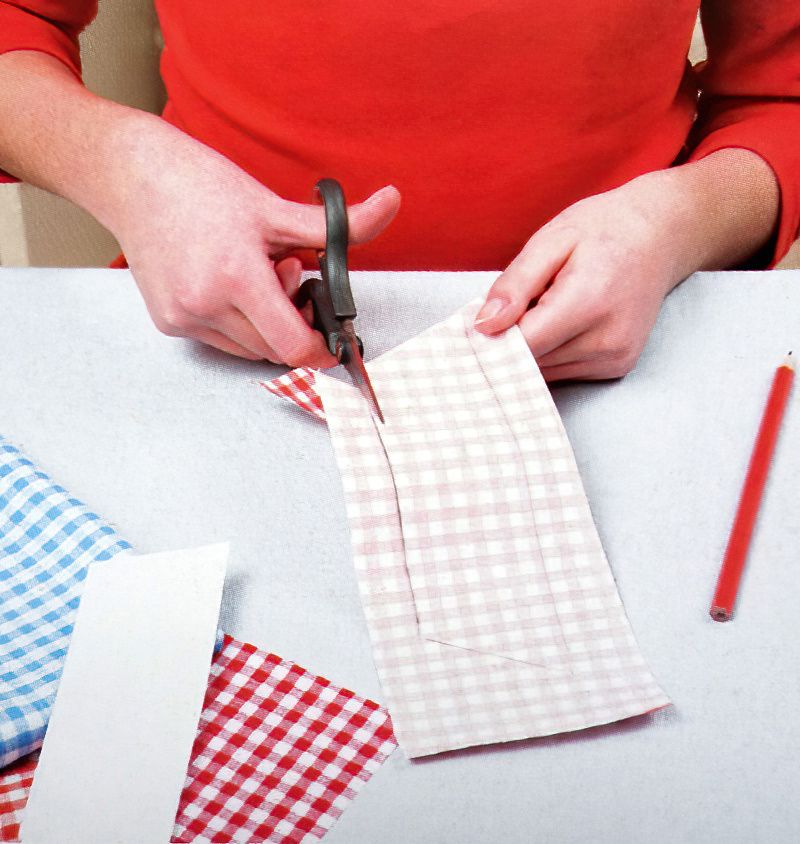
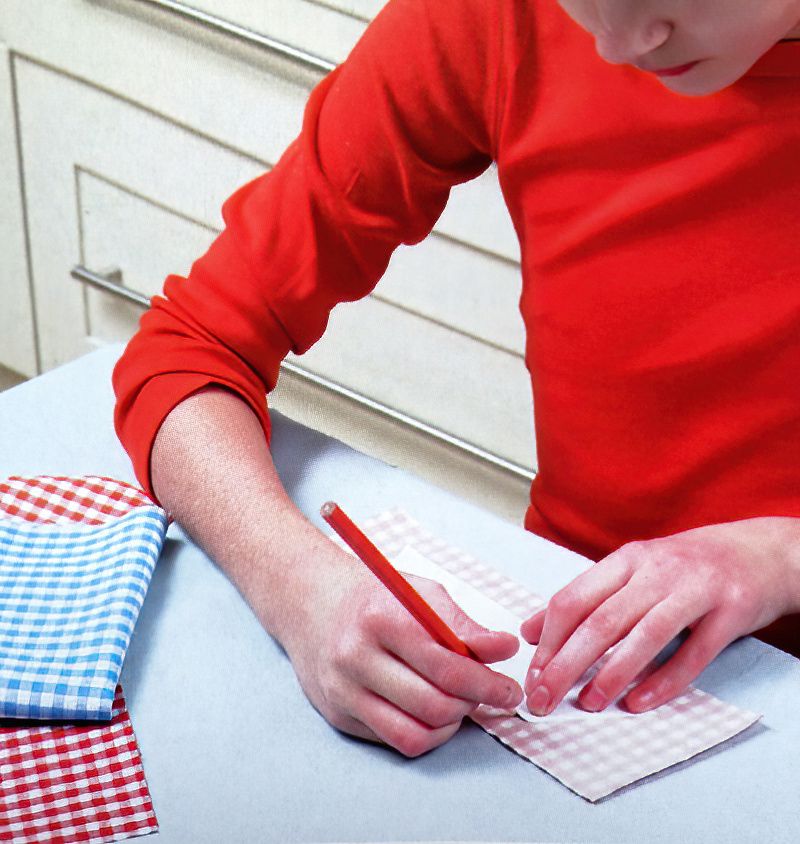
Draw Around Our Gingham Applique Cushion Templates

Step Two

Now we can trace around our cutout house shapes, onto the paper of the fusible web. Finally cut out the gingham fabric shapes.

We also need gingham fabric pieces for the front and back of the cushions. Cut the following pieces of gingham:
  • Front side, 33 x 43cms or 13 x 17 inches
  • Back of cushion, two pieces measuring, 33 x 24cms / 13 x 9 and half inches each

Now we can take the larger piece of gingham, that will be the front of the cushion and lay it flat on the table. Next, remove the backing papers from the back of the house template pieces. And carefully arrange our house shapes in a nice design on top of the fabric for the front of the cushion. 

Now we can lay a clean tea towel on top and ask an adult to use a hot iron to glue the pieces to the front of the cushion.
An Easy Gingham Applique Cushion Tutorial

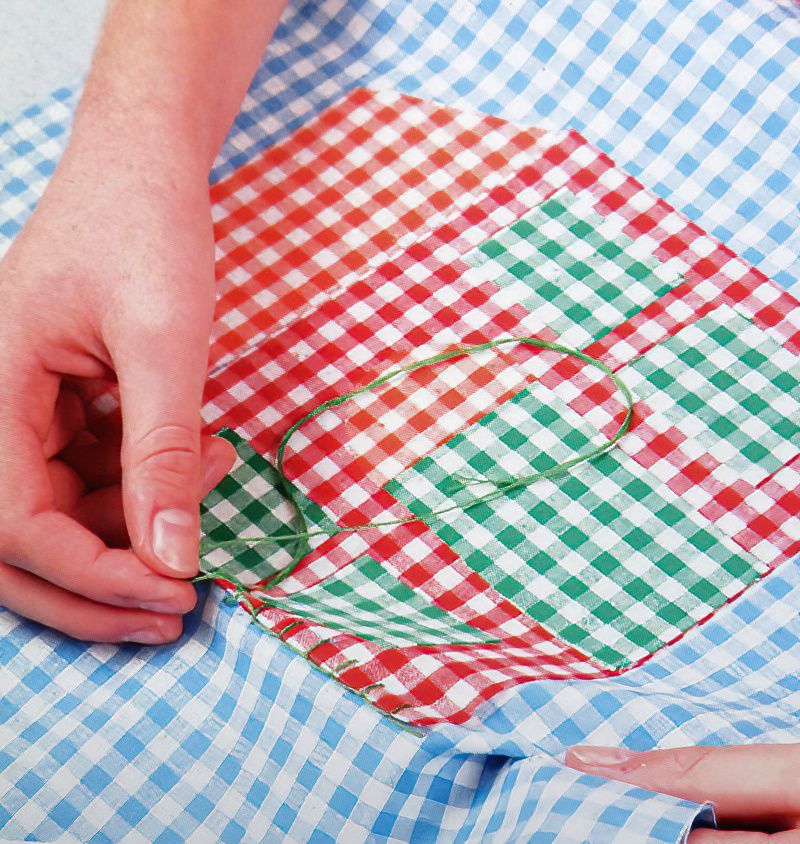
Start The Blanket Stitch Of Our Gingham Applique Cushion

Step Three

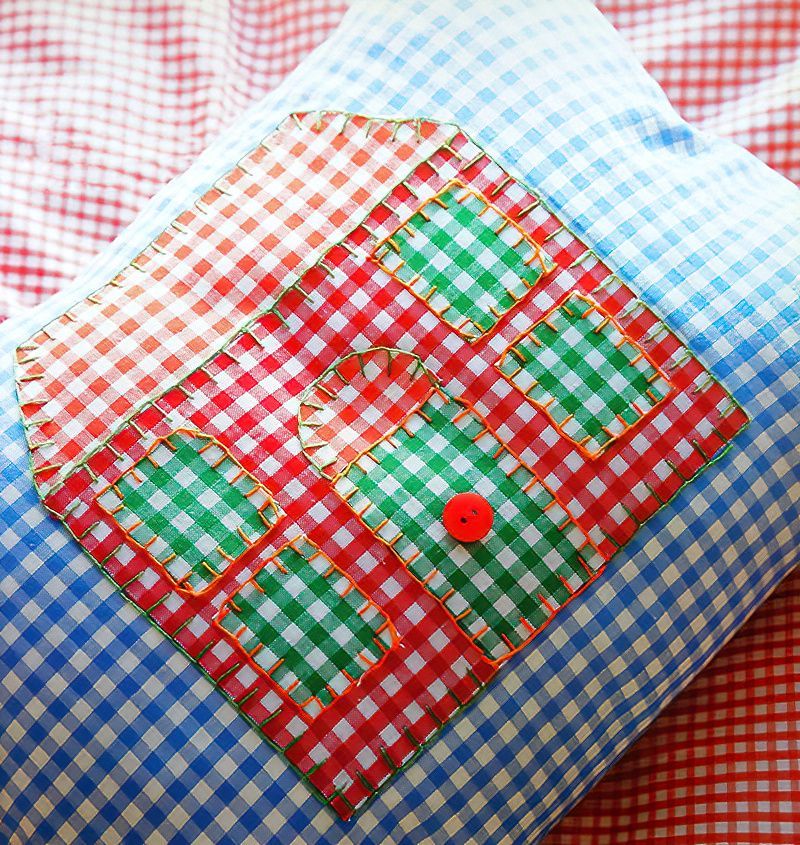
Once all the hot glue is cooled, you will see all the applique house template pieces are held in place. It does not matter if there are parts that are not held so well, we are going to sew next.

Thread your needle with some embroidery thread. It is interesting if we use a contrasting colour for our stitches around the edge. But this is your gingham applique cushion, so you can make it how you like.

Now we want to sew around each template shape using a blanket stitch. A blanket stitch is not too tricky. Basically you go in the front and up and diagonal, then back out the front. But before you go down and back in the front, one stitch along, you hook the dangling thread. This makes the thread go into a square shape. That's basically blanket stitching.

Have a practise on a scrap if you are new.
An Easy Gingham Applique Cushion Tutorial

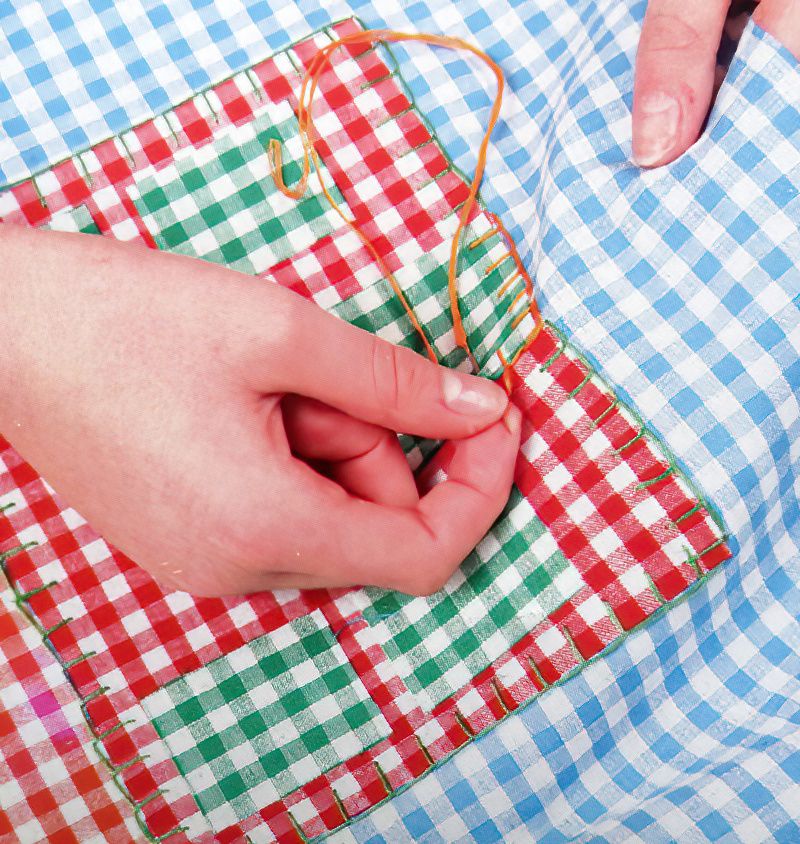
Continue To Sew Your House Applique Gingham Cushion

Step Four

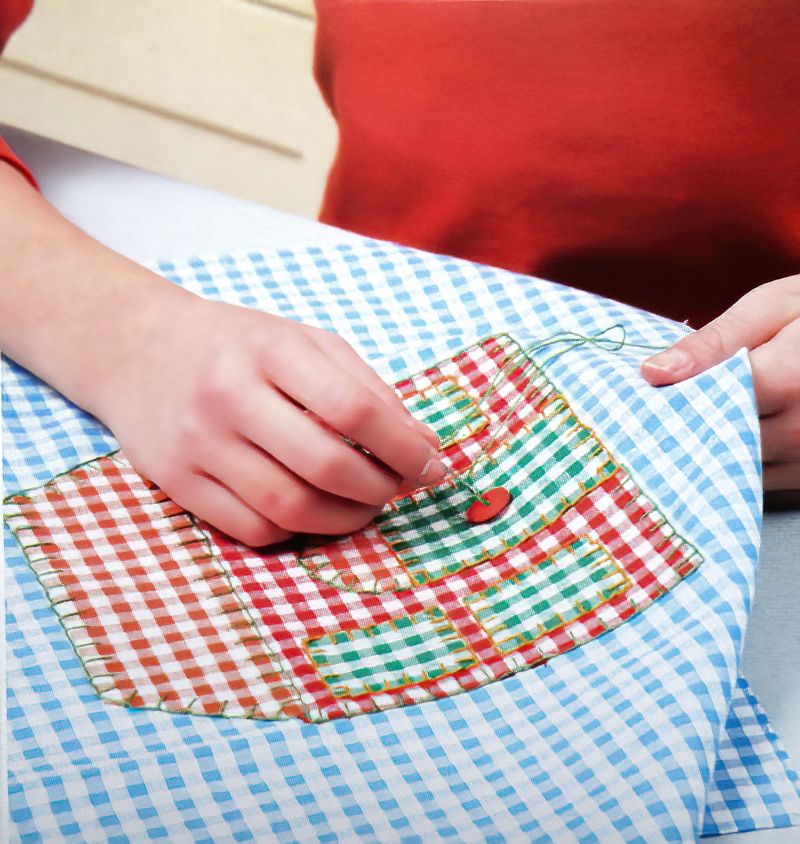
Continue sewing around all the template shapes. Have fun and take your time. Sewing is a very relaxing hobby, so just enjoy the peace and quiet. Make sure you cast off securely at the end of each shape.
An Easy Gingham Applique Cushion Tutorial

Add More Details To Our Gingham Applique Cushion

Step Five

Think about adding more details if you like. We can add a button as a door handle. But you can add anything you like. Decorating with other techniques is just as fun as doing the applique itself.
An Easy Gingham Applique Cushion Tutorial

Sew The Back Part Of Our Gingham Applique Cushion

Step Six

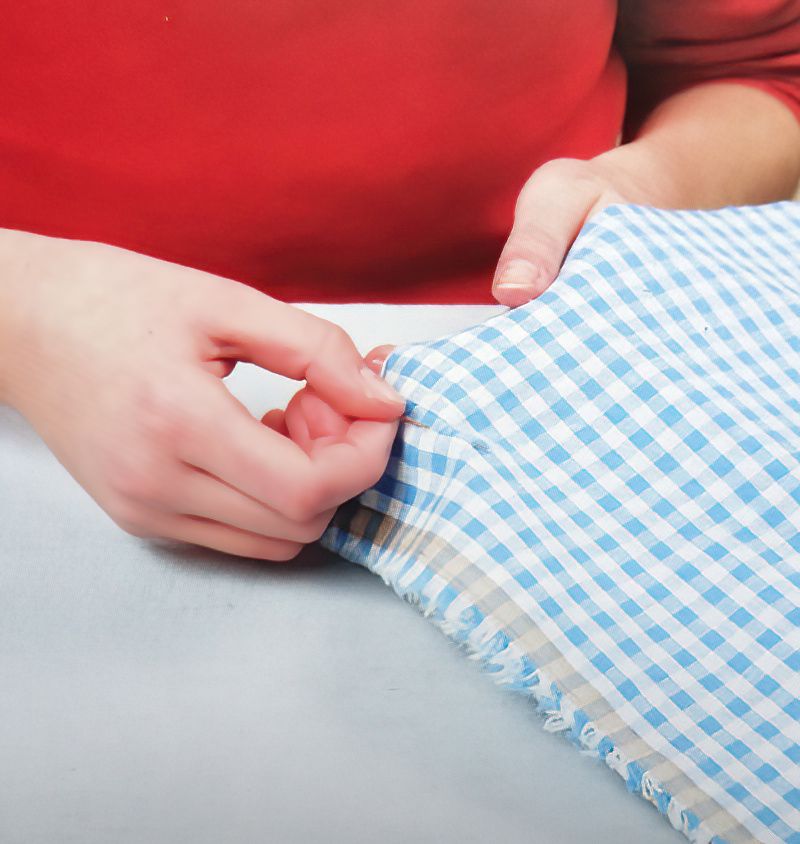
Now we can use some normal sewing thread and make the back part of our gingham cushion. Place the two parts of fabric we need for the back side on top of each other. With the nice side of the fabric on the inside.

We are going to sew along one of the long edges. But we are only going to sew in from the edge about 5cms or 2inches, on both ends. This will leave a big hole in the middle of the edge where we didn't sew. This is because we need a place to pop in our cushion pad at the end.

Make sure you cast off securely after you sew the little bit on each end. Now open out and ask an adult to press the seam flat.
An Easy Gingham Applique Cushion Tutorial

Now Sew Both Sides Of Our Gingham Applique Cushion Together

Step Seven

Now place the front side of the cushion with our applique design on it, on top of the back side with our slit in it for the cushion pad. Place them on top of each other, again with the nice sides facing each other. We will turn it inside out at the end.

Pin the front and back pieces together if you prefer. Now carefully sew around all four edges of the cushion cover.

Before we turn it inside out, there is one more thing. We can notch the corners. Notch the corners means, cut a little diagonal of fabric off each corner. Obviously don't cut your sewing. This helps there not be a big bunch of fabric on the inside when we turn it inside out.

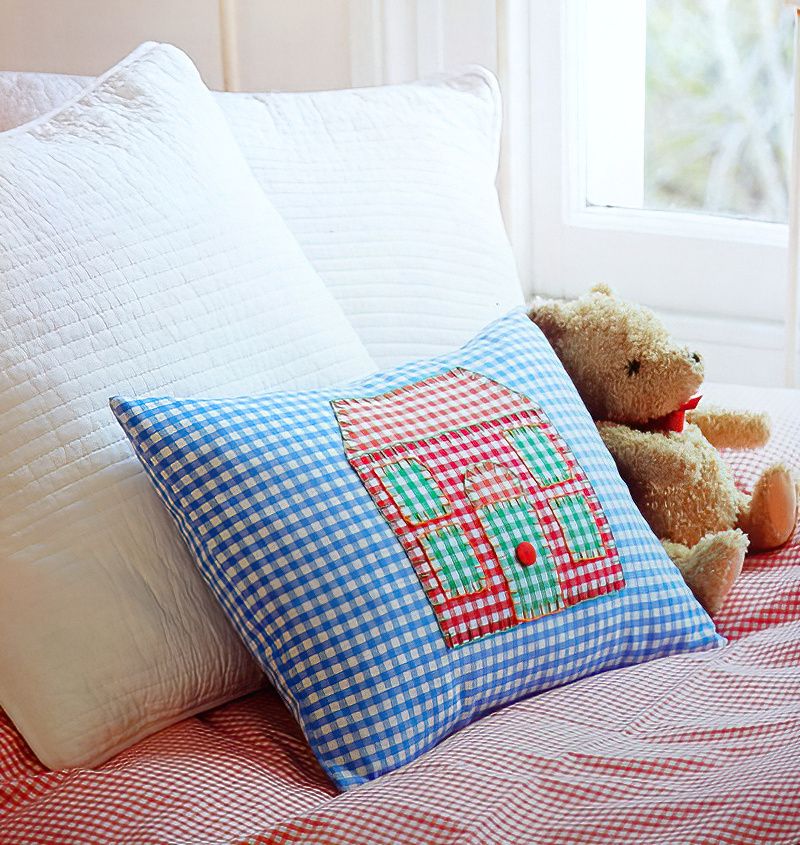
Finally turn the whole cover the right way around so your lovely gingham applique cushion design is on the outside.
An Easy Gingham Applique Cushion Tutorial

Finish Our Gingham Applique Cushion With A Ribbon Closure

Step Eight

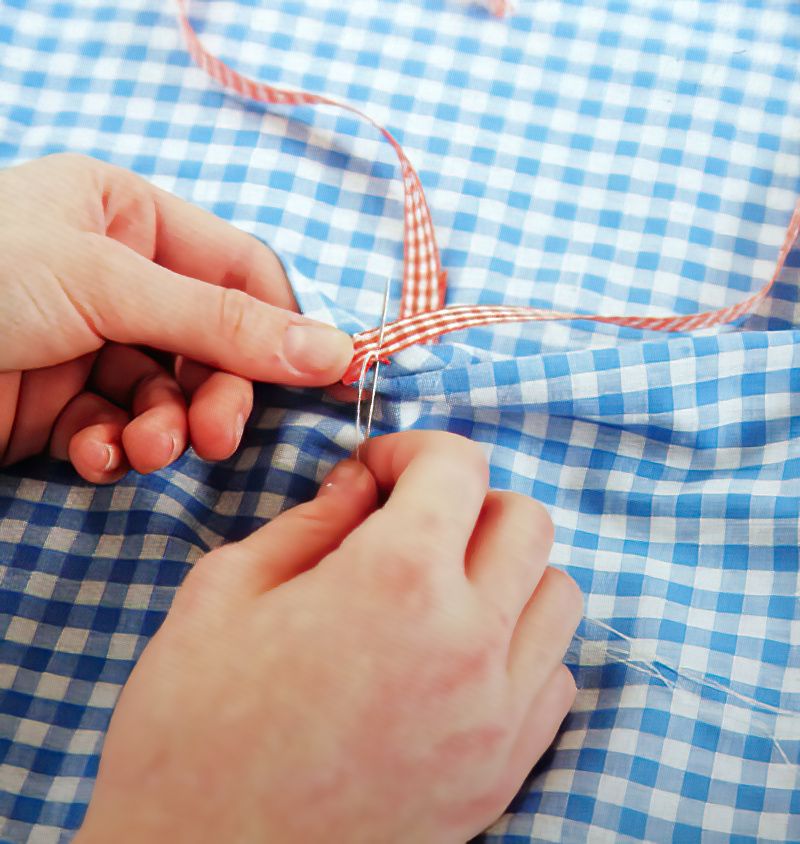
Now we can cut some ribbon into 20cm / 8 inch lengths. On the back of the cushion, where the opening is, sew a piece of ribbon on either side of the opening at the centre. We can use this ribbon to tie the opening closed.

Cut the end of the ribbon diagonally to prevent it from fraying.

Now just pop in the cushion pad and we are done. We have completed our lovely gingham applique cushion. It may seem like a lot of work, but I am sure you will keep this cushion for many years. And once you have a nice comfy sewing corner set up, sewing becomes a joy as you listen to music or watch a tv show or just let your mind wander.
An Easy Gingham Applique Cushion Tutorial
0 Comments
CANCEL
CLEAR
/mystu/newpost/uploads/202310/260343121S51000-standard.jpg thumbnail
Make a Stencilled Doily Box
Kids Craft Club
16 views • 13 Aug 2023
/mystu/newpost/uploads/202310/250848541S01000-standard.jpg thumbnail
Simple Paper Cut Lanterns
Elizabeth Richards
22 views • 16 Feb 2023
/mystu/newpost/uploads/202310/250902081S81000-standard.jpg thumbnail
Making A Handmade Gilded Patchwork Lampshade
Katie Isaacs
20 views • 8 Mar 2023
/mystu/newpost/uploads/202310/250848411S41000-standard.jpg thumbnail
How To Make Paper Cut Bookmarks
Elizabeth Richards
36 views • 2 Feb 2023
/mystu/newpost/uploads/202310/260103311S71003-standard.jpg thumbnail
Instructions for Creating a Christmas Felt Photo Album
Ms Felt
38 views • 7 Dec 2023
/mystu/newpost/uploads/202310/260348461S1000a-standard.jpg thumbnail
How To Make a Fleece Scarf
Kids Craft Club
24 views • 19 Sep 2023
/mystu/newpost/uploads/202310/261252231S0-severe-noise.jpg thumbnail
Paper Diamond Decorations Are Fun for Any Occasion
Kids Christmas Projects
32 views • 16 Sep 2023
/mystu/newpost/uploads/202310/250834341S010932331000.jpg thumbnail
Make a Vintage Decorative Decoupage Tea Tray
Alison Jones
25 views • 1 Jan 2023
/mystu/newpost/uploads/202310/250824111S070235091000.jpg thumbnail
Beautiful Celestial Day And Night Hanging Mobile
Alison Jones
19 views • 8 Dec 2022
/mystu/newpost/uploads/202310/260308191S21000-standard.jpg thumbnail
Paper Chains, More and More Paper Chains
Kids Craft Ideas
18 views • 11 Feb 2023
/mystu/newpost/uploads/202310/260129071S81000-standard.jpg thumbnail
How to Make Coconut Oil Body Scrub
Natural Skin Care
33 views • 24 Jan 2024
/mystu/newpost/uploads/202310/260339091S11000-standard.jpg thumbnail
Time for Fun Finger Puppets
Kids Craft Club
17 views • 18 Jul 2023
/mystu/newpost/uploads/202310/260113421S01001-standard.jpg thumbnail
Crafting Comfort: DIY Pyjama Bag Tutorial for Cozy Nights
Quilting Fun
32 views • 4 Oct 2024
/mystu/newpost/uploads/202310/260100221S41003-standard.jpg thumbnail
Turn Felt into a Stunning Cuckoo Clock Wall Hanging
Ms Felt
25 views • 12 Sep 2023
/mystu/newpost/uploads/202310/260355481S61000-standard.jpg thumbnail
Amazing Homemade Coconut Cleanser for You
Natural Skin Care
22 views • 16 Aug 2023
/mystu/newpost/uploads/202310/260323451S61000-standard.jpg thumbnail
Make a Cool Glove Rabbit Puppet
Things Kids Can Make
28 views • 25 Apr 2023
/mystu/newpost/uploads/202310/261248271S71001-standard.jpg thumbnail
Make a Simple 3D Christmas Card
Kids Christmas Projects
27 views • 13 Aug 2023
/mystu/newpost/uploads/202310/260340371S91000-standard.jpg thumbnail
Make a Flower Patchwork Cushion
Kids Craft Club
18 views • 30 Jul 2023
/mystu/newpost/uploads/202310/260347011S01000-standard.jpg thumbnail
How to Make Marbled Paper
Kids Craft Club
37 views • 9 Sep 2023
/mystu/newpost/uploads/202310/260347181S31000-standard.jpg thumbnail
Make a Pressed Flower Butterfly Picture
Kids Craft Club
44 views • 11 Sep 2023
/mystu/newpost/uploads/202310/261251441S71000-standard.jpg thumbnail
Make Paper Bird Decorations and Gift Tags
Kids Christmas Projects
38 views • 9 Sep 2023
/mystu/newpost/uploads/202310/250928431S61000-standard.jpg thumbnail
A Simple Corrugated Paper Folder Wrapping
Lottie Smith
28 views • 19 Jan 2023
/mystu/newpost/uploads/202310/260118331S81001-standard.jpg thumbnail
A Guide to Sewing Your Own Quilted Coin Purse
Quilting Fun
44 views • 1 Dec 2024
/mystu/newpost/uploads/202310/260117371S11002-standard.jpg thumbnail
How To Make A Quilted Book Cover
Quilting Fun
43 views • 24 Nov 2024
/mystu/newpost/uploads/202310/260107121S41003-standard.jpg thumbnail
Creating Felt Tea Light Glass Holders
Ms Felt
33 views • 10 Aug 2024
/mystu/newpost/uploads/202310/260304301S21000-standard.jpg thumbnail
Painted Stones Are Fun to Make
Kids Craft Ideas
17 views • 29 Jan 2023
/mystu/newpost/uploads/202310/250842061S21000-standard.jpg thumbnail
An Inca Inspired Bird Lampshade
Alison Jones
25 views • 15 May 2023
/mystu/newpost/uploads/202310/250858591S21000-standard.jpg thumbnail
Make Pretty Little Gift Boxes
Katie Isaacs
19 views • 7 Jan 2023
/mystu/newpost/uploads/202310/260346421S1000a-standard.jpg thumbnail
A Fun Basic Paper Weaving Tutorial
Kids Craft Club
18 views • 7 Sep 2023
/mystu/newpost/uploads/202310/250849541S51000-standard.jpg thumbnail
Pretty Ornate Cupid Valentines Card
Elizabeth Richards
28 views • 22 May 2023
/mystu/newpost/uploads/202310/260327131S41000-standard.jpg thumbnail
Basic Wind Chime Tutorial for Kids
Things Kids Can Make
22 views • 23 May 2023
/mystu/newpost/uploads/202310/260335401S31000-standard.jpg thumbnail
Make a Fun Paper Plate Animal Mask
Kids Craft Club
20 views • 26 Jun 2023
/mystu/newpost/uploads/202310/260332241S161249361000.jpg thumbnail
YouTube Channel Nigel Chia Review. His Dolls Are Better Dressed T...
Jane's Best Of YouTube Makers
47 views • 20 Apr 2023
/mystu/newpost/uploads/202310/260341211S11000-standard.jpg thumbnail
A Fun Decoupaged Picture Frame
Kids Craft Club
27 views • 5 Aug 2023
/mystu/newpost/uploads/202310/260339281S51000-standard.jpg thumbnail
Make a Simple Teddy Bear
Kids Craft Club
35 views • 20 Jul 2023
/mystu/newpost/uploads/202310/260341081S11000-standard.jpg thumbnail
Make a Bulletin Board for Pictures and Notes
Kids Craft Club
18 views • 3 Aug 2023
/mystu/newpost/uploads/202310/261252451S11000-standard.jpg thumbnail
Make Your Own Festive Favour Cones
Kids Christmas Projects
34 views • 22 Sep 2023
/mystu/newpost/uploads/202310/260347311S81000-standard.jpg thumbnail
Make Personalised Gift Wrap and Gift Tags
Kids Craft Club
27 views • 13 Sep 2023