Creating a Vintage-Inspired Quilted Picture Frame for Cherished Memories
If you're like me and have a soft spot for old black-and-white family photos, you'll understand the desire to give them a special frame. In this DIY project, we'll guide you through crafting a charming vintage-style frame using your favorite fabric scraps or even vintage textiles. It's a delightful way to showcase your precious photographs.
A quilted picture frame is more than just a mere holder for your cherished memories; it's a work of art in itself. Crafted with love and attention to detail, it combines the warmth of quilting with the timeless elegance of a picture frame. Layers of carefully chosen fabric scraps, or perhaps vintage textiles steeped in history, are stitched together to create a patchwork masterpiece.
This quilted covering not only adds texture and visual interest but also serves as a lovingly handcrafted embrace for your treasured photograph. The result is a unique and personalized frame that tells a story of its own, infusing your precious moments with an extra layer of nostalgia and charm. With its ability to transform any picture into a keepsake, a quilted picture frame is a true testament to the artistry of memory preservation.
Materials Needed To Make A Quilted Picture Frame
- 3 1/4 x 10in. (8 x 25cm) each of floral, printed baby cord, and raspberry silk fabrics
- 7 1/4 x 8 3/4in. (18 x 22cm) piece of cardstock (cardboard)
- Hot glue gun
- Masking tape
- 10in. (25cm) of cream ribbon
- 7 1/4 x 8 3/4in. (18 x 22cm) piece of thick cardstock (cardboard)
- 6 x 6in. (15 x 15cm) piece of floral fabric
- 6 x 6in. (15 x 15cm) piece of Bondaweb
- 6 x 6in. (15 x 15cm) piece of pink felt
- Beads, sequins, and vintage button
Let's Start With Our Quilted Picture Frame Project
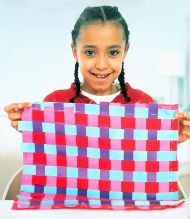
Step One: Create a Striped Patchwork Fabric
Cut two strips from each fabric pattern, approximately 1 1/2 x 10 inches (4 x 25 cm). Pin and stitch these strips together using a 1/4-inch (5 mm) seam, creating a striped piece of fabric. Cut the striped patchwork into four equal lengths.
Step Two: Prepare the Cardstock Frame Base
Cut a piece of cardstock or cardboard measuring 7 1/4 x 8 3/4 inches (18 x 22 cm) with a 1 1/2-inch (4 cm) wide border.
Start Assembling The Elements Of The Quilted Picture Frame
Step Three: Trim Patchwork Strips
Cut two of the patchwork strips down to 8 3/8 inches (21 cm) in length. Cut the ends of all four strips diagonally.
Step Four: Assemble the Fabric Pieces
With right sides facing, pin each of the pieces together. Machine stitch in place without backstitching at the start and end of any seams. Trim and press the seams open.
Complete The Picture Frame And Add A Memory
Step Five: Wrap the Fabric Around the Frame
Place the fabric over the cardstock frame, adjusting as needed to fit neatly. Use a hot glue gun or masking tape to secure the fabric around the frame.
Step Six: Secure the Photo and Hanging Ribbon
Insert your picture into the frame, securing it in place with masking tape. Attach a length of ribbon for hanging and use a hot glue gun to fix a piece of thick cardstock (cardboard) to the back of the frame.
Decorate The Final Quilted Picture Frame
Step Seven: Create a Fabric Yo-Yo (Suffolk Puff)
Iron the Bondaweb onto the back of a square of floral fabric. Remove the paper backing and iron the fabric onto the felt. Follow the instructions to make a yo-yo with the felt on the outside. Cut out the back of the yo-yo to reveal the pleated inside.
Step Eight: Add Embellishments
Decorate the yo-yo with beads, sequins, and a vintage button to create a charming flower. Use a hot glue gun to attach the yo-yo onto the frame for a delightful finishing touch.
Now you have a beautifully quilted picture frame that adds a touch of nostalgia and charm to your cherished family photos. Enjoy the memories!