Making Tie-Dye Vests and T-Shirts Is a Really Fun Project
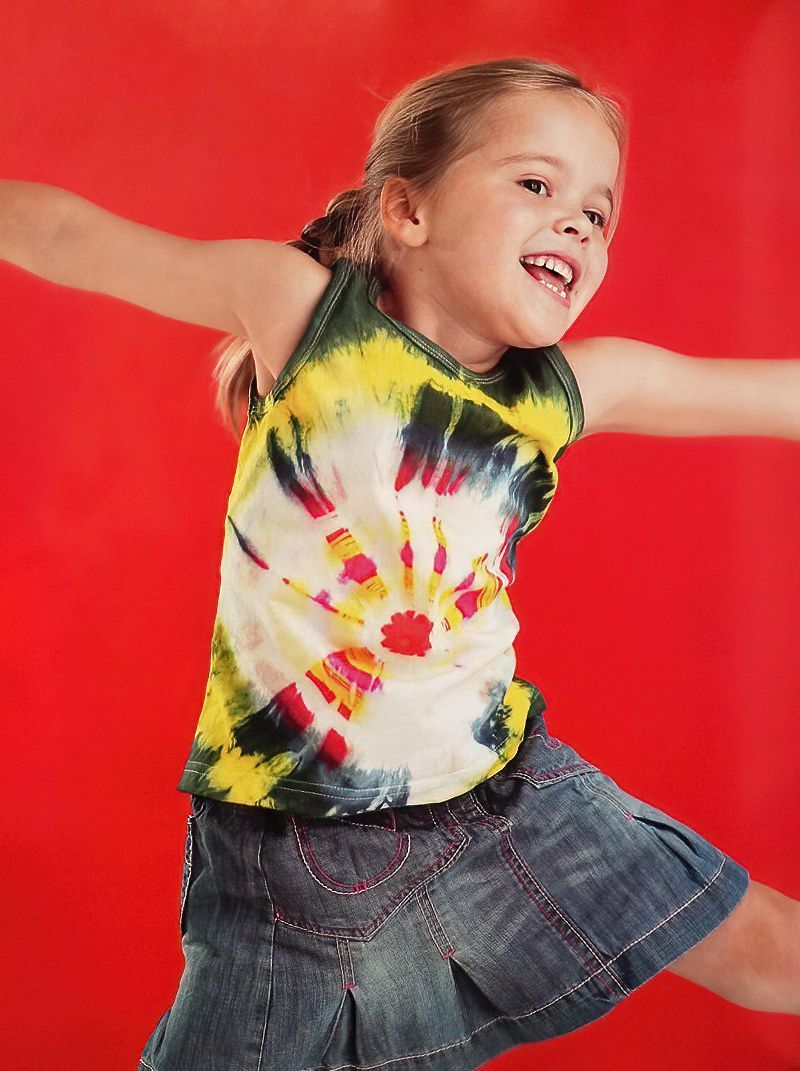
There is something about making a tie-dye vest or t-shirt that is magical. No two pieces you do, will ever look the same and that is amazing. If you get into tie-dye, there are so many techniques and ideas to make amazing unique fashion creations.
So have fun and start with our basic tie-dye tutorial.
What do we need to make a tie-dye vest?
- Cotton vest or t-shirt
- String
- Cole water dyes, here we use yellow, pink and blue
- Plastic sheet
- Rubber gloves
- Bucket
- Scissors
How To Do Simple Tie Dye
Step One
The basic way tie-dye works, is that we tightly tie parts of your vest, t-shirt or garment. Then dip it in dye. Where we have tied it, the dye cannot get in so well. When we untie the string and dry out our tie-dye vest, this makes the amazing colour explosion patterns.
So to start, we need to put down protective sheets so we don't make a mess. We need a clean vest, then soak it in water and wring it out so it is just damp.
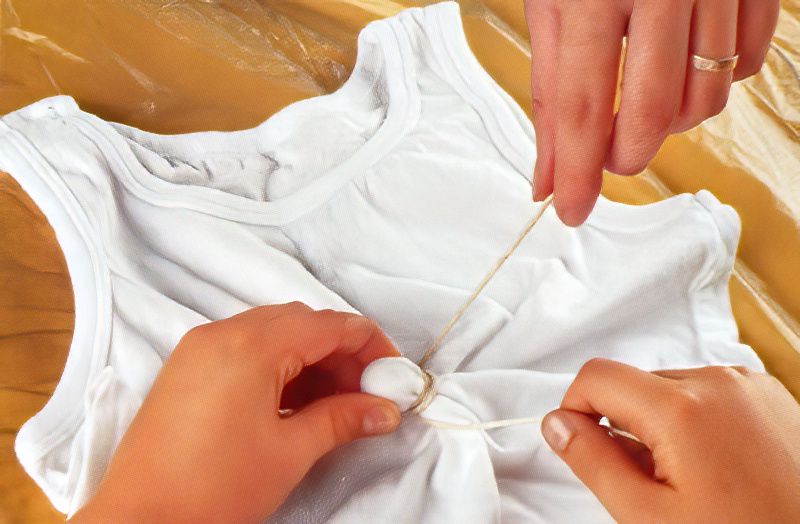
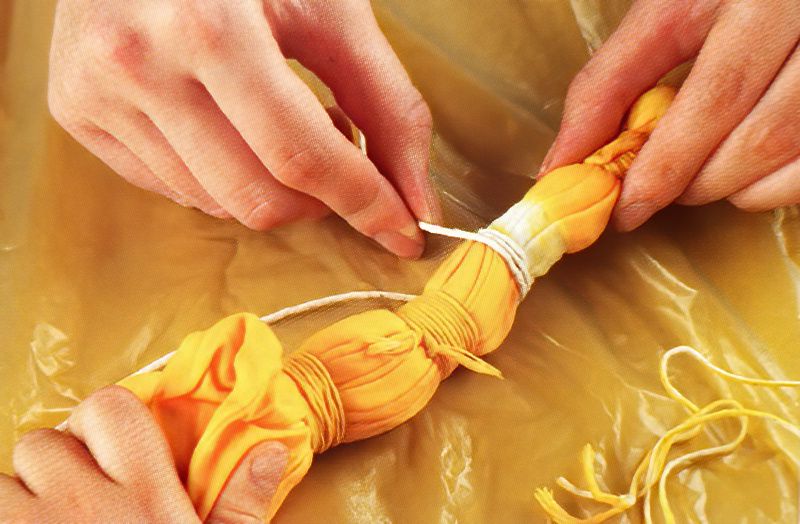
Now find the centre of the vest or t-shirt. Pinch both layers and pull the vest into a little bunch. Now tie a piece of string around the bunch. Wrap the string around a few times and tie the string tightly. As an adult to help if you need help.
Continue Preparing Your Tie Dye Garment
Step Two
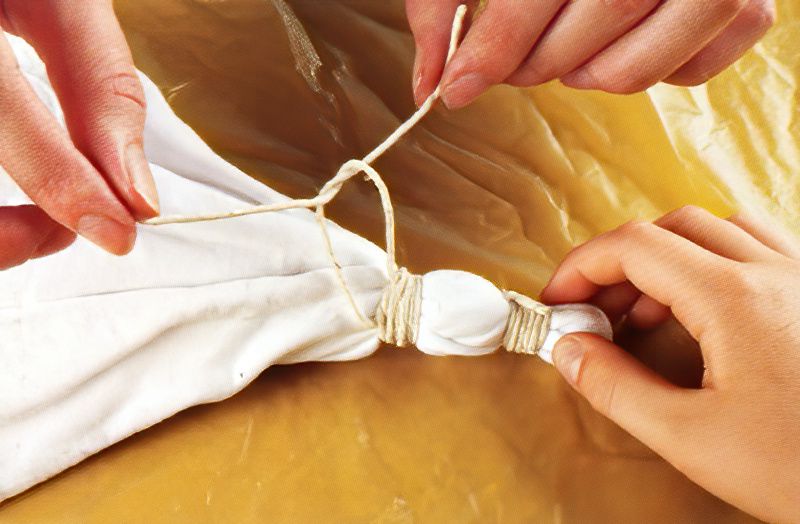
Now we can continue with a few more ties. Take more string and wrap it around another section a little way from the first.
Repeat again with another piece of string.
We have three wraps of string here. But when you try more project, you can do what you like. More of less wraps and in different places on your vest.
How To Die Our Clothes For Tie Dye
Step Three
Now we can take our clean bucket and rubber gloves and start making the dye. Follow the instructions on the dye package. Please ask an adult for help in mixing the dye.
Pop your tied up t-shirt or vest into the bucket and leave it for an hour or whatever the instructions tell you.
Make sure your tie-dye vest or t-shirt is fully submerged.
Wait For The Dye To Take Effect
Step Four
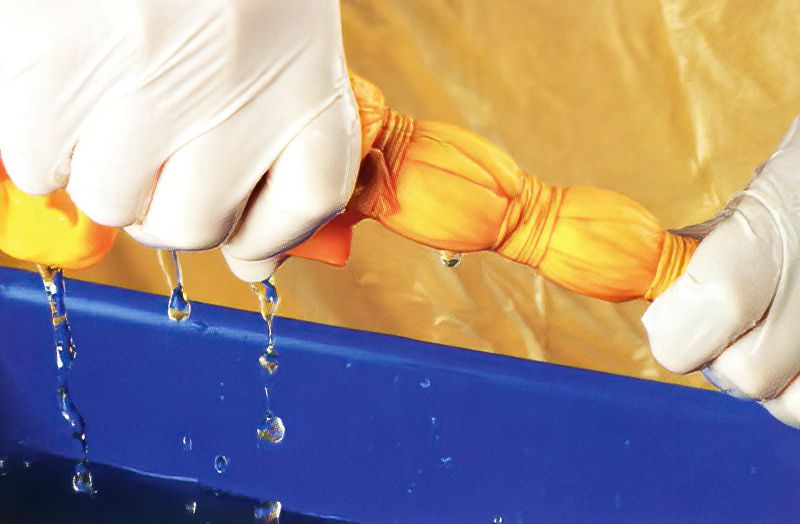
After the hour, remove the tie-dye vest or t-shirt and wring it out to remove a lot of the water and dye. Now we can cut the string carefully, make sure you don't cut the t-shirt or vest.
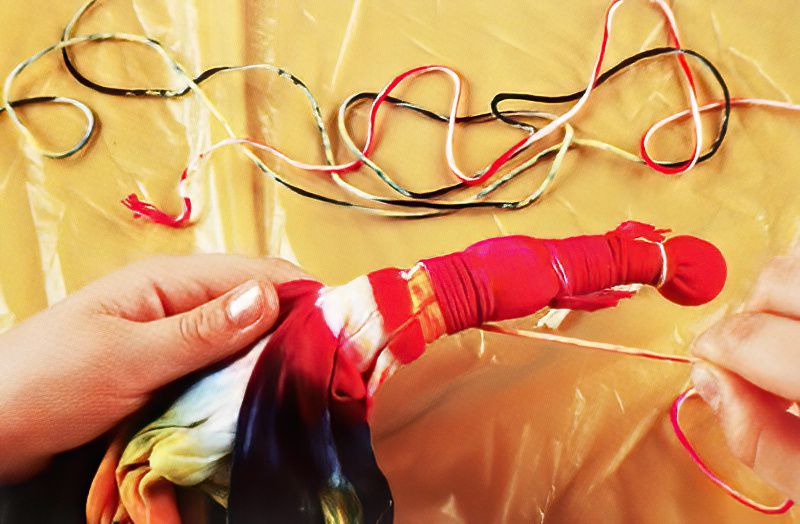
Add more wraps of string now. Wrap it again, but now wrap it between where it was wrapped before.
Complete Our Tie Dye Garment
Step Five
Now we basically repeat the dying step again, but with a different colour.
With your rubber gloves on and over your protective sheet. Make up another bucket of the pink dye. Now we don't want to dunk the whole garment into the bucket this time, but just one end.
Hang the garment over the edge of the bucket. Leave for the hour. Then remove and wring out. This time you don't need to cut the string. Make up more dye in the blue colour and dip the other end in the dye for the hour.
And that's it. That was a lot of work. Maybe think about doing a number of different garments at once to use the dye. Maybe have more buckets. Or maybe even keep the used dye for future projects. Make sure to clearly label any container that you store your dye in.
Finally, when all the dying is done. Rinse the t-shirt, then cut the strings, then hang your vest up to dry.
Making a tie-dye vest is a great project. It can take a bit of time and be a little messy, but it is very rewarding and a great memory your child will keep forever. Who knows where it might inspire them to go next.












.jpg)


