Creating a Quilted Doorstop with Cathedral Window Technique
If you're looking for a fun and manageable way to practice the beloved cathedral window quilting technique while adding a touch of modern vibrancy to your home, this quilted doorstop project is perfect for you.
A quilted doorstop is not just a functional home accessory but a charming piece of textile art that adds warmth and character to any space. Crafted with care and creativity, these doorstops often feature intricate quilting patterns and vibrant fabrics that lend a touch of traditional craftsmanship blended with modern design sensibilities.
Beyond its decorative appeal, a quilted doorstop serves a practical purpose, effortlessly holding doors ajar while adding a cozy touch to your interior decor. Whether you're drawn to the timeless elegance of classic quilting techniques or the bold and contemporary fabric choices, a quilted doorstop is a delightful addition to any home, combining form and function in one charming package.
Materials Need To Make A Quilted Doorstop
- 12 x 6in. (30 x 15cm) piece of blue linen fabric
- 1 1/2 x 1 1/2in. (4 x 4cm) each of seven coordinating patterned fabrics
- 2 buttons
- 9 x 22in (22.5 x 55cm) piece of red floral fabric
- 20in. (50cm) ribbon
Start Making Our Quilted Doorstop
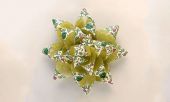
Begin by crafting the cathedral window panel. Utilize two 6 x 6in. (15 x 15cm) squares of blue linen and arrange seven 1 1/2 x 1 1/2in. (4 x 4cm) squares of patterned fabrics in a cathedral window pattern. Secure a button at the center of each cathedral window.
Making The Cathedral Window Panel
Cut the red floral fabric into the required pieces as mentioned above. With right sides facing, carefully stitch the side pieces to the cathedral window panel using a 1/4in. (5mm) seam allowance. Press the seams towards the patchwork.
Complete The Back Of The Quilted Doorstop
Continuing with right sides facing, attach the top and bottom pieces in the same manner. Open out the piece, press the seams as before, and trim any excess fabric. To complete the back of the doorstop, cut a piece of red floral fabric using the patchwork front as a template.
Final Assembly Of The Doorstop
With right sides facing, pin and stitch the front and back together using a 5/8in. (15mm) seam, ensuring you leave the top edge open. After stitching, trim the corners, turn the bag right side out, and press it. Fold the top edge to the inside twice, approximately 1/4in. (5mm) each time, and machine stitch to secure it in place.
Finish Making Our Quilted Doorstop
To create the gusset, flatten the bag across the corners so that the seamline is centered within the resulting triangle. Measure in 2 1/2in. (6.5cm) from each corner along the seam and stitch across at this point to form a triangular flap. Fold these triangular flaps outward to create a flat base. Fill the bag with rice or dried pulses for weight. Finally, gather the top together and tie it closed with a decorative ribbon bow.
With these steps, you'll have a delightful quilted doorstop that not only showcases the classic cathedral window technique but also adds a pop of color to your home decor.


